E

Quilt Design Basics Session 3: Quilt Settings

National Quilters Circle Editors
Duration:   30  mins

Description

In this session I will introduce some of the basic setting options for quilts including; straight set, diagonal set, medallion set, horizontal set and off set. I will introduce any special math that is utilized in each type of set and talk about how to achieve balance, unity and variety with each type of set.

Share tips, start a discussion or ask other students a question. If you have a question for the instructor, please click here.

Make a comment:
characters remaining

No Responses to “Quilt Design Basics Session 3: Quilt Settings”

No Comments

You may not know this but you don't have to have all the answers before you start making your quilt. If you like having all the answers, you can certainly predesign. However, you're probably gonna need to be open to making changes along the way. We may do the math and we may do it perfectly. And things ended up being a little differently, different than we thought they were going to be.

I generally don't predesign. What I do is simply make some blocks that I like, the ones that I like the most I make more of. If I get bored, I do something different and add it in. I don't really like knowing what the quilt's going to look like before I start. I get bored that way.

I like the kind of unveiling as I go sort of thing. But you do what makes you comfortable. Right now I wanna talk about how we take those blocks that we have pieced and we bring them together to form the bulk of our quilt or the center most part of our quilt that we may add borders to later. How are you going to set them basically? Are we gonna set them with a straight set, which is the traditional way where we have rows that go from side to side and top to bottom.

Are we gonna set them in another traditional way, a diagonal set so that the blocks are on point. Are we gonna set them in a radial way that they start in the middle and build out? Or are we gonna offset them, have them kind of floating about the surface. So we have options here. Are we gonna put them so that they butt up right next to each other?

Or are we gonna separate them with sashing. Sashing is, is this stuff here? How are we gonna set those blocks? A great way to, to play with this is to actually lay them out on a flat surface like your floor and play with their positioning. Unfortunately, you could play with their positioning forever.

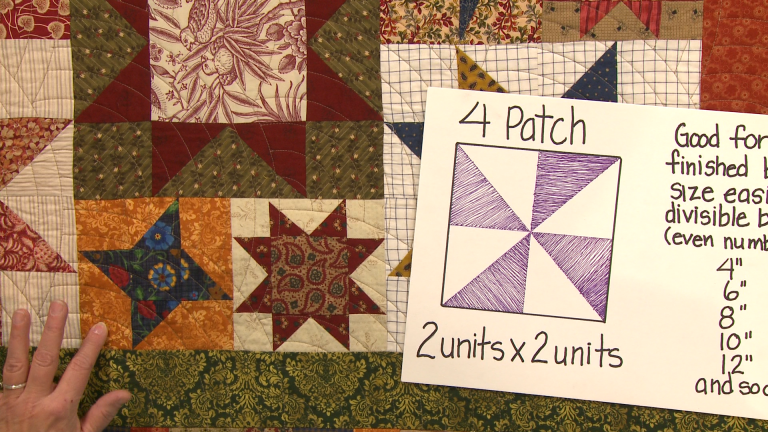
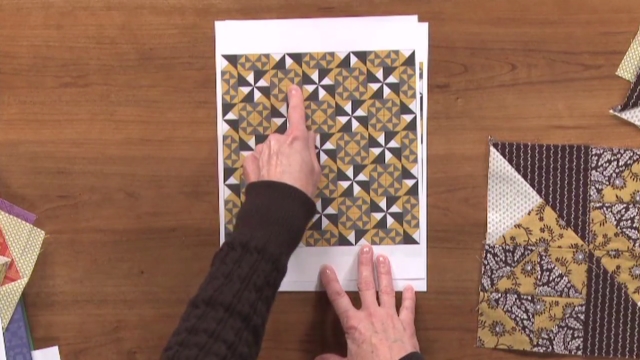
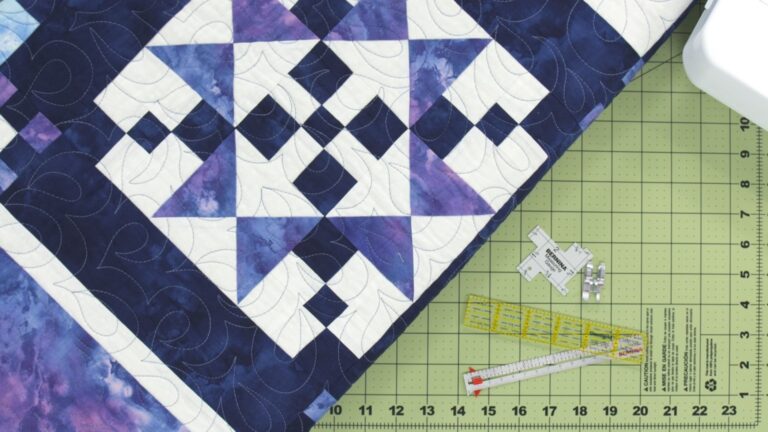
So you need to get to a point somewhat quickly as to, you know, this is how I'm going to do it. You can also just take squares, small squares that represent those blocks and play with them on a piece of paper or on a tabletop or whatever and play with different ways of positioning them. Now, this quilt that we've referred to before is filled with tons of different stars and the stars are in two different sizes, the finished square. So we have a finished square that is 12 inches and a finished square that is half of its size, which is six inches. The reason I did that is to add more visual interest because a variety in size adds visual interest.

I also did it because it's more fun. I don't get as bored as easily. I use lots of different stars, but I repeated them. When you're doing design work on your own, you wanna consider the three basic pillars or pinnacles of good design and that is balance, unity and variety. Balance simply means that the things that are on the surface of the quilt are in places that make everything look good.

No one area is heavy and feels like it's gonna fall off the surface. No one area is dead. There's nothing happening and you don't, your eye doesn't even go there 'cause it's so boring. Unity means that everything that's there looks as though it belongs. It looks as though it's part of the story that's being told on the surface.

And then we have variety and variety is very important and variety is kind of the opposite of unity. But the two work together hand in hand. Variety happens when we change the style, we change the size. We change the fabric, but those things also bring about unity too. So if we're talking about this quilt, one of the things that's happening in this quilt is that all of the colors are duller than the pure hue.

They're all tones and shades. They're also old fashioned looking fabrics. They're reproduction type fabrics. So that brings unity. However, we've got differences in scale, meaning here we've got large leaves and here we have tiny leaves.

That's the scale or the size of the prints. We've got differences in the type of prints. Here, we've got a plaid. Here, we've got a type of polka dot. Here, we've got a type of fleur de lis and those, all of those things add variety to it.

So when I decided to do the two different sizes of blocks, I knew I needed to make sure that one block easily divided into the other block evenly. So I know that if I have a 12 inch block that I can put two six inch blocks next to it and have the same width. If I were to put four next to it, it would be just like having another 12 inch block. If I did one, two, three, four. So I know that that's gonna work together easily, mathematically and that I can probably sew this together in long rows so that I make strip units and then those strip units can be sewn to each other.

However, when you look at this, you're gonna see some offset rows too. And that again, adds visual interest. If we follow this row here all the way across, we can find the blocks very easily. It's a 12 inch block and a 12 inch block and a 12 inch block, two six inch blocks, a 12 inch block, two six inch blocks. We go up to the next row, though, we run into an issue.

Here we have two six inch blocks, a 12 inch, a 12 inch. Oh, two six inch blocks down here and half of a 12 inch block here and a 12 inch block and two six inch blocks. So the other half is over here. It's flipped to the other side. It's simply means that I sewed a wider strip unit together, rather than just one strip unit so that I could offset that block in there.

It's not hard to do. It's simply doubling the math. Remember as you're doing this, you're always working with the finished size. So if I have a six inch block here, that's its width with a 12 and a six and a 12 and a 12 and a 12. I can multiply that one, two, three, four, twelves, plus these two six, make another 12, five twelves.

When I multiply, multiply that together, it's 60 inches, which means that my strip, when it's done sewn together, it's gonna be 60 1/2 inches before the border is on. When it's finished, it's going to be 60 inches. So if I were to put a piece sashing in between here, I would simply need it to be 60 1/2 inches, which would be 60 inches finished. So this is a traditional straight set or a symmetrical set, if you will. This is a diagonal set.

It means that the blocks are set on point. That means they're the points are going on the horizontal and the vertical. And there is they're set diagonally. And so you can see in the corner here, how a row starts. Now, you could say that the row goes across this way too.

Some people call it then on point because the blocks are on point. So either way that you want to refer to it is up to you. Now, this particular block, I'm gonna show you how it is pieced real quickly, but mostly I want you to see this sashing. This is a wonky piece sashing. It's one of my favorite sashes to do.

I tend to work with things that don't have to be exact. I am not, I don't find joy in persnicketyness. Some people love persnicketyness. They just love working with that perfection. And so they like to know that they have to sew all of these things together for it to measure this.

I like to sew all this stuff together and then measure. It's much easier for me. So I'm gonna show you this kind of wonky piece sashing, but what we need to know when we're doing a diagonal set or an on-point set is how to cut our setting triangles which are these up here and our corner triangle, which is these here what's important is that if we were to use templates, it's a pain. We don't, none of us wanna do template cutting anymore. We wanna be able to do rotary cutting and we need to be able to cut so that our bias is not right across here.

If we were to cut this in such a way that our bias was here when we sewed this together, it would stretch out and be very deformed. We also want in here, for our bias not to be across here. We wanna very quickly sew our bias into the strips and have a very stable outside edge. And so there's a particular type of cutting and particular type of math that has done with this. And here is that math.

This is going to be a downloadable for you. So, so make sure that you print it out. Now, this is a wonderful website and it's going to do the math already for you. You can go and say, my finished block is this size and it'll show you a list of finished sizes and tell you exactly what size to cut this block and exactly what size to cut that block. So you can go to quiltville.com/onpointmath.shtml And you're gonna have that wonderful list.

It's open for anybody to use. Now you don't have to though, if you have this wonderful math and everything is either divided by or multiplied by 1.1, excuse me, 1.414. So the first thing we're gonna talk about is our corner triangle. Our corner triangle, we wanna cut a square and then divide it in half diagonally just once because we want our bias to be right here. So if we pretended there was a square of this background fabric and we cut it in half diagonally our bias would be right there.

This is on the straight of the grain here so that it's going to protect the outside edge of the quilt. To do that, we're gonna take the size of our finished block and we're gonna divide it by 1.414. And then we're gonna add 7/8 of an inch, which is 0.8625, if you're gonna use a calculator and then you're gonna round up if necessary. So if it ends up being, you know, what would that be? Something like 8 7/8, that's fine.

But if it's 8 3/8 and you don't wanna have to cut 8 3/8, then rounded up to 8 1/2. It's not a big deal if it's too big. It's a big deal, if it's too small. And then you're simply going to cut that square in half diagonally, and you're gonna need a total of four of those triangles, so you're gonna need two of those squares. And one goes in each corner.

So on the center row of your quilt, you'll have one of those triangles on each end. The rest of the rows, you're gonna have to have a side triangle on and the math for that includes that same magic number, the 1.414, only this time, you're gonna multiply. So I'm gonna take the size of my square, multiply it by 1.414. And then I'm going to add in one and quarter inches or 1.25. Then I'm gonna cut that in half diagonally, twice so that my stable side is here and my bias is here.

And I'm gonna use that when I sew my rows together. And then when I sew those rows to each other, that straight of the grain, it's gonna be on the outside edge. This is very, very important. There is nothing that can screw up the body of your quilt faster than having bias edges on the outside edge of your quilt. It will just continue to grow and grow and grow and be impossible to quilt and be very difficult to put a binding on or a border on.

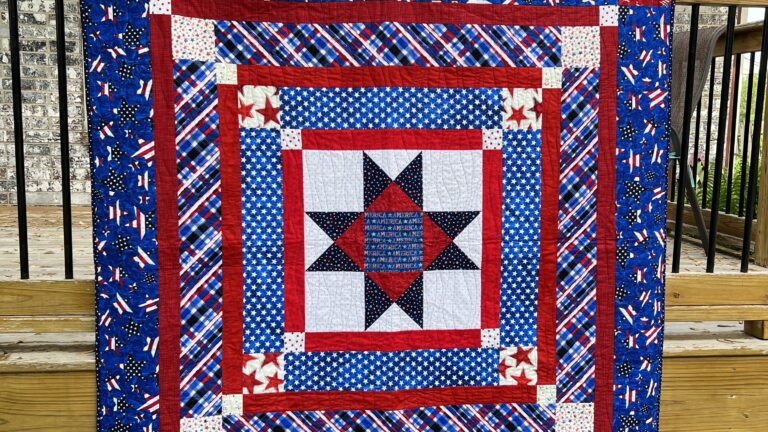
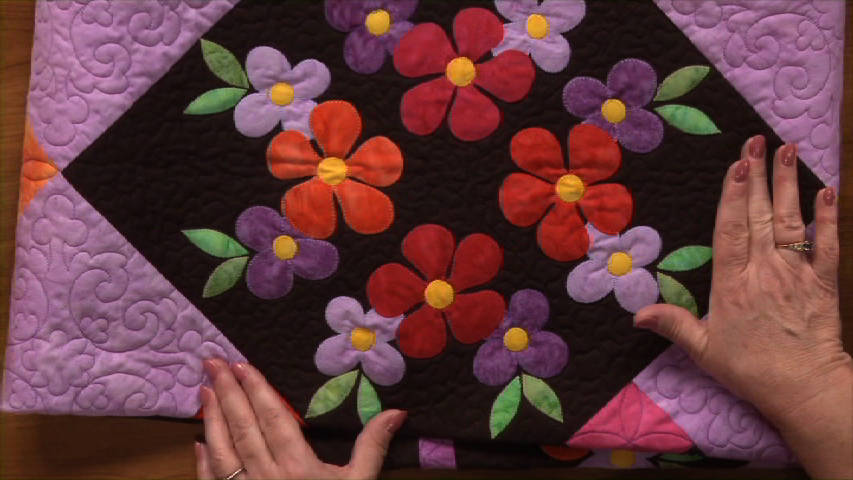
So those are your magic mathematical equations for figuring out your side triangles and your quarter corner triangles in a diagonal set. Now we have other ways of setting. And this next one is a medallion. A medallion simply means that the design starts with a center most design, and it builds outwards. And in this one, I started with a four patch that was set on point and then more triangles were added to make it larger.

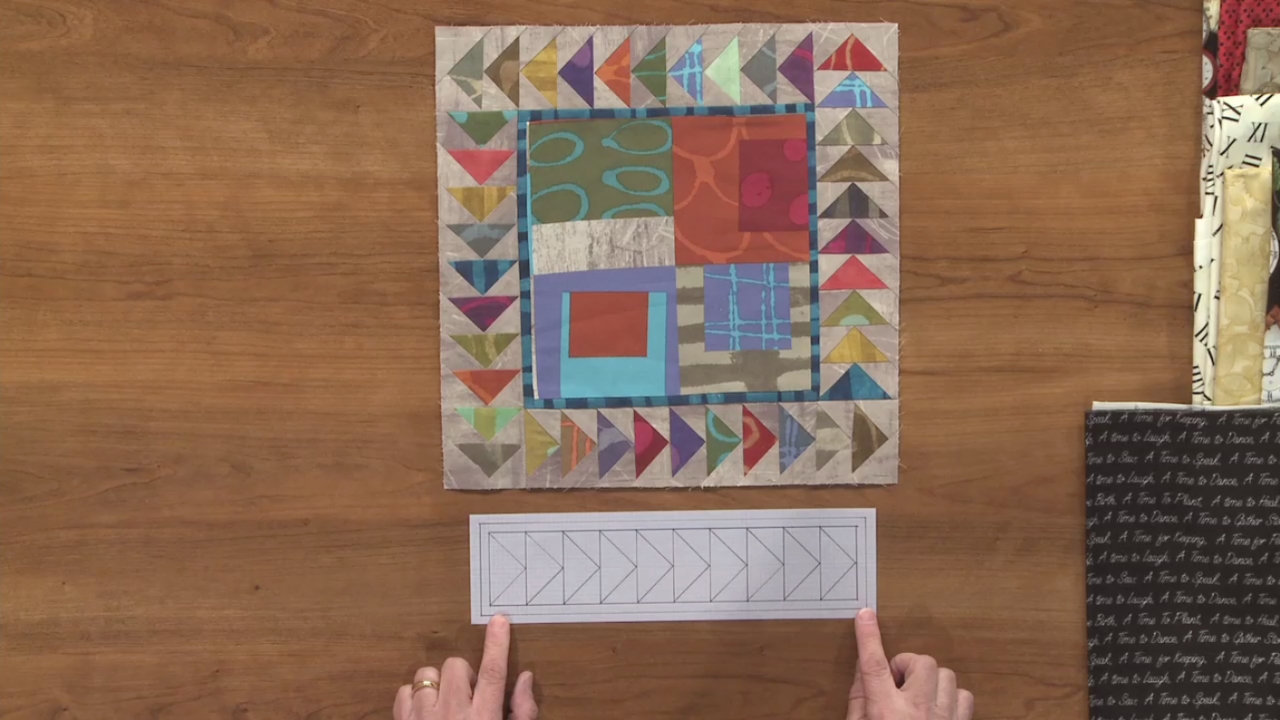
So it ends up being a square within a square. Then I wanted to do a variety of piecing in my borders that I kept adding. Now, this is very simple to do. Just like our blocks are made up of units, our pieced borders are made up of units and the measurement, the finished measurement of those units needs to divide equally into whatever we're sewing it onto. Again, you can make that so directly on.

So I could make this row of pieced units sew directly to this, or I can use a coping strip. I like the way the coping strip looks. So I like having this little narrow border and then this little narrow border and then this little narrow border and this border before I put the next border on it acts as a stopping point of the action or activity that's just taken place. But if you don't want that coping strip, then you need to make sure that your math, that your math is right on. So I'm gonna give you an example here.

Let's say that this block finishes at 14 inches. I need to know that whatever unit I piece with. So here we have, this is the unit, or this is the unit or this is unit, depending on how I wanna consider this that it can equally divide into this number. These finish at one inch. So I know that's gonna go into 14 inches, 14 times.

This is two inches. So this is two inches. I need to know that a certain amount of those are gonna go into this a certain amount of times. Now I happen to think this really is a 16 inch block because there's eight of these across. So it must be, and I need to know that they're gonna fit.

So I need to know that they're finished size is going to be two inches because two can go into any even number that's here. Same with this unit here and same with this unit here. These are all one inch, just like these are one inch. One divides equally into here, one divides equally into here, two divides equally into here, two divide equally into here. Now I could have left that and pieced them directly to this, but I wanted that sashing.

So I simply increased the size of my inner block by an inch. Half inch on each side gave me that. I don't wanna put a whole inch on each side. That would have been too wide of a sashing unit or inner coping strip unit or an inner border unit. I want things to grow as they go out.

That is a natural feeling for the human eye. I don't really want something narrow on the outside edge. If I've got something wider on the inside edge, it would look unbalanced. And remember I said, balance, unity, and variety are those pillars of good design. So let's go back to the math here.

These are half square triangle units, like we pieced earlier and again, 16 inches or 18 inches or whatever this is, I'm not sure. And equally divided. Two inches finished means that they're gonna be cut at 2 7/8 inch, and each of those units is going to yield two of these units. So that helps me with determining how many I have to do, that's if I use the piecing that I showed you how to do earlier. Here, again, I can do this in strip piecing.

I don't have to cut little one inch units. I can cut 1 1/2 inch strips, sew them together and then subdivide those down into units. And I'm gonna cut those down into 1 1/2 inch units. I'm always gonna add that half inch in for my seam allowances. These are done basically the same way.

These are half square triangle units that have been sewn together and so that gives you the same type of idea as this, which builds unity. I'm repeating certain shapes and certain combinations, so that I'm building unity in my piecing along the way. And I just keep getting larger as I go out. My coping strips get larger. The width of my borders gets larger as I go out so that I have that wonderful sense of balance.

So we're gonna be constantly using that addition of the half inch. We're gonna be constantly paying attention to the unit, just like we have the unit here. This is a unit that makes up the square. This is a unit that makes up the pieced border. And again, we wanna make sure to make sure that this fits here, that it's equally divisable.

Now we can always divide it, but we don't wanna end up with a, in the number of a finished size that's, you know, 2 7/8 inch. That's too hard to work with. We want it to divide equally into so that we ended up with a whole number. Otherwise the math becomes in my opinion, traumatic and we don't want trauma in our, in our design. So that equal number is what we're looking for.

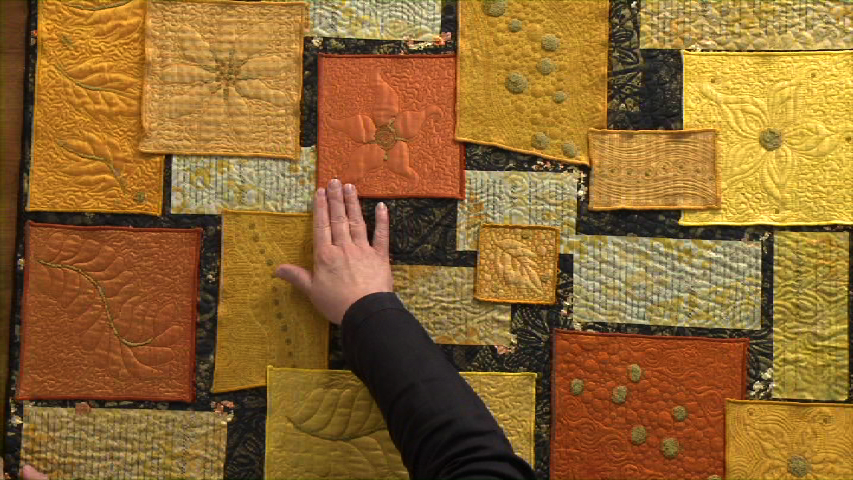
So this is a medallion set. Now we're gonna go to offset. And a lot of people think that offset is very difficult. What offset really is, is a way to bring added interest but also to let you have more freedom and not have to necessarily work with the idea of perfection. And it makes things a little bit more, in my opinion, contemporary and a little bit more sophisticated.

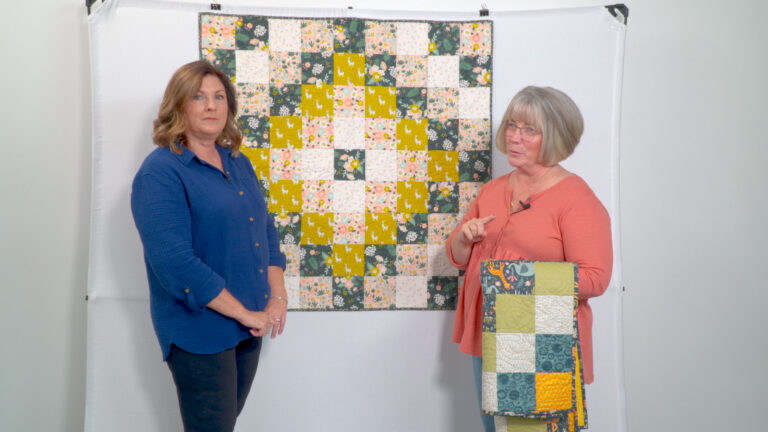
Now this could have been a totally normal set, but we offset it ever so slightly. Our block is a four patch and you can see that each one of these blocks is the same. It's got four patches in it and then we have a sashing unit that is just a solid piece of fabric. These units were pieced in rows with a block and sashing, a block and sashing, a block and sashing, and this was done the same way and this was done the same way. The center one was simply turned so that we had sashing on this end and then on this end, instead of like these two, where there's no sashing on this end and sashing on that end.

Then when the units were pieced together, these were but butted together so that we had this nice butting together of seams and they're offset and that makes it a little bit more interesting than just having that straight line across. This will have a binding on it of the same fabric here. So that we'll frame that in, but that offset adds just a little bit of interest. However, it is basically a horizontal set that is simply offset a little and the math stays the same throughout. For our sashing, we took the width of our unfinished block, which I believe was probably 8 1/2 and whatever width we wanted.

So the length was the size of our block and cut it that length. So if it's 8 1/2 inches here, this is gonna be 8 1/2 by whatever we want our width to be. And as long as we keep that width consistent, then all of the rows are gonna be the same length if we keep the same number of sashing units. Three, three and three, easy to sew together. So this is a very simple offset setting.

Whereas this setting is a little bit more complex. So I'm gonna help you see the units of how the blocks themselves were sewn together with other blocks. And those units were formed and then sewn together into a whole. And we're gonna start with this row closest to me because of this right here was sewn together. These two blocks were the same size and these two are the same size.

One sewn to one side, one sewn to the other side, makes those two units easy to be sewn to each other. It didn't really matter at this point how big I cut those. This is gonna help me determine the rest of everything else. I simply guesstimated a size that I thought would work with it. It's a little bit more than half the width of this block.

Sewed it to one side, sewed it to the other side. Sewed the two together. What was important was that this block is half the size of this block. So this unit right here is three inches square finished. This square is six inches square finished and I knew that two of these could be sewn to one of these.

So everything in here is based on the numbers three and six. So once I put this unit here on this X unit and this unit here on this X unit and sewed them together, they were the same height as my six inch square, which was 6 1/2 inches because we still have that seam allowance to deal with. Once that was sewn together, then I decided that I was gonna have to have something over here and I needed something over here, I knew, because I wanted to be able to get more width across. I wanted to be able to get more interest. I didn't wanna narrow piece.

So I simply added this unit. So this became my standard for the rest of the quilt. Everything else had to be then the finished width of this piece. It could have been any measurement. It's up to me, it's my quilt.

I can make that decision. At that point, I then pieced the next unit. And that became this unit right here. And it was pieced in portions. This piece was pieced together.

This piece was pieced together. This piece was sewn onto that piece. This was added so that this piece was the length of this piece. So I'm trying to make these various units make sense with each other measurement-wise. And all I knew is that this had to be the same length when it was done as this one, because this one was the length standard 'cause it was the first one I did.

If I had done this one first, its' length would have been my length standard. So to do this next portion here, I wanted to repeat something I'd already done. And I have these solid pieces of fabric here. So I knew I could get away with adding solid pieces of fabric to this X block. So I added a portion here and a portion there.

Two inches finished, one inch finished because this was a three inch block finished and that would give me the six inches of my six inch square. I repeated the same funky fabric that was down here up here, but in a different color. Again, I repeated a solid fabric like I did here, but in a different color. Repetition brings about unity. Repeating, but with variety makes things more interesting.

So I knew I could sew this six inch long unit to this six inch long square. Now, remember when they're unpieced, they're gonna be have that extra half inch. So 6 1/2, 6 1/2. I also knew that I wanted to sew this unit together. I knew I wanted to have this funky portion of this quilt with this bright limey green and that high contrast white.

And I had pieced this together as a large piece of fabric that I could just cut apart and use as a piece of fabric, basically. So I took one of these blocks. That is not three inches, it's four inches. So the four-inch block works because I had four inches left to get to this measurement. If I'd only had three inches left to get to this measurement of this unit, then I would not have been able to put that four inch block there and still have this block here.

That's just paying attention to the math. It's why I cut this unit right here. The length I cut it, was 'cause I knew I wanted to be able to insert those four inch blocks. So I started with the four-inch block, added a portion of this pieced fabric, and again, this is a repeat again of what I would done here. Sewing that solid fabric to one side of the X blocks.

I needed it to be four inches when it was three inches. So this is one inch finished, 1 1/2 inches cut. And I needed this total to be four inches because this is a four inch block and because this was eight inches wide. That unit was this sewed onto that unit. And now I had this unit, which is the same length as my standard and those two could be sewn to each other.

All right, which takes us to this top unit. It's the biggest or widest of the three units. And it's made from two units sewn together, this one and this one. After they were so to each other, they had the width that was our standard and could be sewn onto the rest of the quilt. Again, I've got six inch blocks, four inch blocks, three inch blocks, a repeat of this funky embroidered fabric, a repeat of this high contrast, very bright, bold pieced fabric.

Here, I've taken a fabric that's a little fancier than this one, but it's doing the same sort of thing. And this fabric that I put on the sides of an X block, I'm adding in here close to that X block, but on top of a repeat of this square here. So I'm repeating squares, I'm repeating styles of units. I'm repeating solid fabrics. I'm repeating color, that's adding unity and I'm changing up the size of things.

And I'm changing up the piecing order to add variety in this offset piecing. So we're gonna go back to the math again. Here, I knew I wanted to use the six inch and the four inch and the three inch. And when we come down here, we have the six inch and the three inch. There was no four inch, but here's a two inch unit and here is a two inch unit.

And those two inch units together add four inches, which is what I was doing with the four inch blocks with those two inch categories. So here, as long as it was going to be as wide as my other two inch units, I was gonna be fine. So I go ahead and I piece these into sewable units that can go into each other. Again, six inches, three inches, three inches, four inches. Now you can see here that these two blocks overlap each other a bit.

So you know that this was sewn to this one, that one was sewn to that one, this one was sewn to that one. This unit was sewn to this unit, this unit was sewn to this unit and then those two were sewn to each other. It's kind of like putting together a puzzle. And so you lay your blocks out and you logically say, if I sew these two together, can those two be sewn to those two? If they can't, how can I do it differently?

What you don't wanna have to do is a bunch of what's called why seams. Having to sew a seam in here partially because you can't do it otherwise. So make sure that when you do an offset that you can piece your blocks and units in together into sub units. And then those sub units are all the same length so that they piece together into a nice center. So offset piecing adds lots of wonderful variety and it's a great way to increase your math skills and your design skills.

I would really give it a try. Now let's talk about pieced borders, but first I wanna show you how I did that sashing for that very first quilt. So we're gonna go back to this sashing here and I'm gonna show you a wonderful technique for doing the star tips of this block and the sashing right here that you're gonna turn around and use over and over again for pieced borders and piece sashing. So let's do some sewing.

Get exclusive premium content! Sign up for a membership now!