Heads up! This article is part of a series on precision quilt piecing techniques. Make sure to read the previous installment of this series here.
The method for piecing flying geese that is the most efficient as well as accurate begins with five squares. One large square and four small squares will give you four flying geese units. The fabric for the large square will be the center triangle of the flying geese units and the fabric for the four smaller squares will be the corners of the units. Using this method there is no time or effort wasted cutting and sewing individual units, and no bias to be concerned about. Follow along as I take you through the precision technique basics of piecing flying geese.
Crunching the Numbers
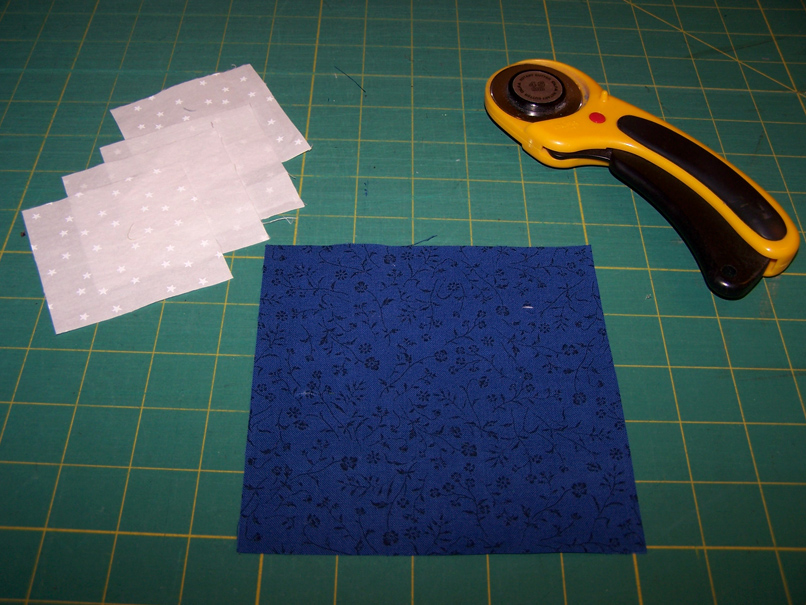 To determine the size of the squares, you will first need to know the finished size of the flying geese unit you wish to make. The large square is cut 1½” larger than the finished outside edge of the center triangle of the unit. If the finished flying geese unit is to measure 2” x 4”, you would cut the large square 5½” (4 + 1½ = 5½).
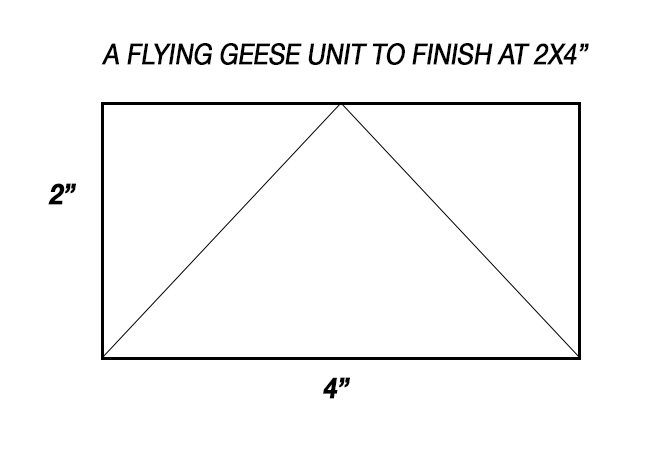 The smaller squares are cut 1” larger than the outside edge of the corner triangle of the unit. For a 2” x 4” unit, you would cut the smaller squares 3” (2 + 1 = 3).
Piecing it Together
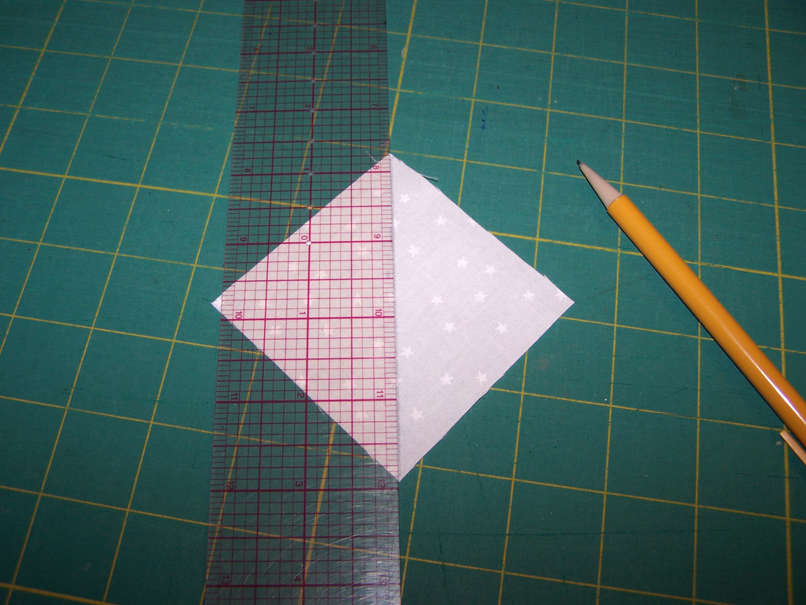 Step 1: The first step is to draw a diagonal line on the wrong side of each smaller square.
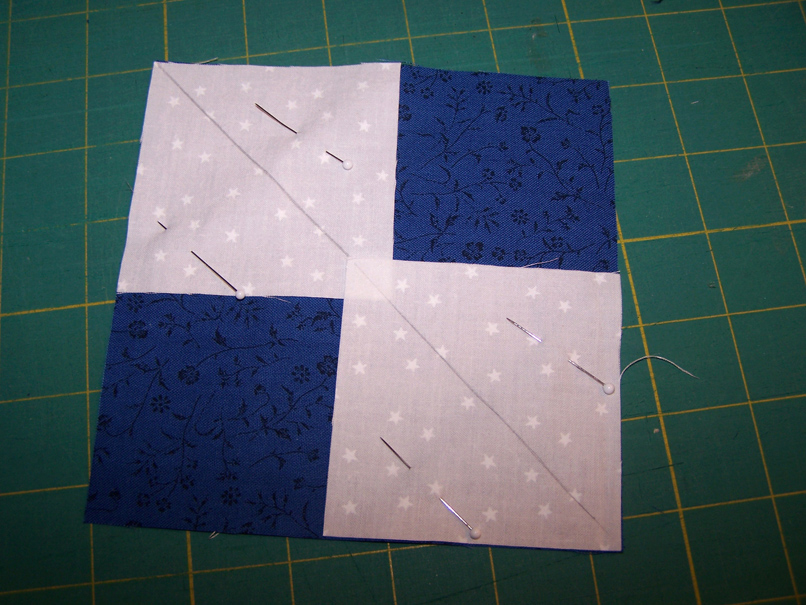 Step 2: Pin two smaller squares to opposite corners of the large square, right sides together and with the diagonal lines running toward the center. They will overlap in the center.
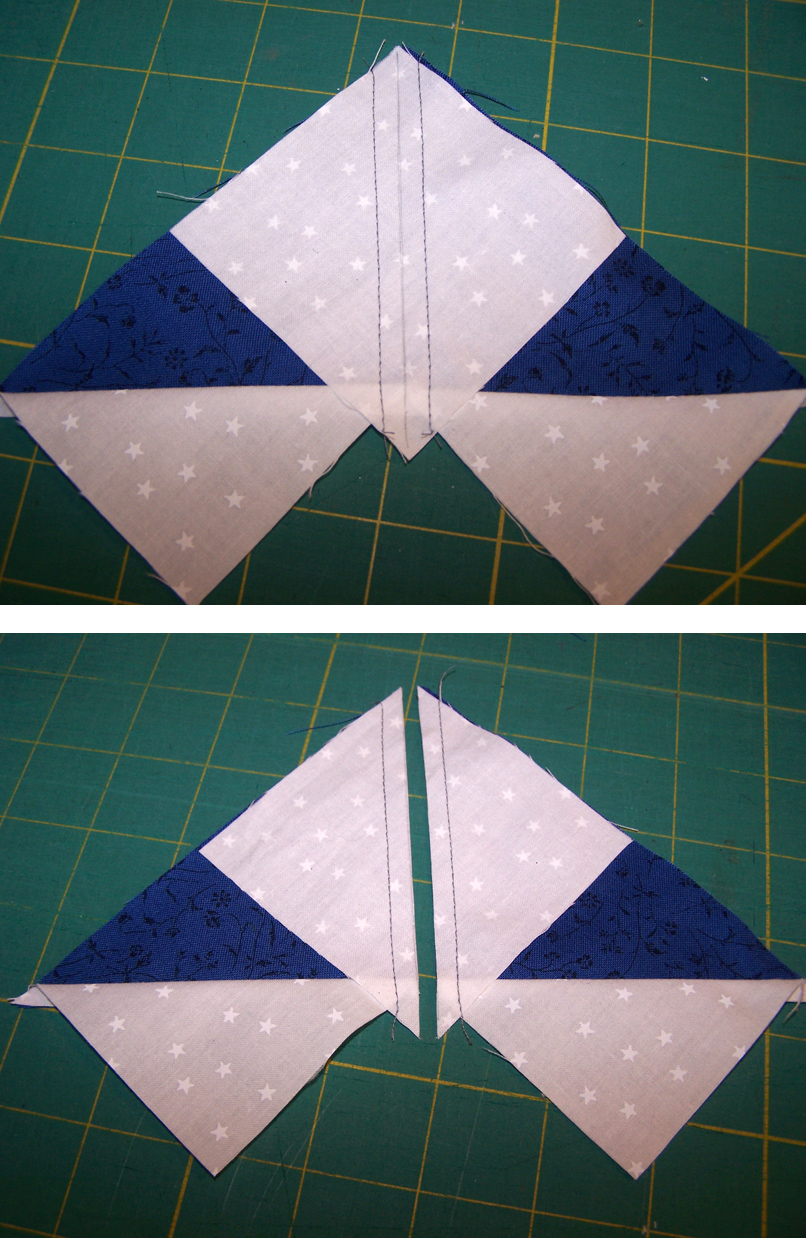
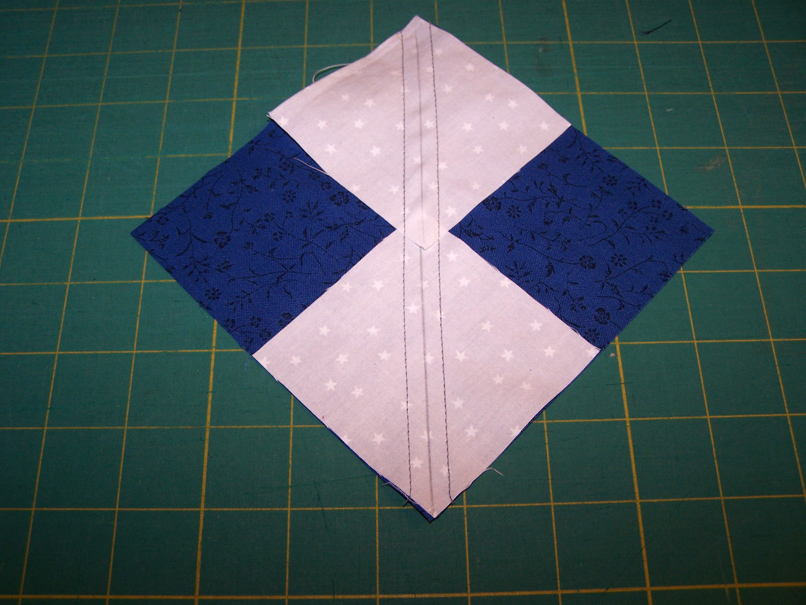 Step 3: Stitch a scant ¼” on both sides of the diagonal line.
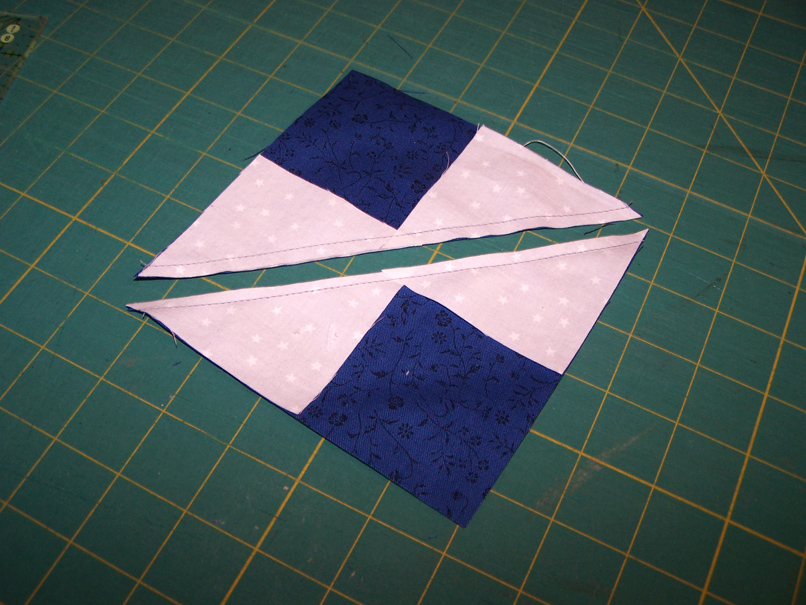 Step 4: Cut along the diagonal line and you will have two triangle units with small triangles on each corner.
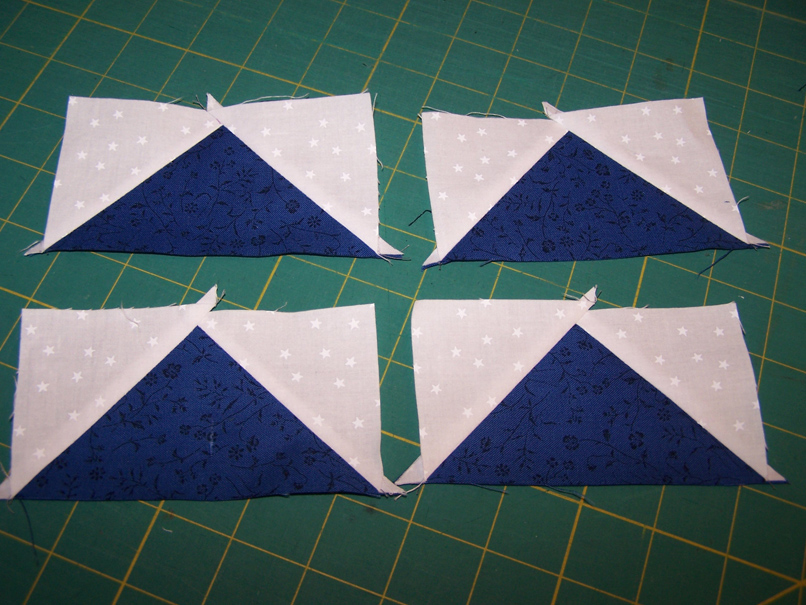
 Step 5: Carefully press toward the small triangles and away from the larger triangle.
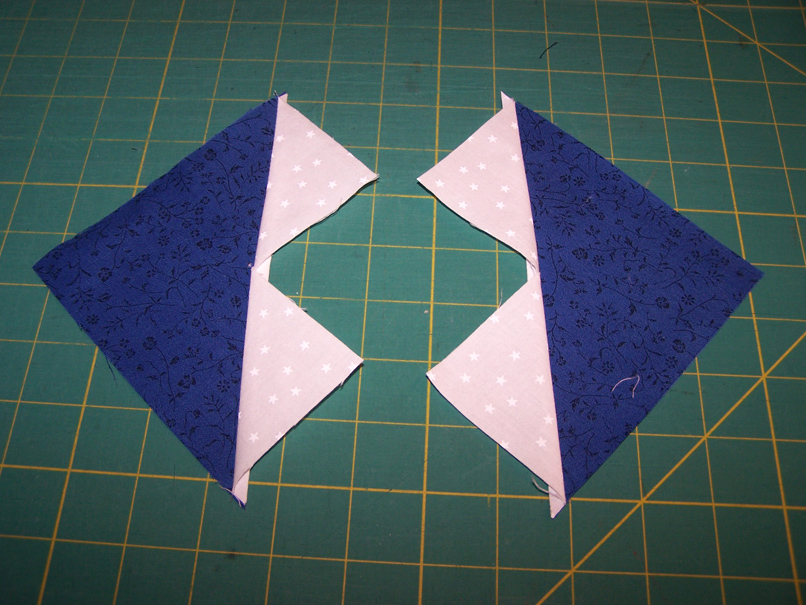
 Step 6: Pin each of the two remaining squares to the free corner of each large triangle unit, making sure the drawn line is running toward the center.
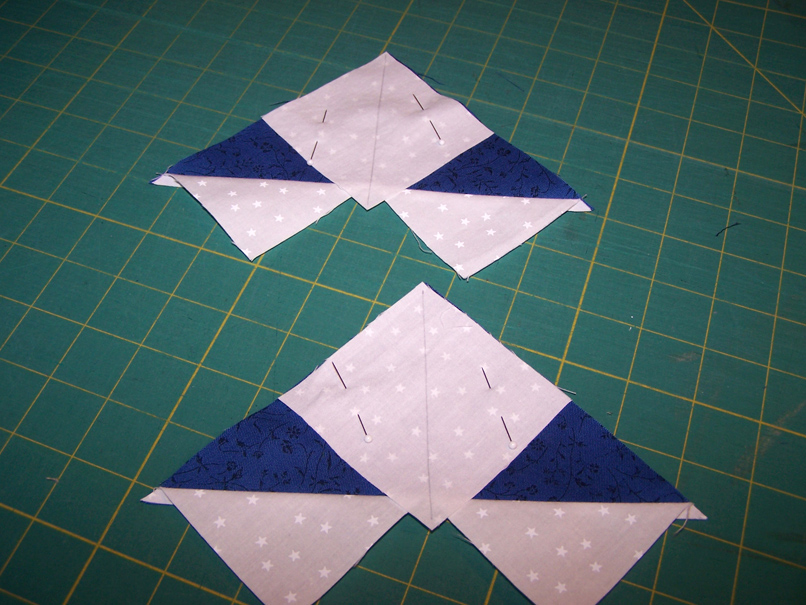
 Step 7: Stitch a scant ¼” along both sides of each drawn line then cut along the drawn line.
 Step 8: Press toward the small triangle and away from the large triangle. You now have four flying geese ready to be trimmed to size.
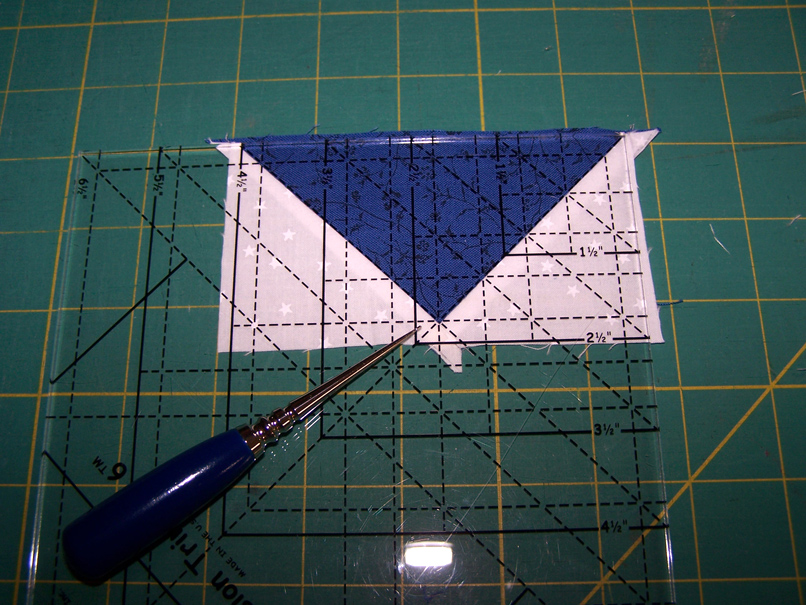 Step 9: To trim, align the Precision Trimmer 6 ruler over the flying geese unit matching the cross hatches with the peak of the flying geese unit and matching the diagonal lines of the ruler with the diagonal piecing lines of the flying geese unit. Trim two sides.
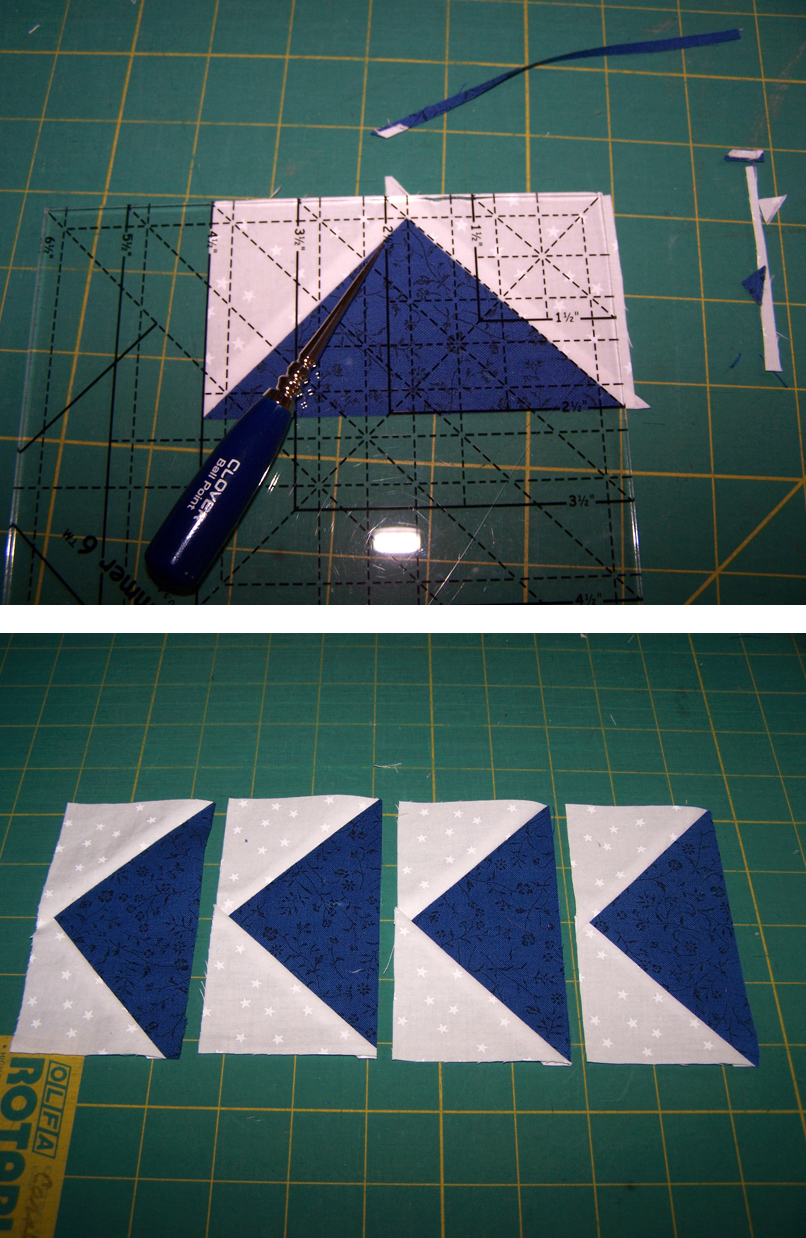 Step 10: Turn the unit and re-align the ruler with the cross hatches and diagonal line with the peak and diagonal line of the flying geese unit. Check to make sure the outside edges match up to the desired size of the flying geese unit. Trim the other two sides. Repeat this process for all four flying geese units and you have got yourself a complete flock!
See you next time when we will discuss square in a square units in the next installment of this series.
More in this Series:
- Precision Quilt Piecing Part 1: Squares
- Precision Quilt Piecing Part 2: Half-Square Triangles
- Precision Quilt Piecing Part 3: Quarter & Triple Triangle Squares
- Precision Quilt Piecing Part 5: Square in a Square
- Precision Quilt Piecing Part 6: Triangle in a Square
- Precision Quilt Piecing Part 7: Fancy Half-Square Triangle
- Precision Quilt Piecing Part 8: Blocks and Borders
Get in touch! Leave a comment or email editor@nationalquilterscircle.com.
Really love it💖
merci, merci !!!! bonne journée
Thank you for showing an easier way for these blocks. I am 82 and just started quilting a few months ago, so I need to learn everything fast. Appreciate all the tutorials online and being able to glean from others knowledge.
I would also appreciate sharing how to square up these units WITHOUT using a specialty ruler.
Love HST
I tried this method and loved it except it didn’t work with my directional fabric.
How &where can I find the precision ruler near me in Texas?
Wonderful instructions!
I like the way you did those
Very Understandable explanation and pictures. Thank you, Cynday Frye