Heads up! This article is part of a series on precision quilt piecing techniques. Make sure to read the previous installment of this series here.
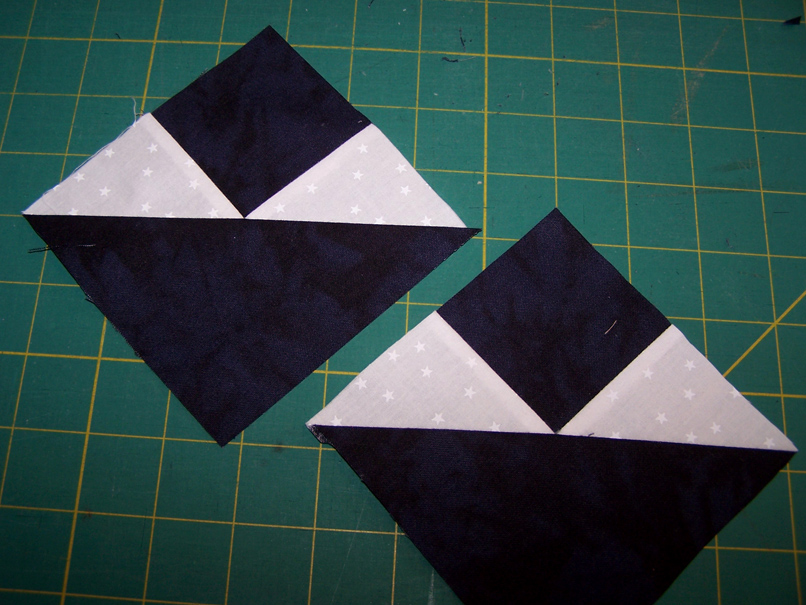
This method for making the fancy half square triangle will increase your efficiency as well as your accuracy. The unit is made using two small squares, two rectangles, and one large rectangle. This method will make two fancy half square units. Follow along as I take you through the precision technique basics of piecing fancy half square triangles.
Crunching the Numbers
To determine the size of the pieces, begin with the finished size of the unit. Cut the large rectangle ½” by 1½” larger than the finished unit. For example, for a 4” finished unit, you will need to cut the large rectangle 4½” x 5½” (4 + ½ = 4½” and 4 + 1½ = 5½”).
Cut the small squares ½” larger than half of the finished unit. In the example you would cut the small square 2½” (half of 4 = 2 + ½ = 2½”).
 Cut the rectangles the same as the unfinished square on one side and add 1” to the other. Therefore you would cut the rectangle 2½ x 3½” (2½ is the size of the small square and plus 1” for the other side = 3½”.)
Piecing it Together
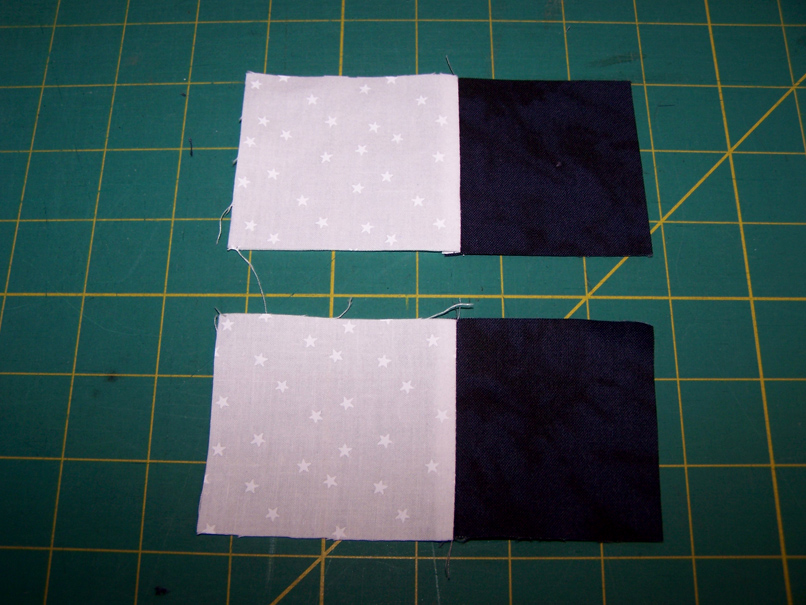 Step 1: With a scant ¼”, stitch each square to the end of each smaller rectangle. Press to the seams to the rectangle.
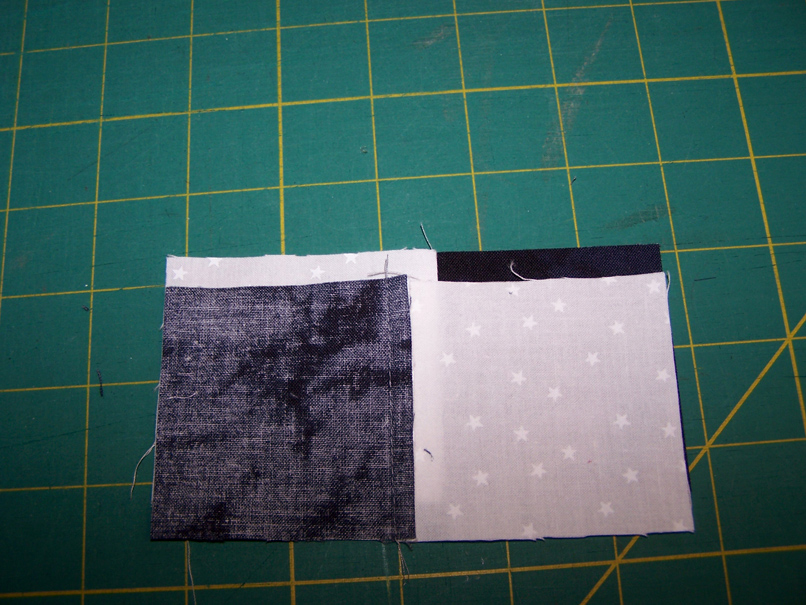 Step 2: Align the rectangles over each other, with the small square on opposite ends, right sides together.
 Step 3: Stitch a scant ¼” along the length. The center seams will not match up. Press each seam toward the rectangle. To do this you will need the clip the seam in the center.
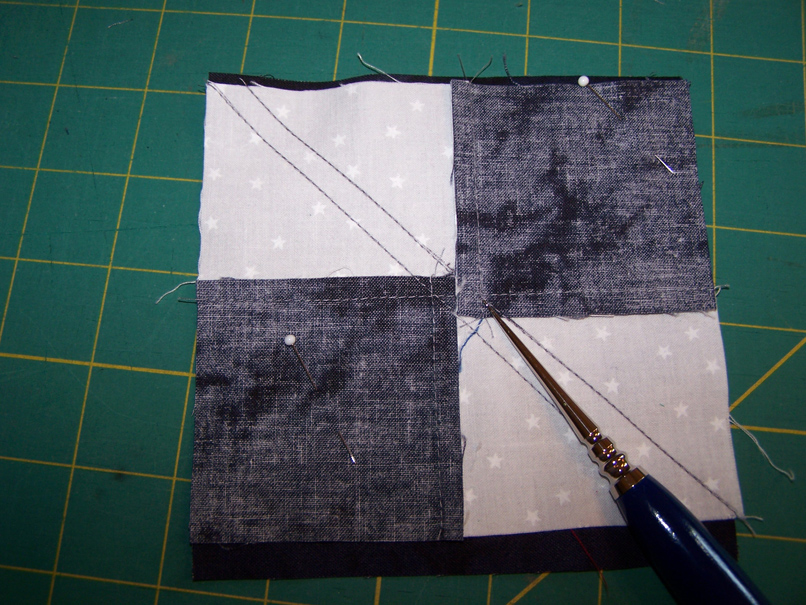 Step 4: On the wrong side, draw a 45 degree diagonal line crossing the stitching line at the corner of the small square. Draw another 45 degree diagonal line crossing the stitching line for the other small square.
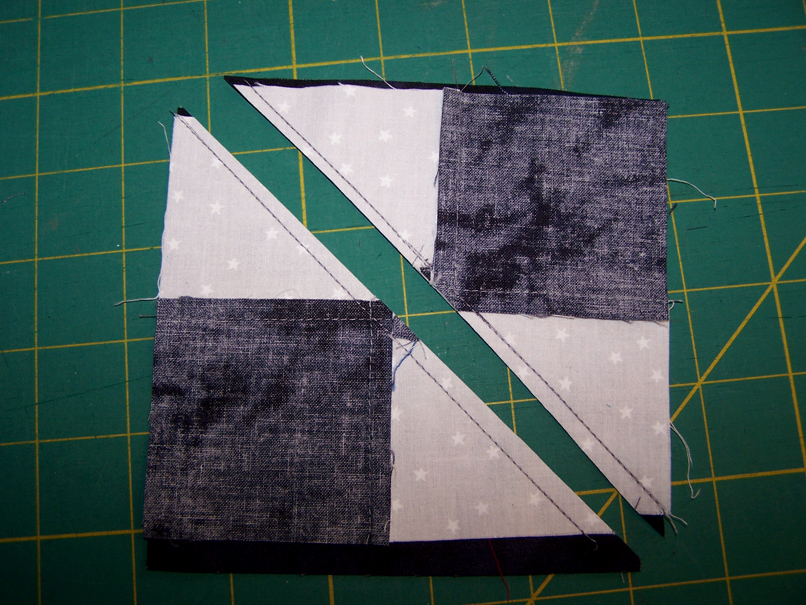 Step 5: Position the small square piece over the large rectangle, right sides together, and stitch on the drawn lines. Cut ¼” from each stitching line. Discard the remnant from the trim. Press unit toward the large triangle.
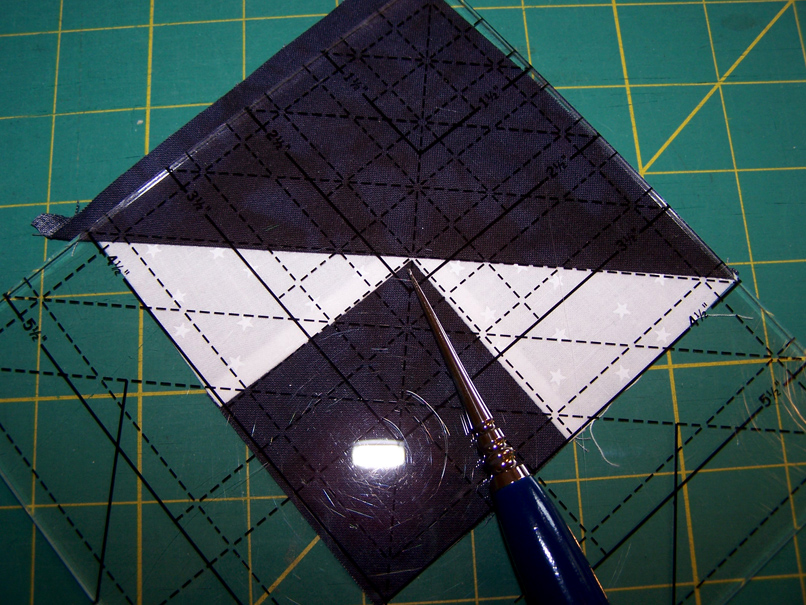 Step 6: To trim, position the Precision Trimmer 6 over the unit aligning the diagonal line along the pieced diagonal line and center cross hatches at the corner of the small square. Trim two sides.
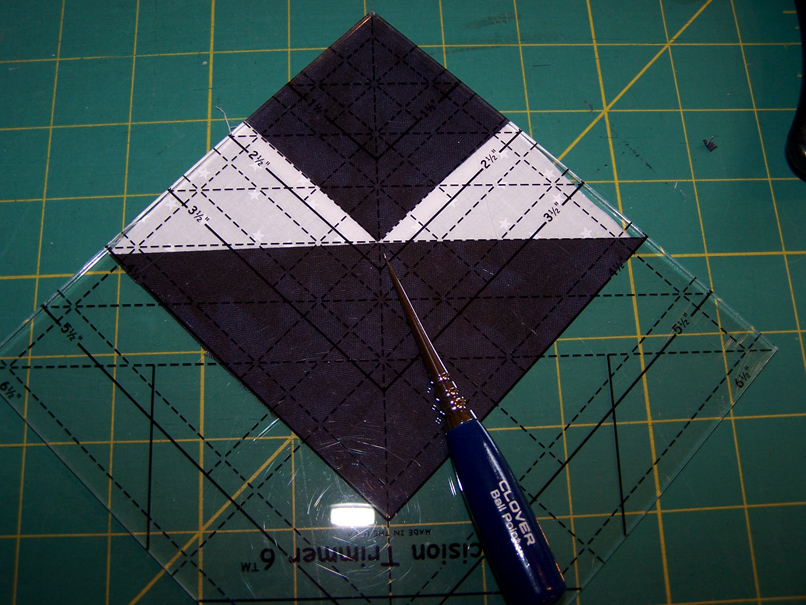 Step 7: Turn the unit, reposition, and trim the other two sides to finish.
 Bonus tip: This unit can also be made using a half-square or quarter-square triangle in place of the small square.
See you next time when we will discuss quilt blocks and borders in the next and final installment of this series.
More in this Series:
- Precision Quilt Piecing Part 1: Squares
- Precision Quilt Piecing Part 2: Half-Square Triangles
- Precision Quilt Piecing Part 3: Quarter & Triple Triangle Squares
- Precision Quilt Piecing Part 4: Flying Geese
- Precision Quilt Piecing Part 5: Square in a Square
- Precision Quilt Piecing Part 6: Triangle in a Square
- Precision Quilt Piecing Part 8: Blocks and Borders
Get in touch! Leave a comment or email editor@nationalquilterscircle.com.

This example does not turn out as the block. I followed measurements and directions, but it's not right. Help!
Some time ago I had seen this block called the Treadlemania block and couldn't remember how it was made. I also questioned a number of websites about it and no one had heard of it. Thank you so much for this tutorial. I am ecstatic to have found this. Thanks again.
I can't do the math. What would the numbers be for a 12" block. Please and thank you.