Crunching the Numbers
You can obtain eight half-square triangles from a single square by first by adding 1 inch to the finished measurement of the half-square triangle and then multiplying that number by 2. For example, if you wanted to make eight 2-inch finished half-square triangles you would need a 6-inch square (2 + 1 = 3 x 2= 6”).Piecing It Together
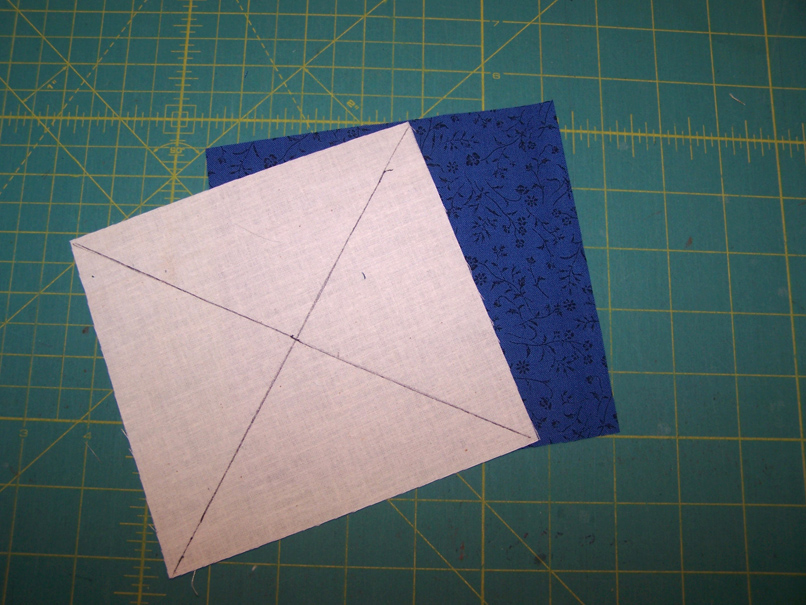 Step 1: Cut two 6-inch squares from contrasting fabrics. On the Wrong Side of one square, draw a line diagonally from corner to corner in both directions.
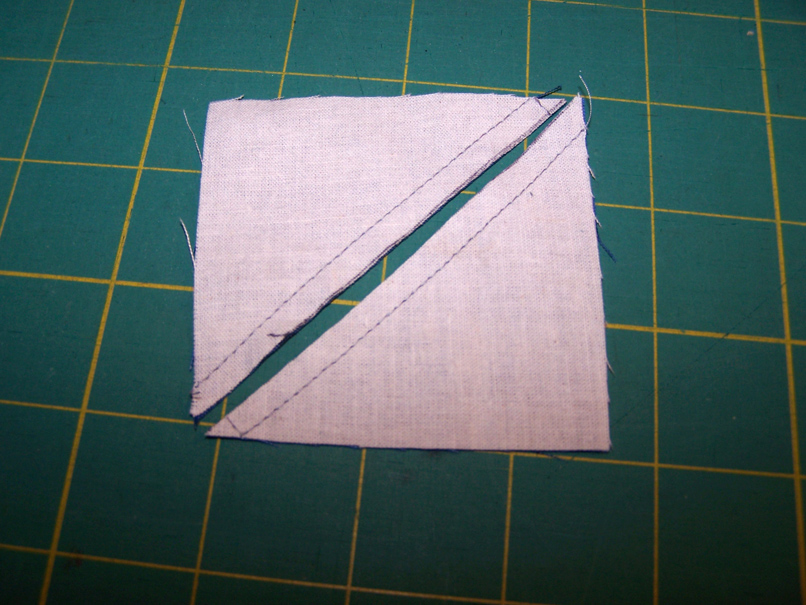
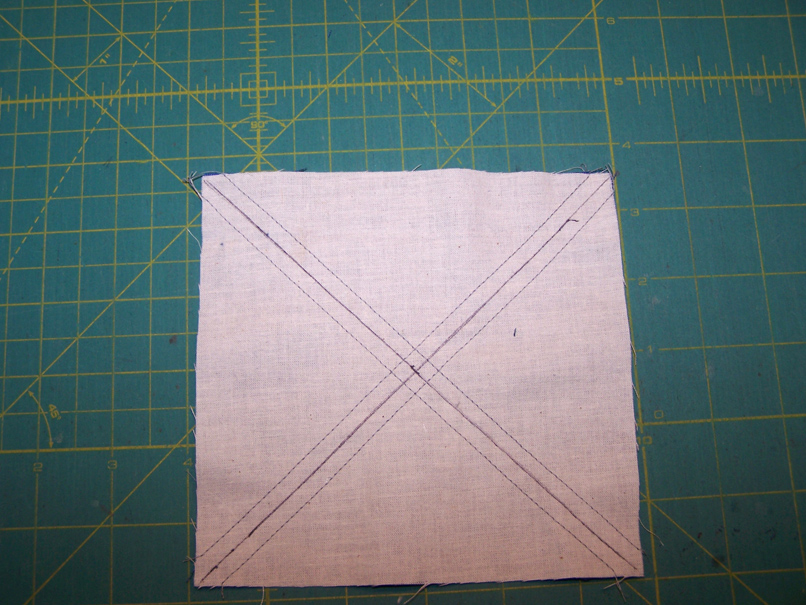 Step 2: Place the squares Right Sides together. Stitch a scant ¼-inch on each side of both lines.
 Step 3: After stitching, cut the square along the drawn diagonal lines and cut the square from side to side, being careful not to move the unit as you do so. You will have eight half-square triangles.
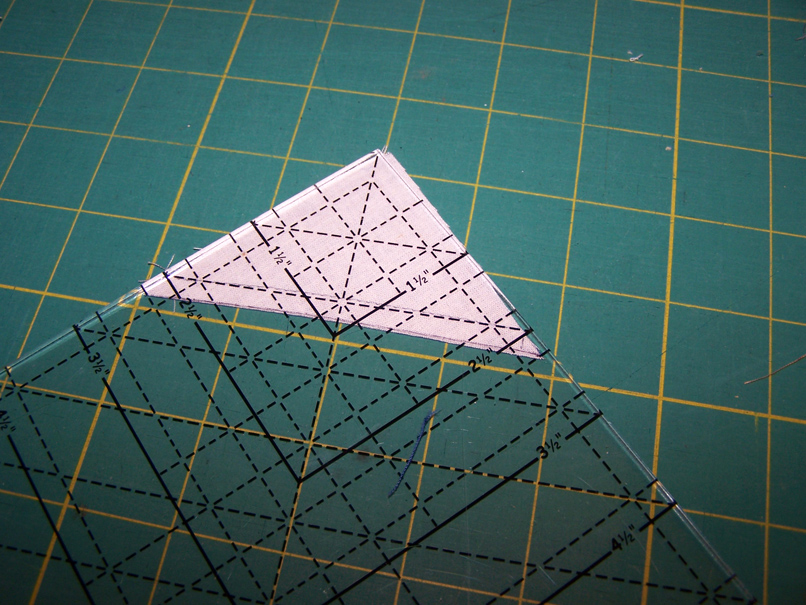 Step 4: Before opening and pressing the half-square triangles, trim the units using a Precision Trimmer 6 ruler. Place the dotted line on the ruler along the stitching line on the half-square triangle and trim.
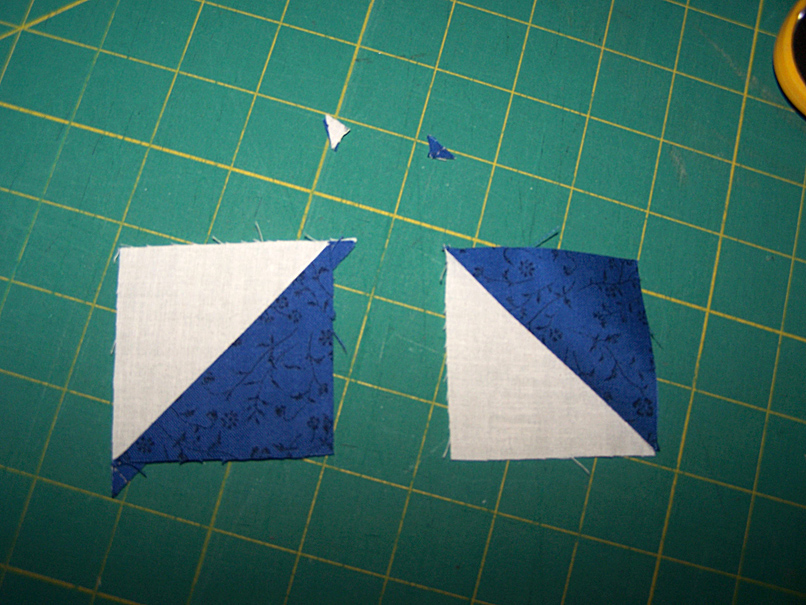 Step 5: Press the unit to the dark and clip the ears.
 Step 6: For just two half-square triangles, add 1 inch to the finished size of the half-square triangle and mark one fabric diagonally once and stitch a scant ¼-inch down both sides of the marking. After stitching, cut on the drawn diagonal line and you will have two half-square triangles. Trim the units as described above using the Precision Trimmer 6 ruler and you have completed quilt piecing!
More in this Series:
- Precision Quilt Piecing Part 1: Squares
- Precision Quilt Piecing Part 3: Quarter & Triple Triangle Squares
- Precision Quilt Piecing Part 4: Flying Geese
- Precision Quilt Piecing Part 5: Square in a Square
- Precision Quilt Piecing Part 6: Triangle in a Square
- Precision Quilt Piecing Part 7: Fancy Half-Square Triangle
- Precision Quilt Piecing Part 8: Blocks and Borders

Your instructions are easy to follow. Thank you
This series is extremely helpful!!
Thankyou
I have such a hard time doing the math trying to fit half square triangles into a square to try to piece together like flying geese around the square. This I think might be helpful for me
When you are referring to the "finished size", does that mean that this is the actual size of the units when done cutting, or does it refer to a block that includes the extra 1/2" required to piece it to other blocks? Thank you for the clarification!
thank you for explaining this
Is there anyway to get these steps in PDF form? Thank you so much
I use Bloc Loc to square up my HST's, my seams always match when piecing the blocks together. If you're interested check out there website www.blocloc.com
Thanks for clear directions it all makes sense now being a learner the lightbulb just went off
Thank you Now I understand