Heads up! This article is part of a series on precision quilt piecing techniques. Make sure to read the previous installment of this series here.
The most accurate and efficient method for piecing quarter and triple triangle squares is to make them from a half-square triangle. Other techniques for piecing these units involve cutting and sewing individual pieces or having finished units with bias edges. The first method is less efficient and the second is less accurate. Follow along as I take you through the precision technique basics of piecing quarter and triple triangle squares.
Crunching the Numbers
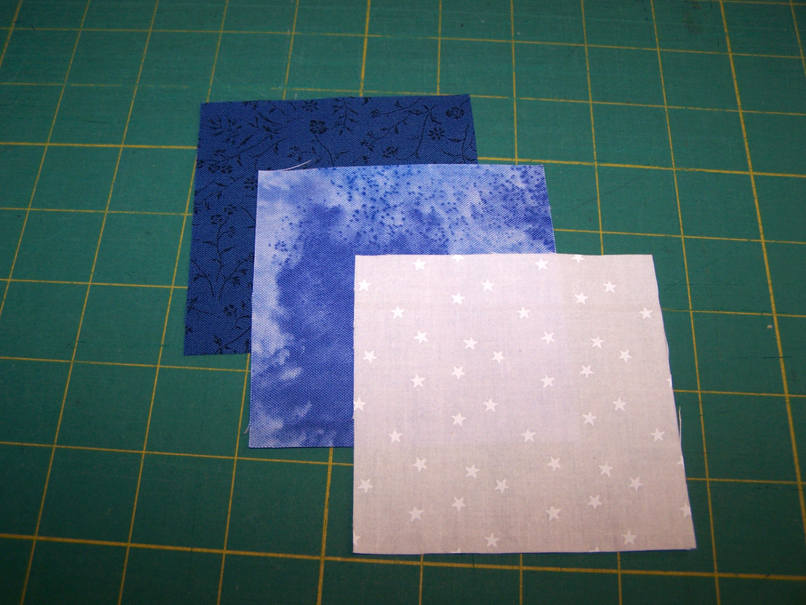
To make the half square triangle you will need to cut your squares 1½” larger than the finished size of the quarter/triple triangle square. For example, if the finished size of the quarter/triangle square is to be 2”, cut the squares for your half square triangle 3½”.
Proceed to make half-square triangles from two contrasting 3½” squares. See Part 2 of this series for more on half-square triangles.
Piecing It Together
 Quarter Triangle
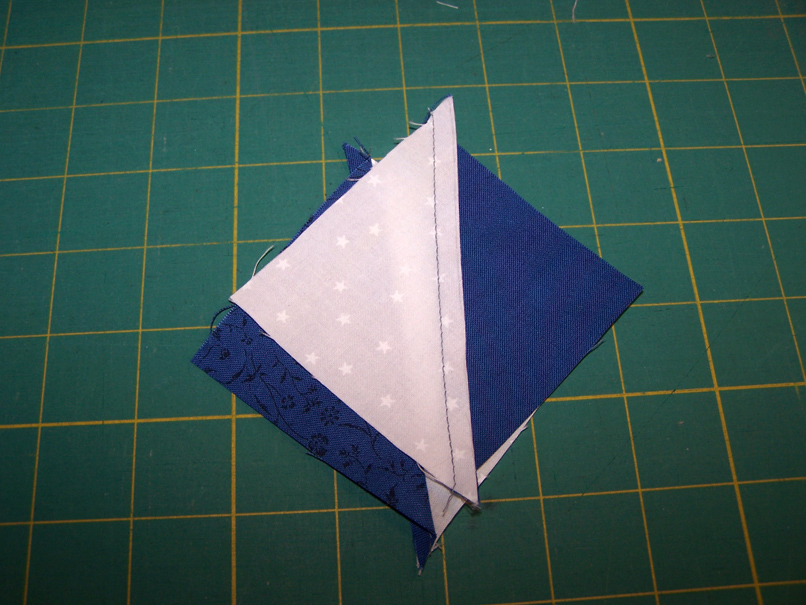
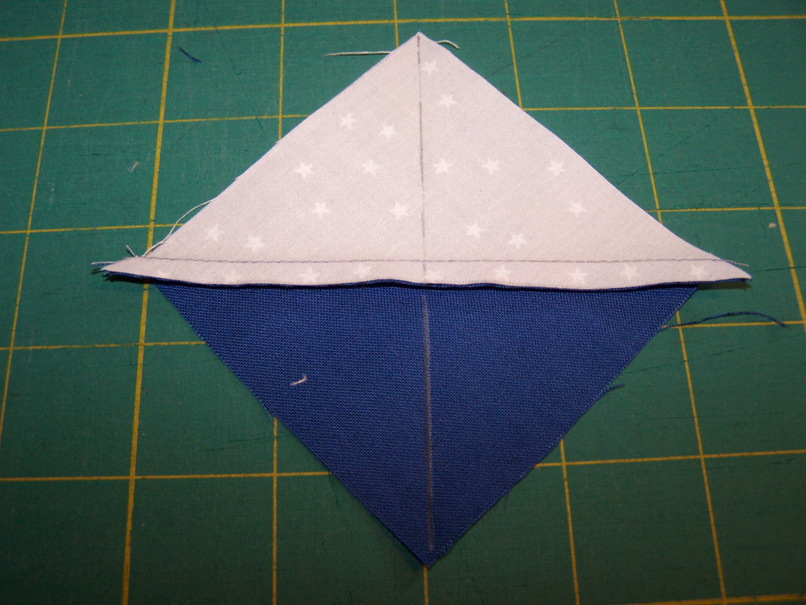
Step 1: To make the quarter-triangle square, position the two half-square triangles right sides together, with the colors opposing of each other. Align the seams, nesting them together, and draw a diagonal line from corner to corner across the half-square triangle.
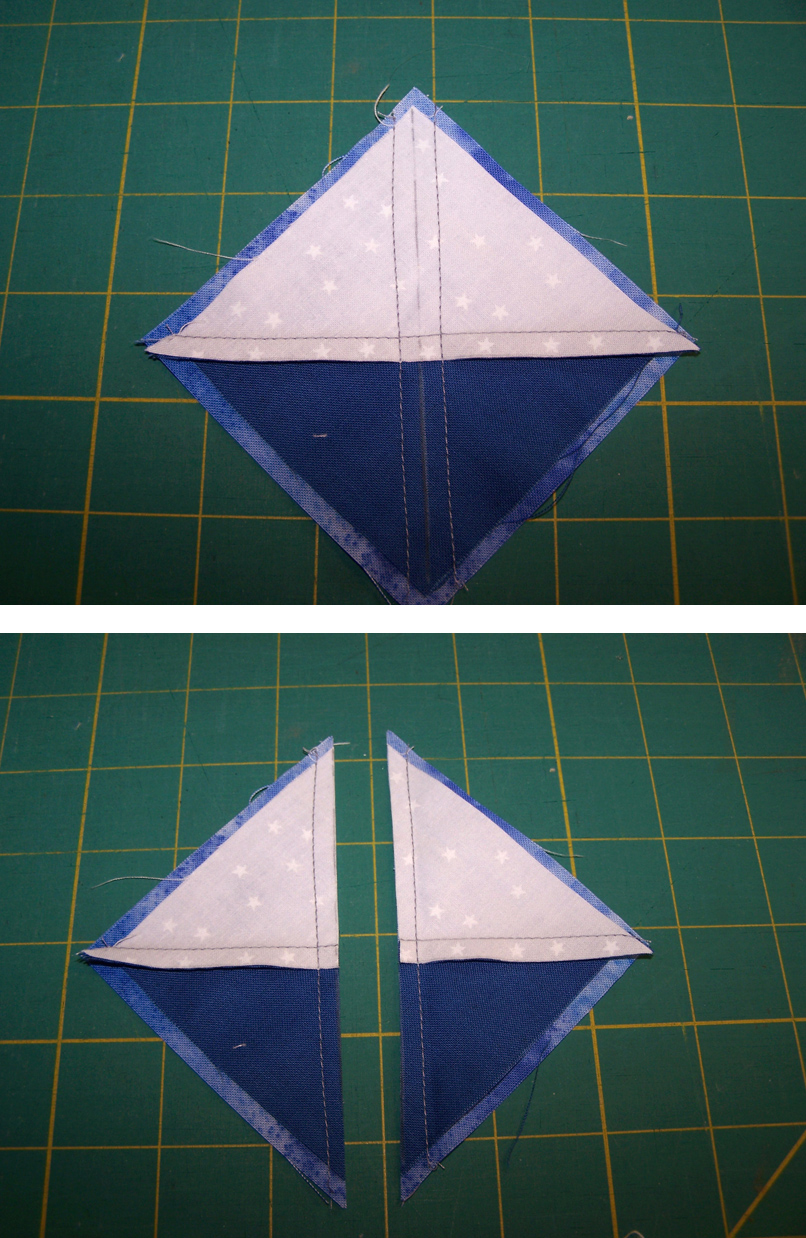
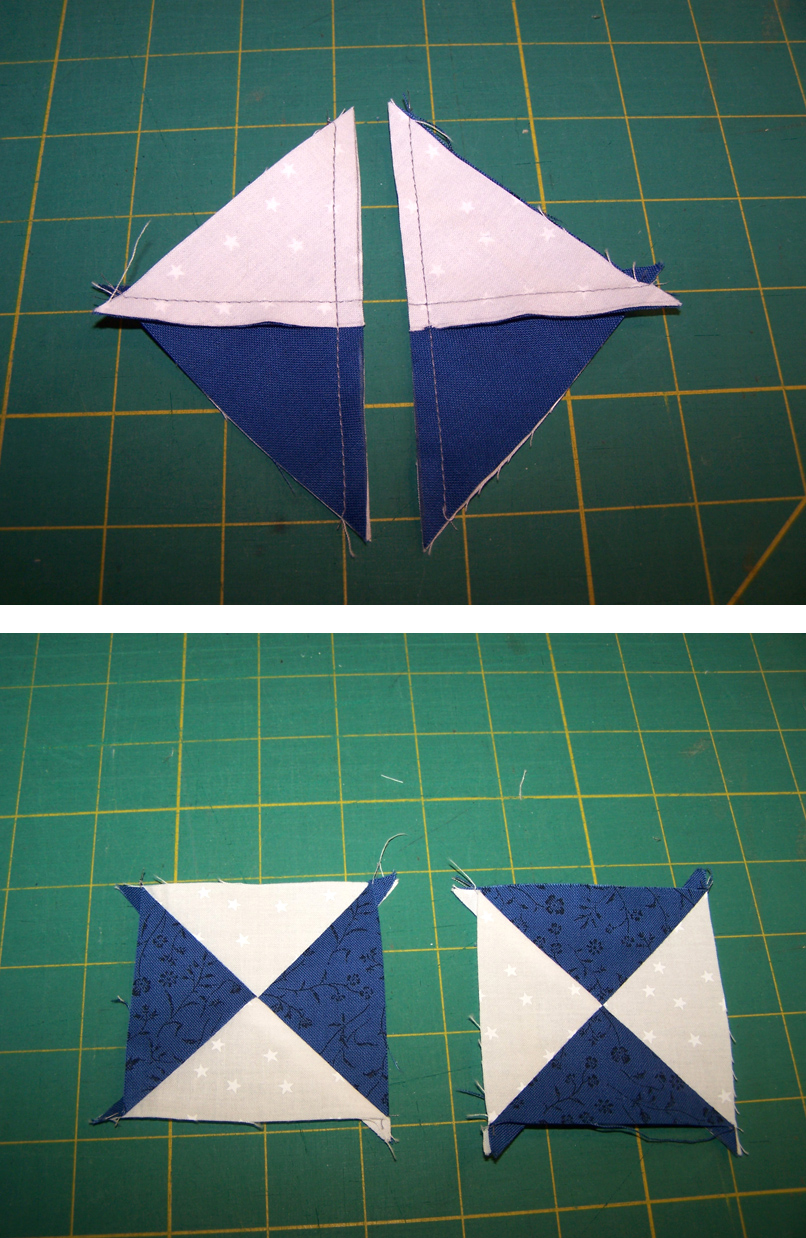 Step 2: Stitch a scant ¼” along both sides of the drawn line then cut along the drawn line and press open. You will have two quarter-triangle squares.
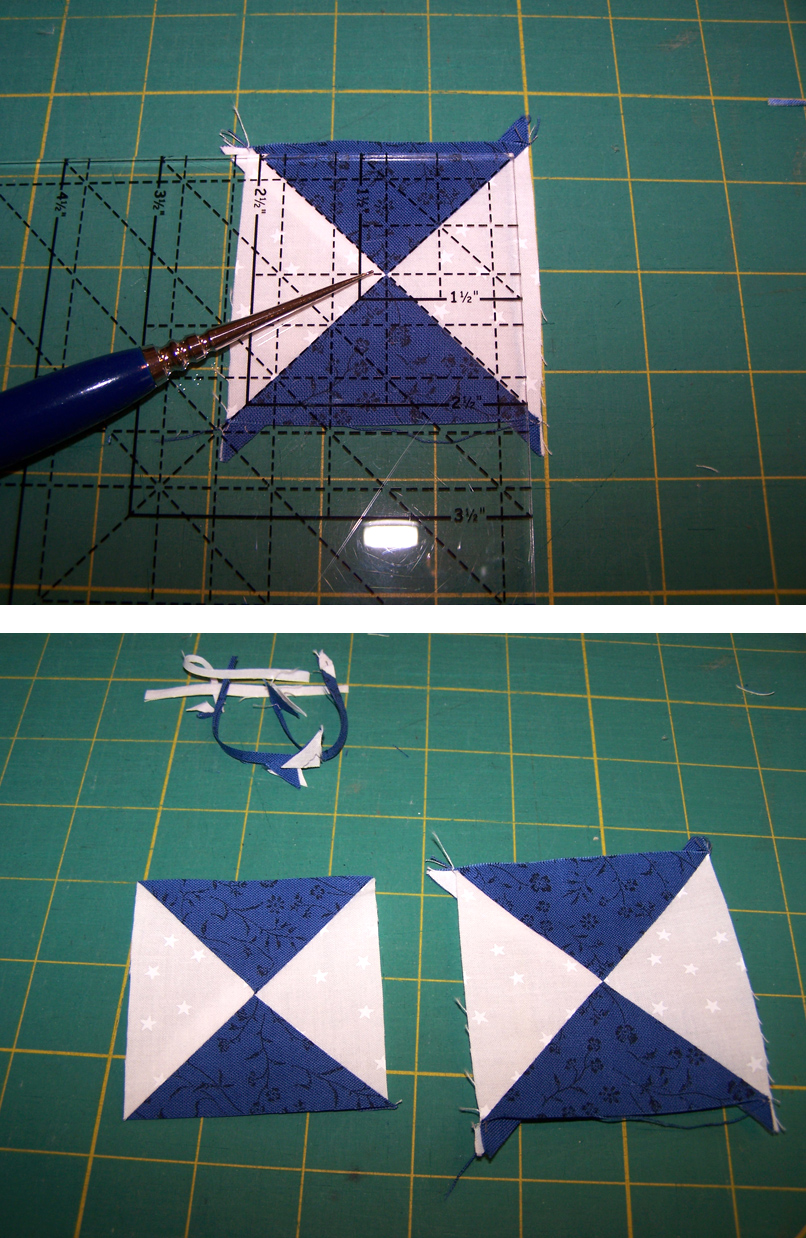 Step 3: To trim, center the cross hatches of the Precision Trimmer 6 ruler at the center of the quarter-triangle square making sure that the diagonal lines line up. Trim two sides. Turn the quarter-triangle square around and reposition the Precision Trimmer 6 making sure that all lines match up. Trim the other two sides.
 Triple Triangle
Step 1: To make a 2” finished triple triangle square, cut three squares 3½”. Make half-square triangles from two of the fabrics.
 Step 2: On the wrong side of the half-square triangle mark a diagonal line from corner to corner crossing the stitching line.
 Step 3: Center one of the half-square triangles on the third 3½” square, right sides together.
 Step 4: Stitch a scant ¼” along both sides of the drawn line then cut along the drawn line and press open. You will have two triple triangle squares.
 Step 5: To trim, center the cross hatches of the Precision Trimmer 6 ruler at the center of the triple triangle square aligning the diagonal lines. Trim two sides. Turn the unit around, re-align and trim the other two sides to finish off your new triangles!
See you next time when we will discuss flying geese units in the next installment of this series.
More in this Series:
- Precision Quilt Piecing Part 1: Squares
- Precision Quilt Piecing Part 2: Half-Square Triangles
- Precision Quilt Piecing Part 4: Flying Geese
- Precision Quilt Piecing Part 5: Square in a Square
- Precision Quilt Piecing Part 6: Triangle in a Square
- Precision Quilt Piecing Part 7: Fancy Half-Square Triangle
- Precision Quilt Piecing Part 8: Blocks and Borders
Get in touch! Leave a comment or email editor@nationalquilterscircle.com.


Thanks for directions, I was looking for that
How do you calculate the beginning size of fabric to make an 8.5" half square triangle block
If I wanted to make my HSTs to use to make quarter square triangles in your 8 at a time method and I wanted my finished quarter square triangles to be 4", how big would I need to cut the square to make the 8 at a time HSTs? I simply cannot wrap my head around that math. Help!
Looking forward to more posts
I wish these were pinnable, because are quite good!
Is there a printer friendly way to print these directions? thanks,it really like the clear instructions.
I just recently sewed qtr sq triangle for a BOM and hadn't realized how easy they were to make. Good directions here.