A quilt, no matter how beautiful its design or how soft its fabric, isn’t truly complete until the final binding stitch is sewn. One of the most elegant and professional finishes for a quilt is a perfectly mitered corner. For years, I’ve been asked countless times how to achieve those crisp, clean mitered corners that adorn my quilts.
In this guide, we’ll go over how to make mitered binding corners, in a comprehensive step-by-step tutorial. We’ll explore essential techniques and tips to elevate your quiltmaking skills and help you create stunning mitered corners.
First off, mitered corners aren’t always perfect. I do my best to get a nice corner, but there are times it just doesn’t happen. That’s fine too—my quilts have personality, and there are times I just remind myself, Done is good!
Let’s discuss what you can do to make mitering a binding corner less daunting. I learned by example, so here are a series of pictures to help show you how I make a mitered binding corner.
How to Make Mitered Corners on a Quilt
Cutting and Pressing Your Binding
1. My binding is normally cut 2 ½ inches wide, but some might prefer a narrower 2 ¼ inch binding, which works just as well. Make sure to press the strip lengthwise, matching the cut edges. A precise fold will ensure an even binding width.
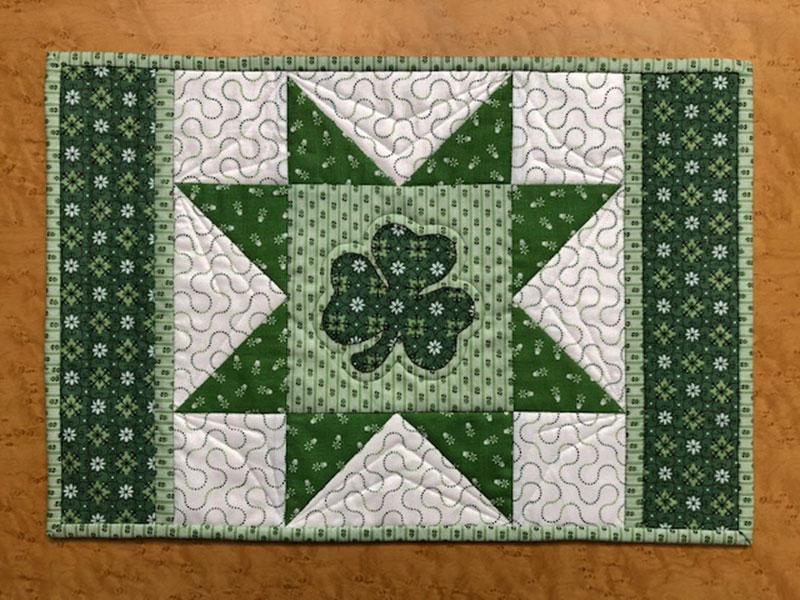
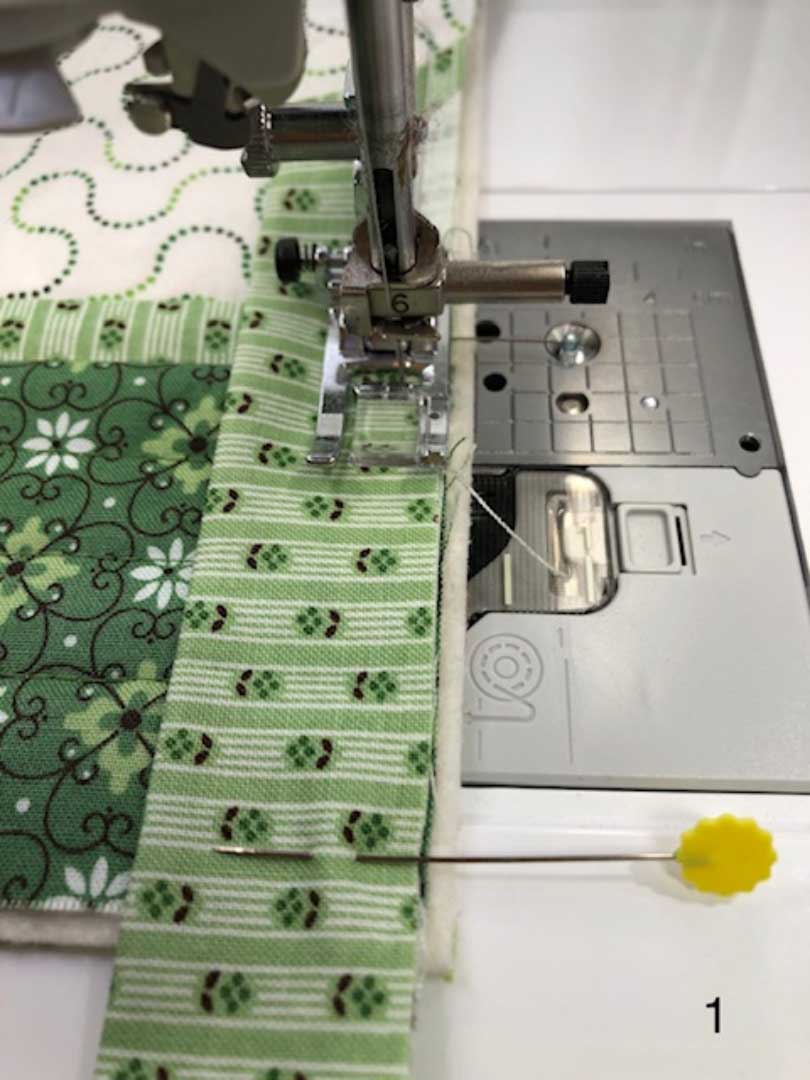
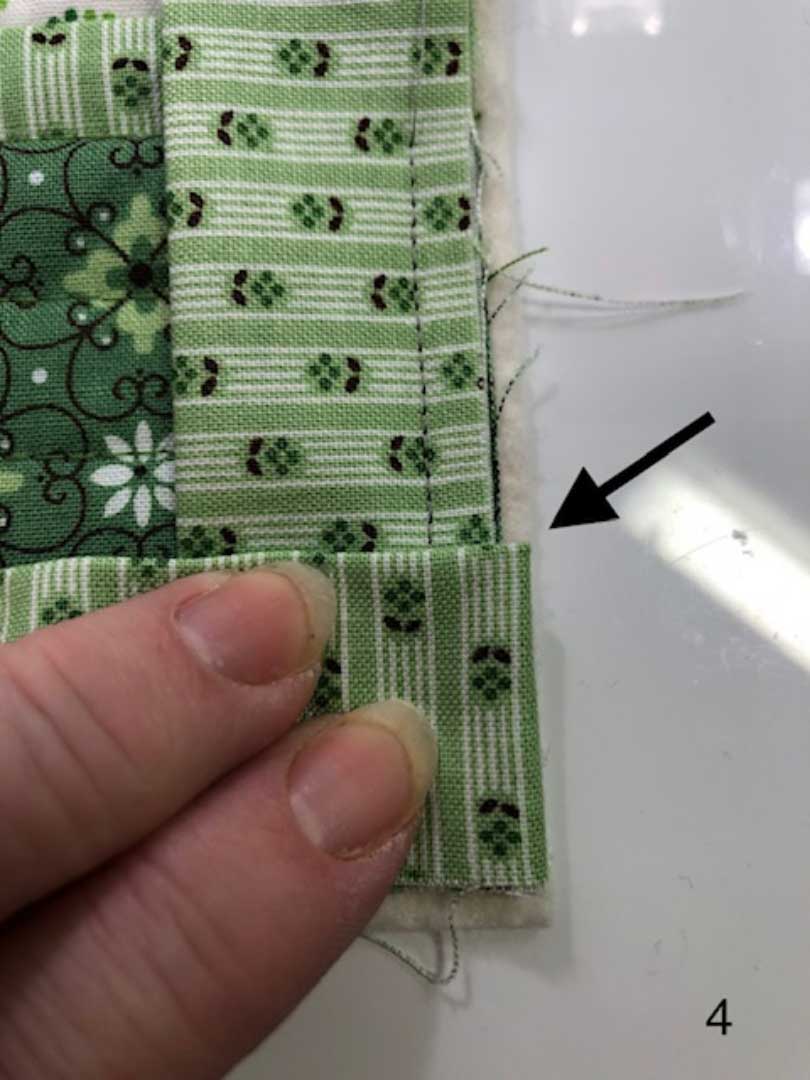
2. When applying the binding to the right side of the quilt sandwich and approaching the corner, stop ¼ inch from the edge of the quilt top, as shown here, marked with a pin.
Begin Stitching
Make a quick reinforcement stitch, then trim the thread and remove the quilt from the machine.
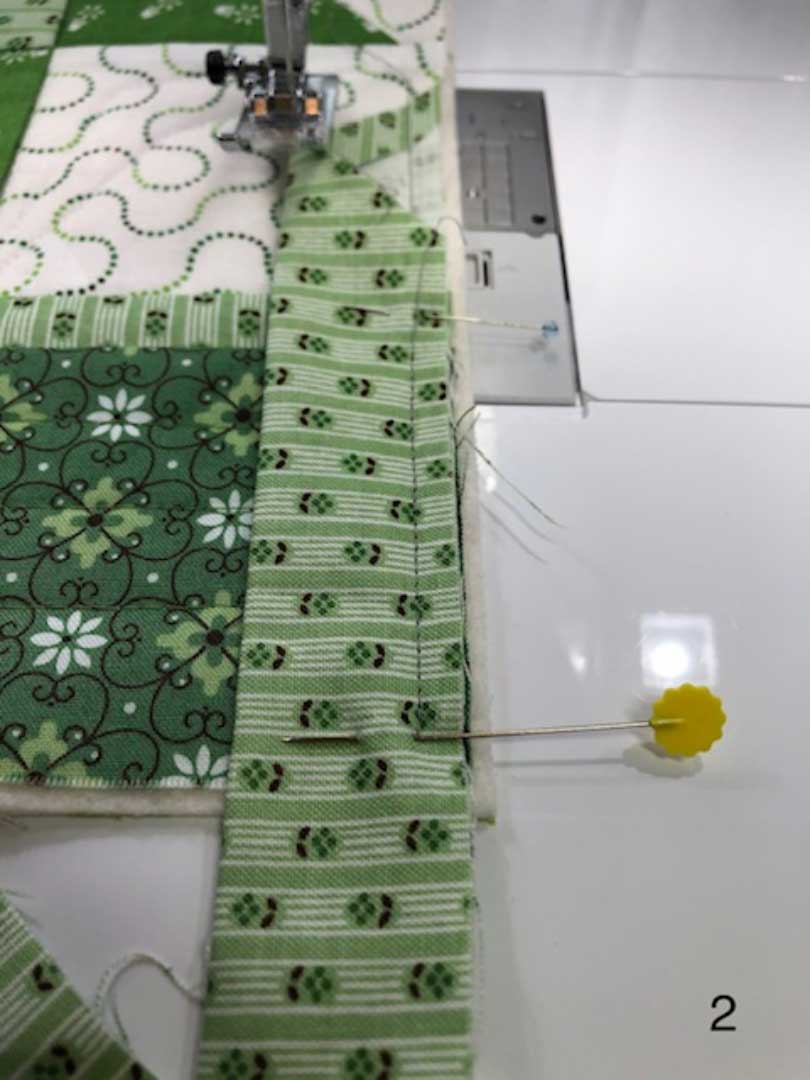
Bring the binding strip to the right at a 45-degree angle, then fold it back to the left.
TIP: Don’t fold the binding back into a perfect right angle. Leave a bit of extra fabric behind—the fold should extend at least ⅛ inch beyond the quilt top’s edge.
Begin stitching from the quilt sandwich’s edge along the next side. Follow the same process for each corner, ensuring a bit more fabric remains in the folded corner.
Secure with Hand Stitching
3. Once you’ve attached the binding to the quilt top, it’s time to turn the binding to the back side and secure it with hand stitching.
I position the quilt face down in my lap, with the binding edge close to me. This allows me to see the folded edge of the binding and the previous stitching line, which acts a as a guide for an even binding width.
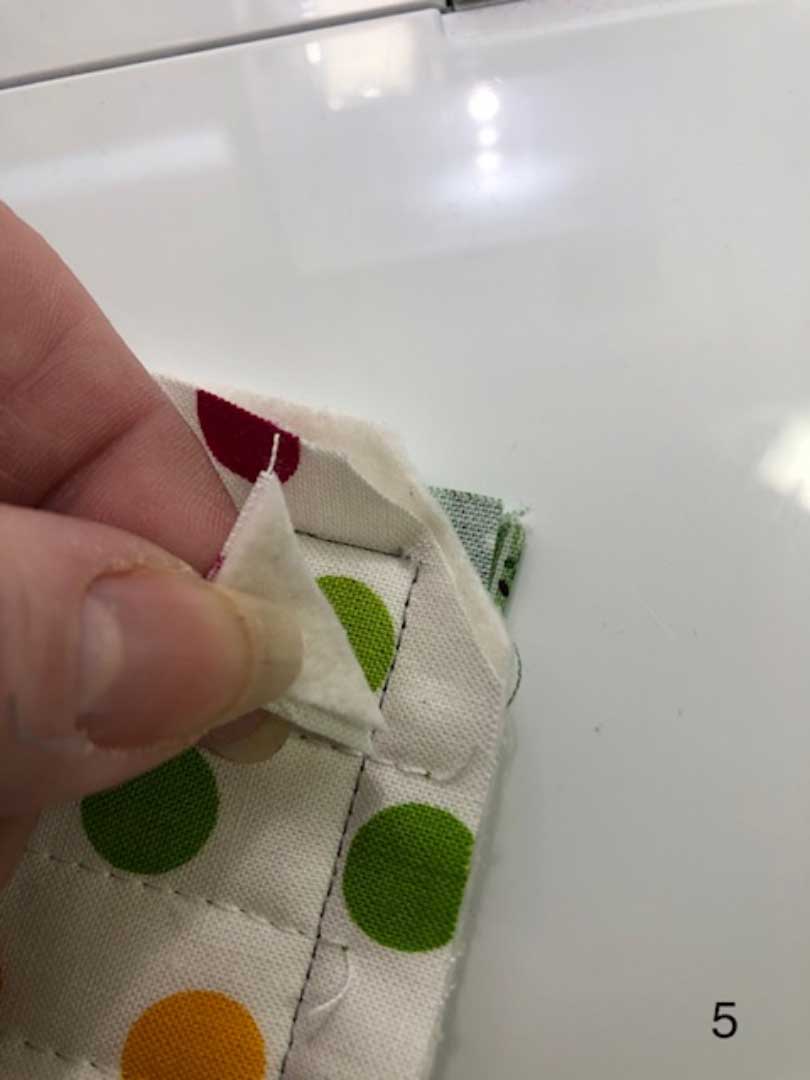
4. Before stitching, I diagonally trim each corner to remove excess batting and backing fabric, reducing bulk and making the folded miter easier to create.
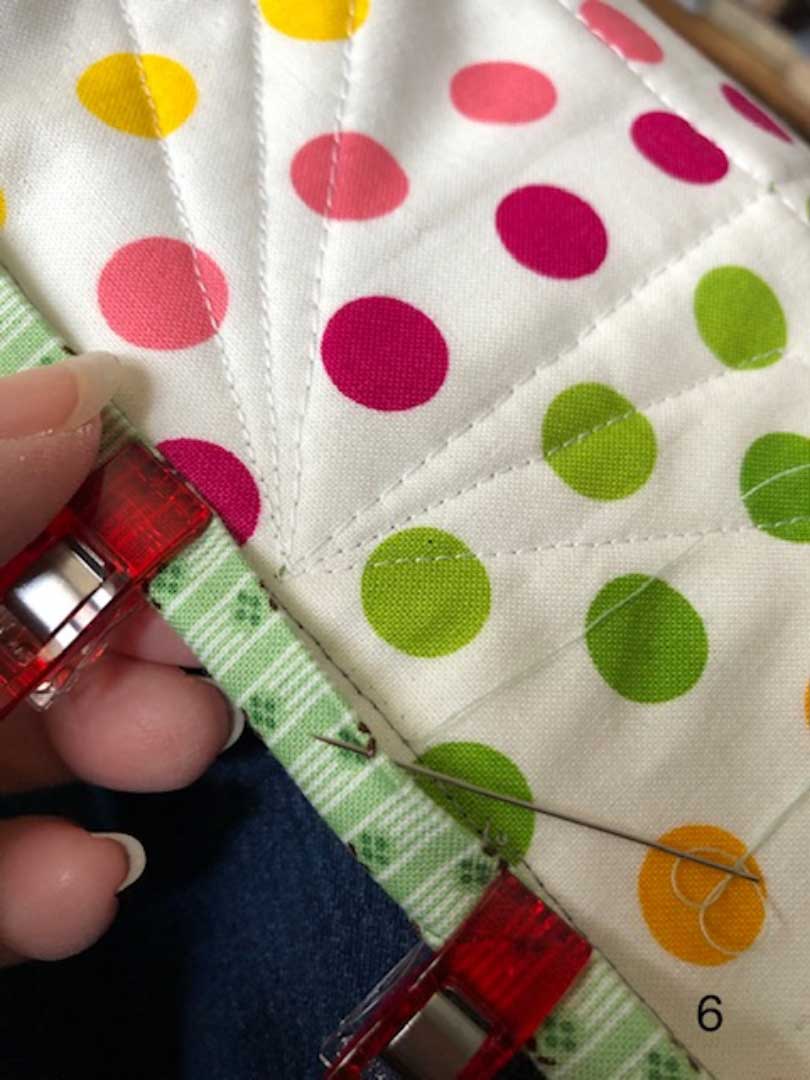
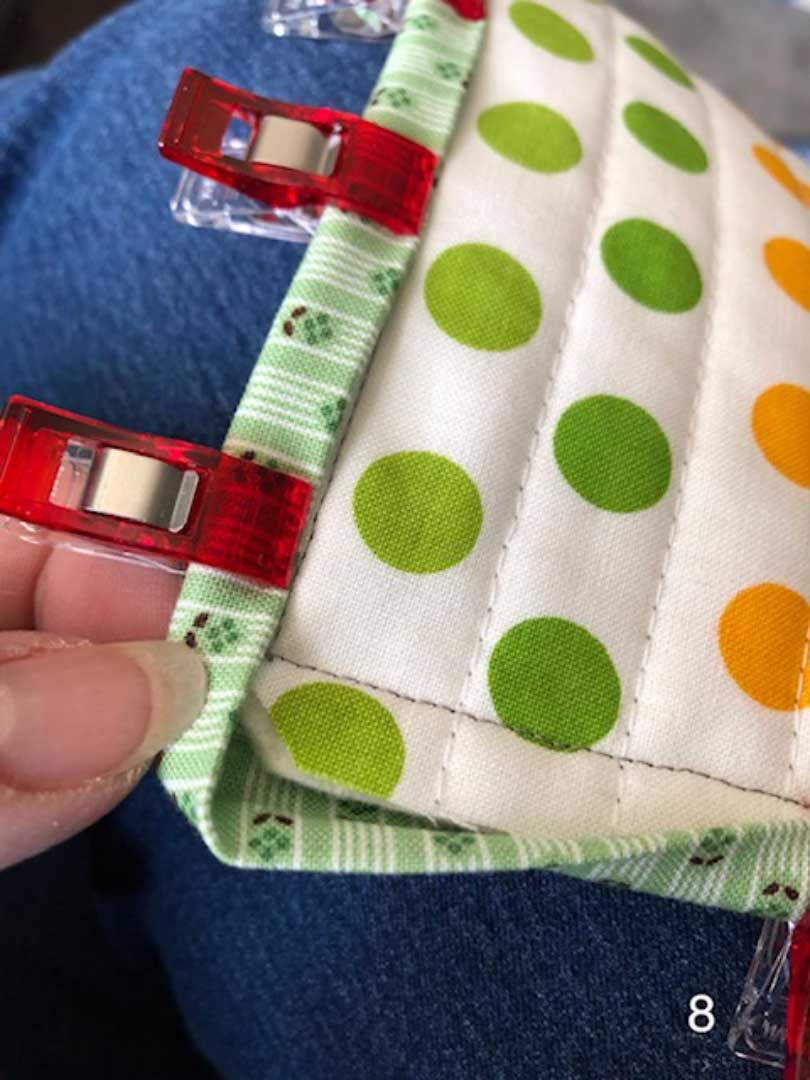
5. I use Wonder Clips to hold the binding fold in place as I approach the area for stitching.
6. I prefer to use a straw needle, which is very thin and slightly longer, for securing the binding. My first stitch, with a single layer of thread, is into the seam allowance to hide the knot. Then I take a small stitch into the binding fold and pull the thread snug.
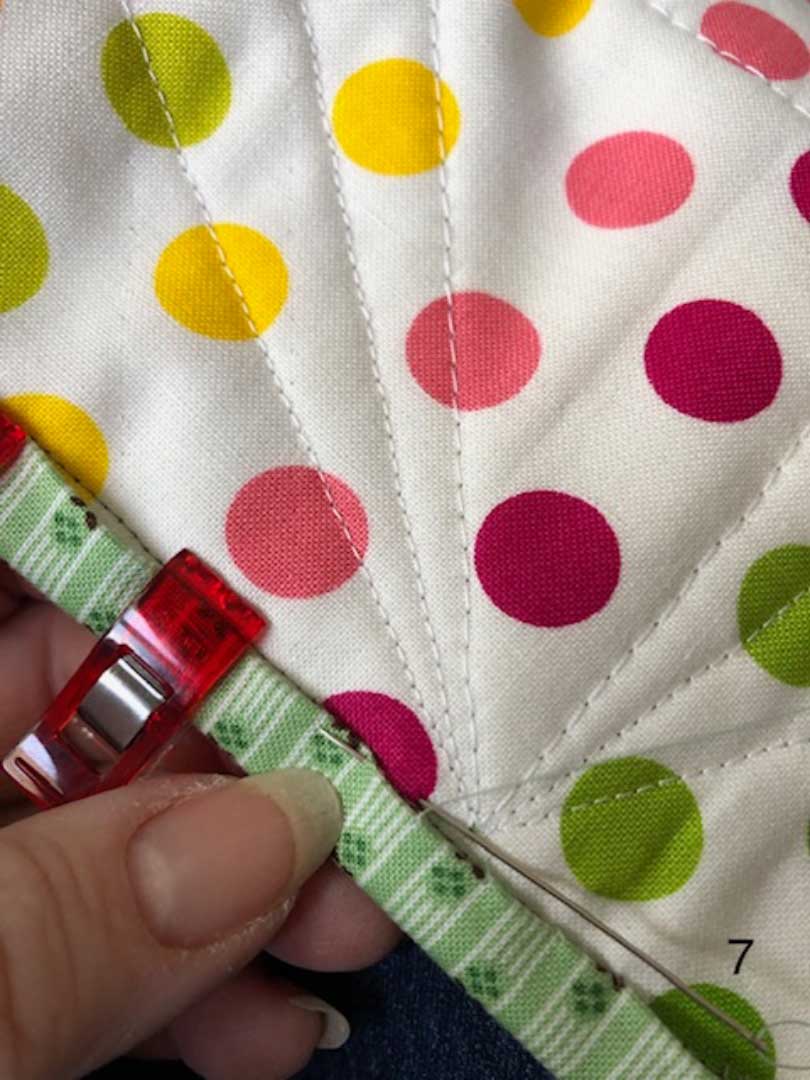
7. Next, I cross back to the backing fabric and run the needle in a shallow stitch, parallel to the binding seam, while also stitching into the binding fold. Pull the stitch snug to bury the thread. Continue this method all the way to the corner.
Fold the Binding
8. As I approach the corner, I stop and fold the binding as shown here. First, I fold the far edge, and then the adjacent side. I secure the binding fold with clips until I am ready to stitch that section.
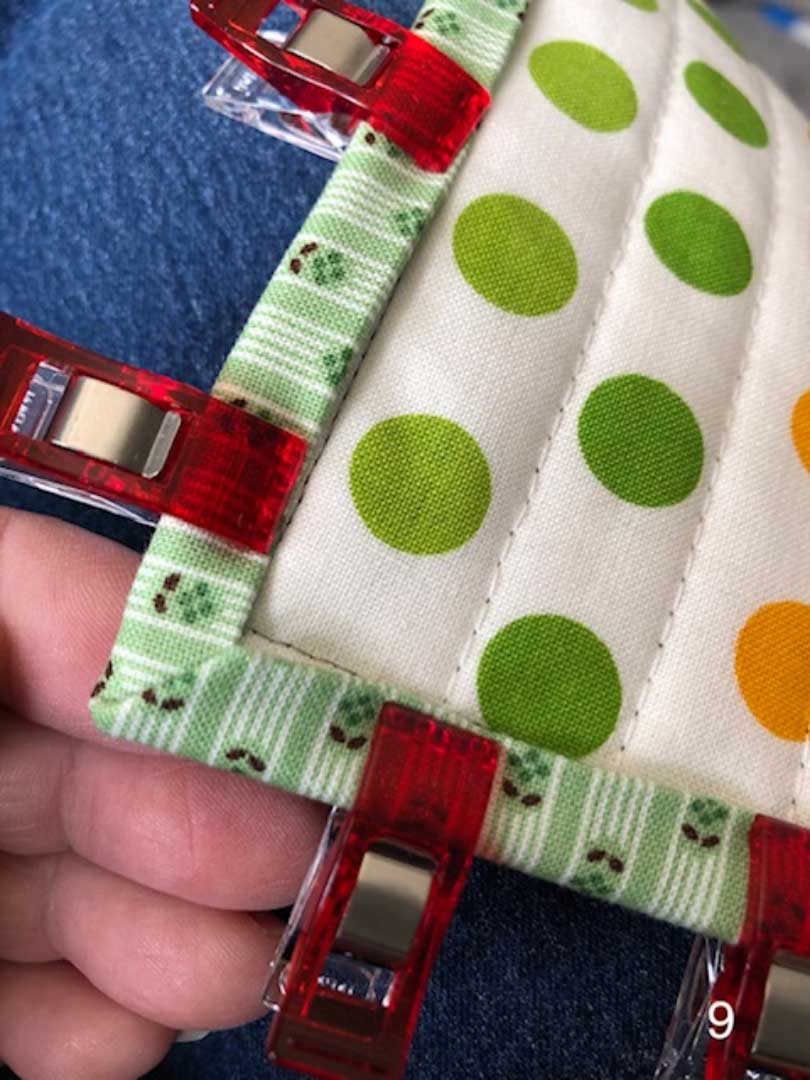
9. Once I’ve stitched all the way to the mitered corner, I take a few stitches into the folded miter to secure the corner.
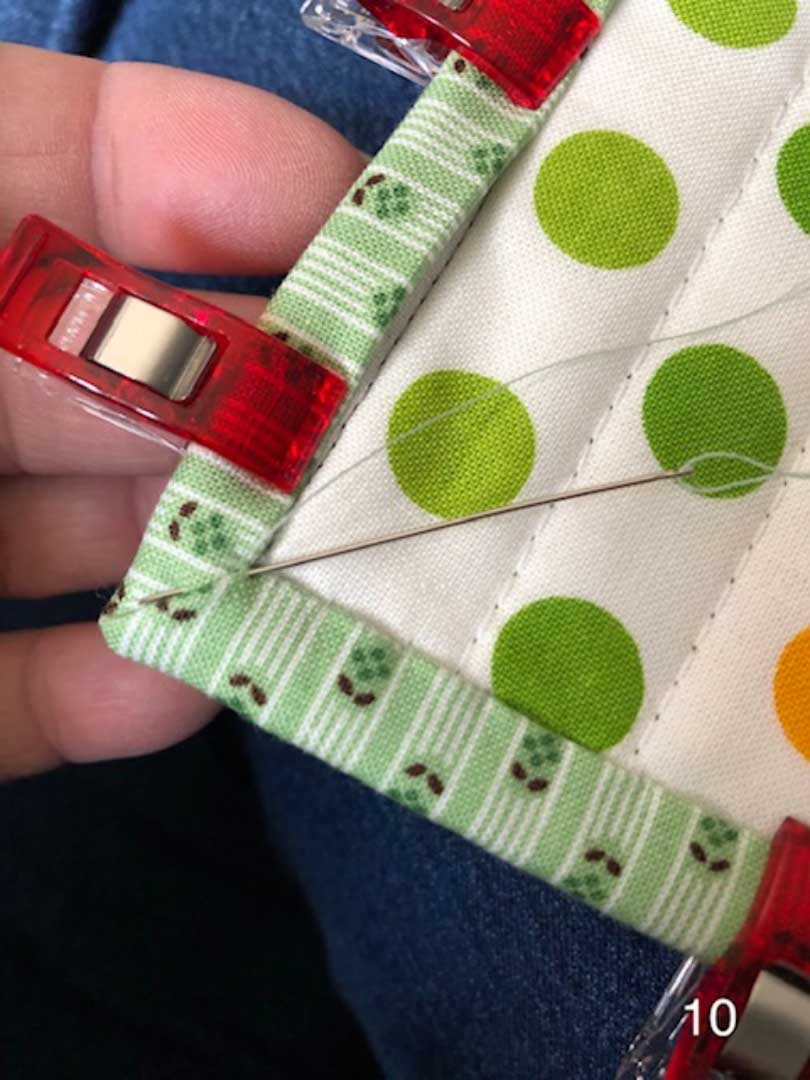
Then, I drive the needle to the front side of my quilt and take a few stitches across the miter to secure the front corner.

Once I’m at the inner edge of the miter, I drive the needle to the back side of my quilt and continue securing the binding along the next edge. I repeat this process until the entire binding and all four corners are complete.
NOTE: There are other methods, and many quilters use their machine to secure the binding. In this case, the binding is applied to the back of the quilt first, but mitering the corners follows the same process.
Your quilt is ready to be enjoyed! Whether every binding corner is picture perfect or not, feel the satisfaction and remember: Done is good!
Happy quilting!
You might also be interested in:
Mitered Borders
Mitering Any Degree Corner
Continuous Binding and How to Miter Corners
Mitering Made Easy
Binding Corners
How to Sew Mitered Corners for Gorgeous Quilt Borders
Applying Bias Tape to Edges and Mitering Corners
. I am a relatively new quilter and have done mitered corners but they were very hard. Thank you for your tips and pictures. I learned from you to snip the corner of batting and fabric and to line up the far edge first and then the first edge. I can't wait until I can finish my next quilt with much more confidence. I do bring it from the back to the front and sew with my machine as I cannot manage a hand needle any more. Thank you so very much.
Thank you, Colleen! I have been really struggling with the mitered corners. Almost ready to give up and round my corners. So, thank you.
Explanations are very clear. Easy to understand. Thanks so much !
Thank you for the tips. Even though I have made numerous quilts I always struggle to get it as neat as yours. I will definitely try this new "how to"on my next quilt.
I would love to see how to do scalloped edge mitered binding corners. Do you have info on that? Thanks
AH! I always fold my mitre even with the edge. No wonder I have so much trouble! I get the 45 deg fold OK, but going 1/8" over the edge makes sense! And DUH! for some reason, I always trim corners, but never on quilts! Thanks for your help.
Great instructions and pictures. You made binding easy. Thank you for your instructions.
Thank you very much
I am intrigued that the binding and front are not as wide as the backing and batting ? It appears you leave extra batting in the binding? Please comment. Thank you. Such a good tutorial!
Excellent article ... very helpful and the pictures of each step are extremely helpful!