You may have heard the terms “mitered border” or “mitered corner” and wondered what they refer to in the quilting world. Think of a picture frame and how the corners of the frame are joined together to make an angle. That is exactly what quilters are simulating. The 45° angle can be created when two fabric strips converge to make a corner.
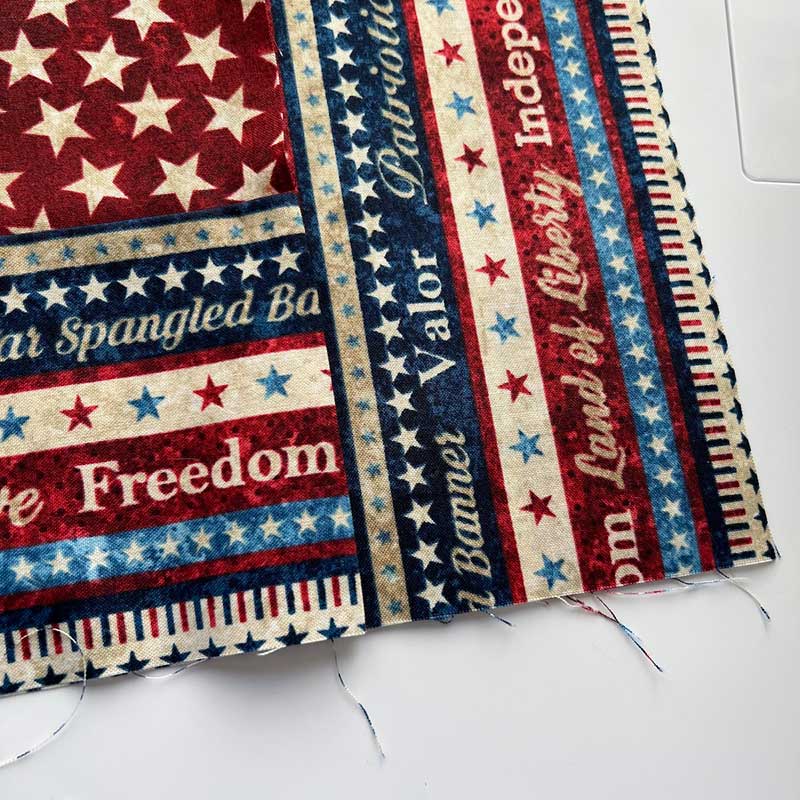
Many quilters will utilize this technique when a particular framing look is desired around the outer edge of a quilt. This can be seen especially when a design contains bold stripes or patterns that create a continued motion when making the angle, as opposed to butted borders where the pattern is interrupted.
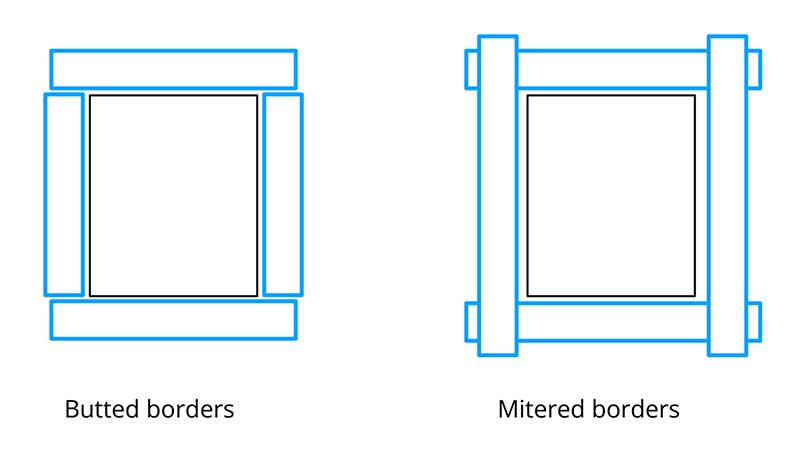
Below you’ll see a butted corner (left) compared to a mitered corner (right).
One consideration to keep in mind when planning a quilt with this type of border is that it requires more yardage. One way to calculate this is to refer to the finished size of the quilt. Here is an example:
Finished size of the quilt = 54” x 64”
Add 4” to each dimension = 58” x 68”
This will allow an extra two inches for trimming at each corner. Use these numbers for calculating the new yardage need for borders.
Note: You will need to use the width of the desired border in your new calculations for overall yardage. This method will determine the number of strips needed when cutting strips from the width of fabric.
(2) 58” + (2) 68” = 252” total needed
252” divided by 42” (the useable width of most fabrics) = approximately 6 strips. (I would typically round this to 7 strips to ensure I had additional fabric if needed.)
Notice the overlapping strips at each corner in the mitered border diagram. This will be where the diagonal seams will occur in this method.
Construction:
1. Cut the number of border strips using the new calculation for length (in the example that was 6). Join the strips in an end-to-end fashion. Then, cut the lengths needed. Two (2) strips at 58” and two (2) strips at 68”.
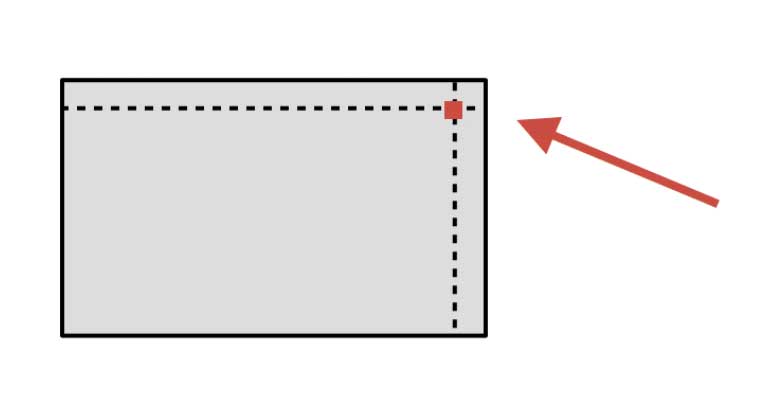
2. Next, find the center of each strip and mark it with either a pin or a fabric marking pencil.
3. Do the same with your patchwork quilt top. Determine the center point of each side and mark that spot. Also place a dot at each corner of your quilt top where the 1⁄4” seams would normally intersect. This will be your start and stop marks when seaming the border to your quilt top.
4. Working one border at a time, place border right-sides together with quilt top, matching center markings. Pin border in place, working out from the center point.
5. Position the quilt in the sewing machine with the border on the bottom. Use the corner dot as your starting point. Reinforce your stitch as you begin and proceed to the dot marked at the far side of this side. Reinforce stitch at the final marked dot.
6. Proceed in this same manner to join all four border strips to their respective sides, always taking care to not catch the extra border fabric in any seam.
7. Press all seam allowances toward the outer edge of the quilt.
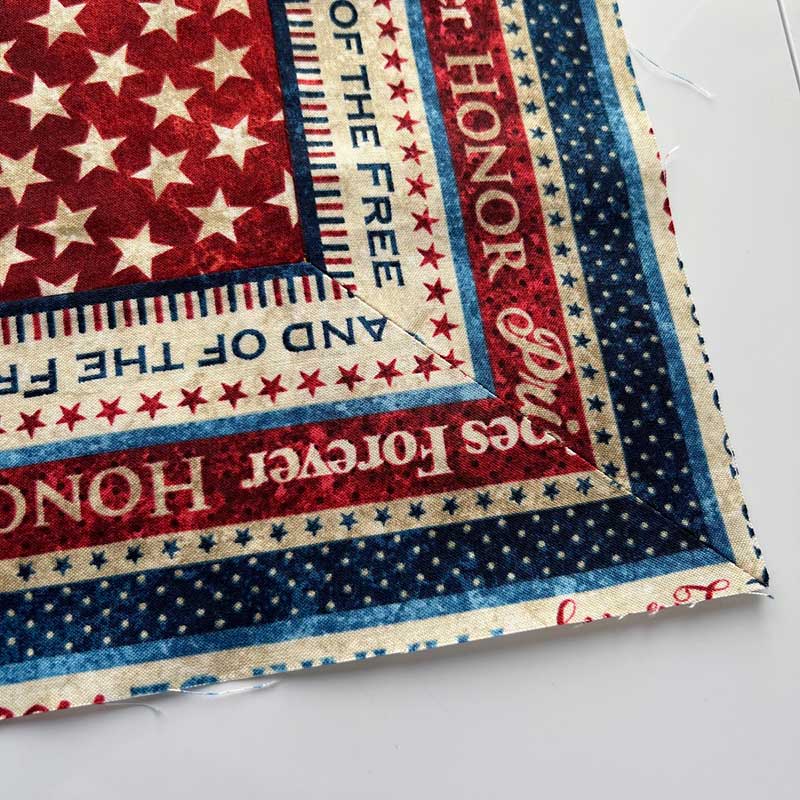
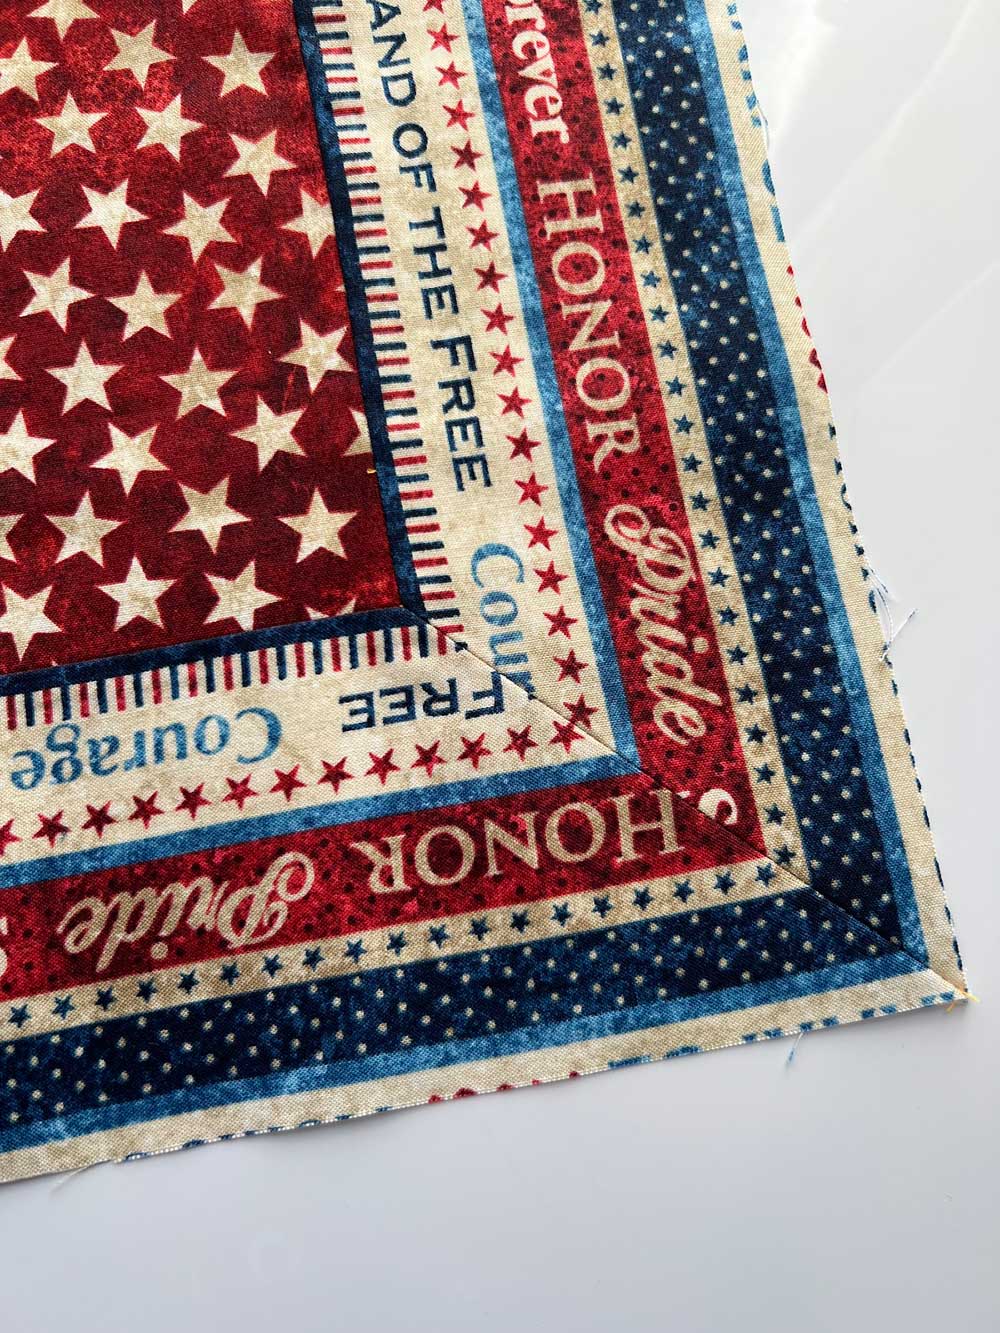
8. Addressing one corner at a time, fold the quilt top right-sides together diagonally as shown in the photo.
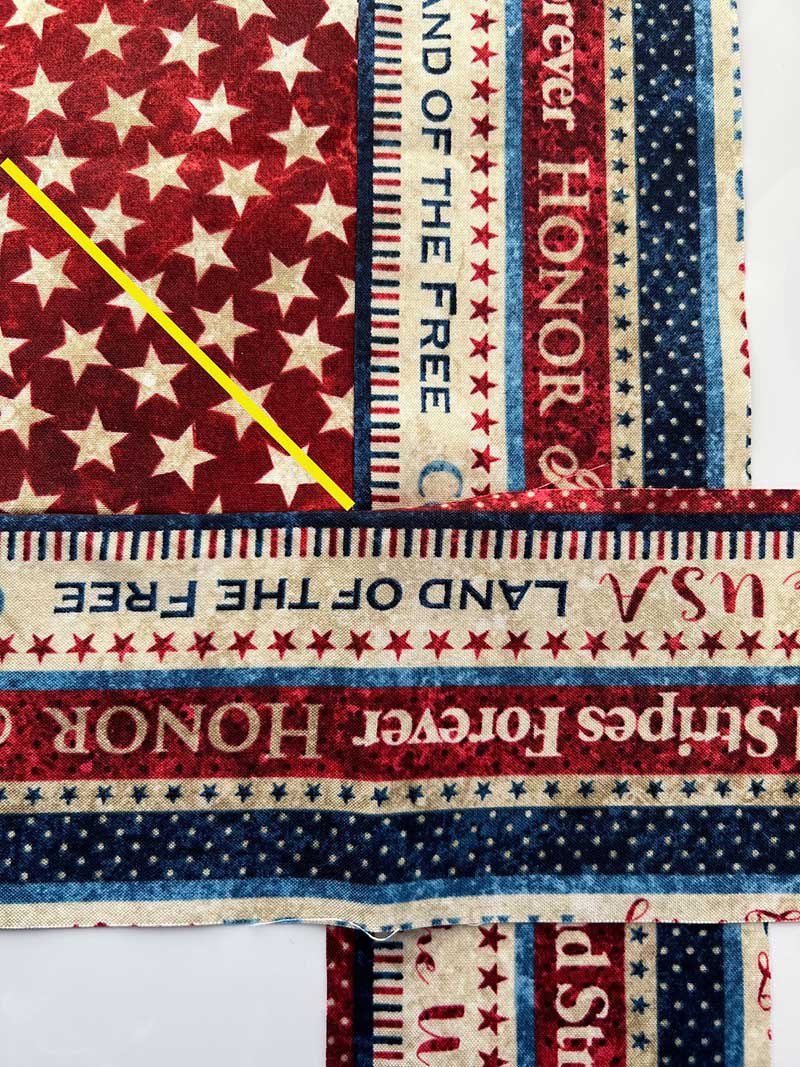
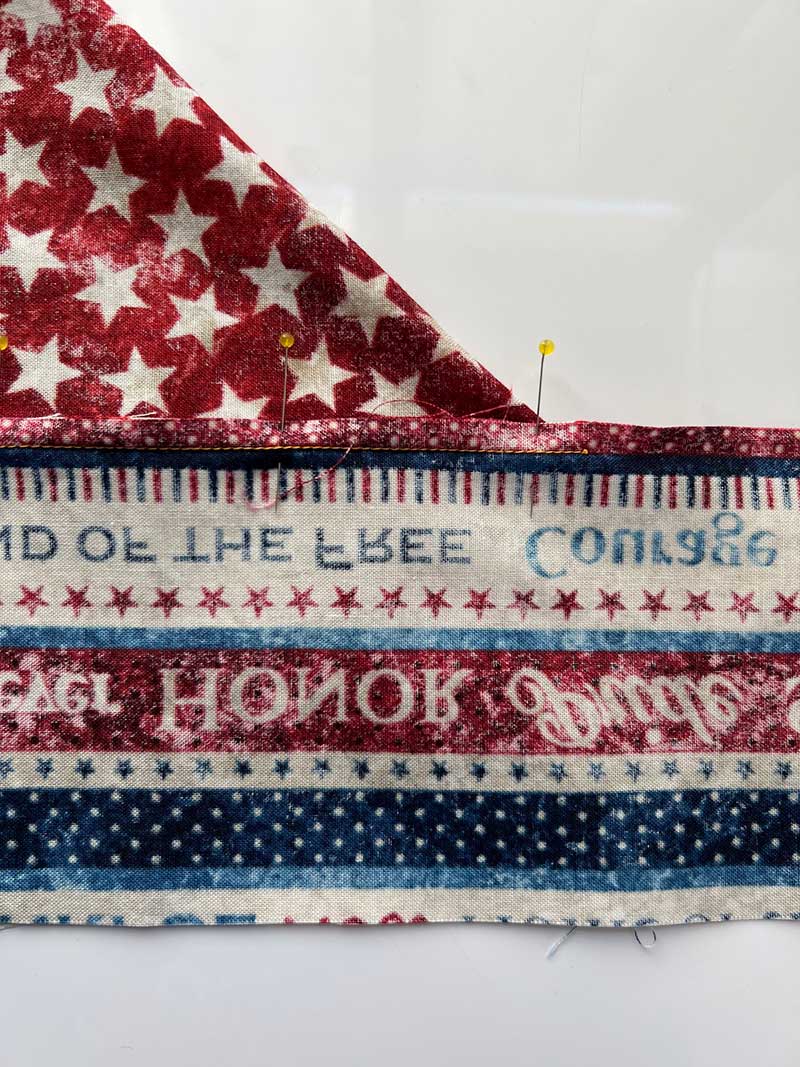
9. Align the border strips one on top of the other. Pin seam allowances out of the way. Use a ruler and fabric marking pen/pencil to create a 45° stitching line that begins with the seam line that joined the patchwork top to the border strip. See photo below. Yellow = stitching line.
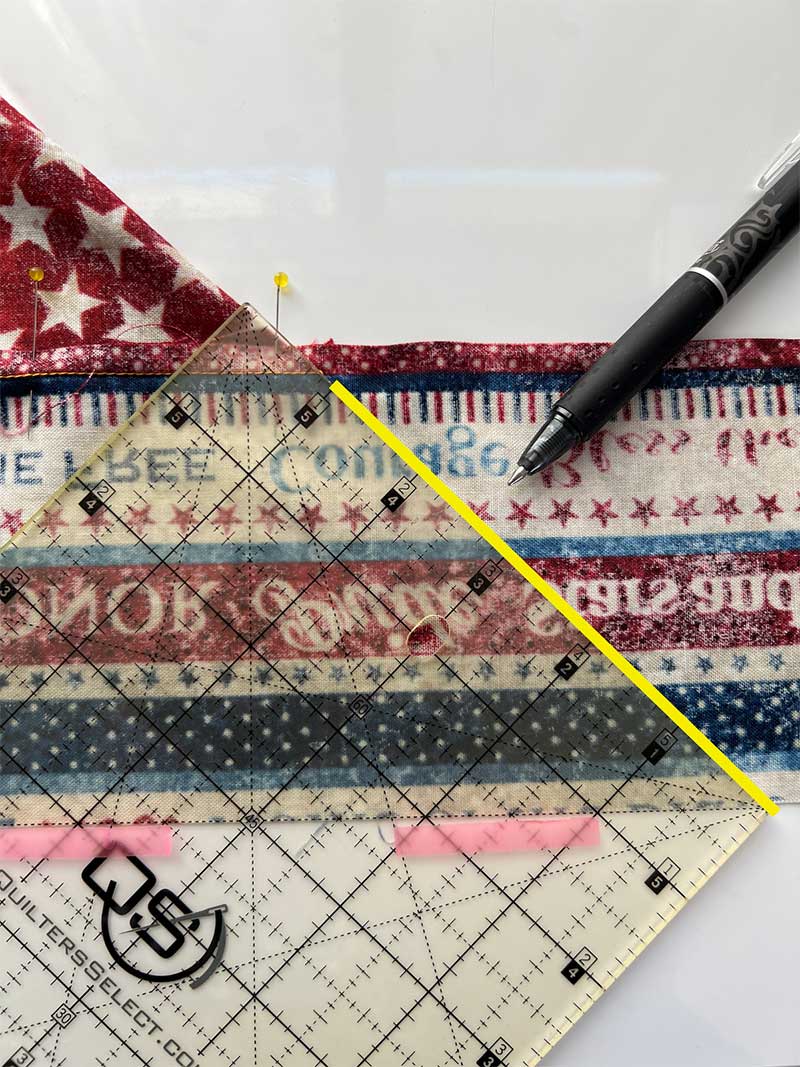
10. Place pins along this seam line and then stitch on the marked line.
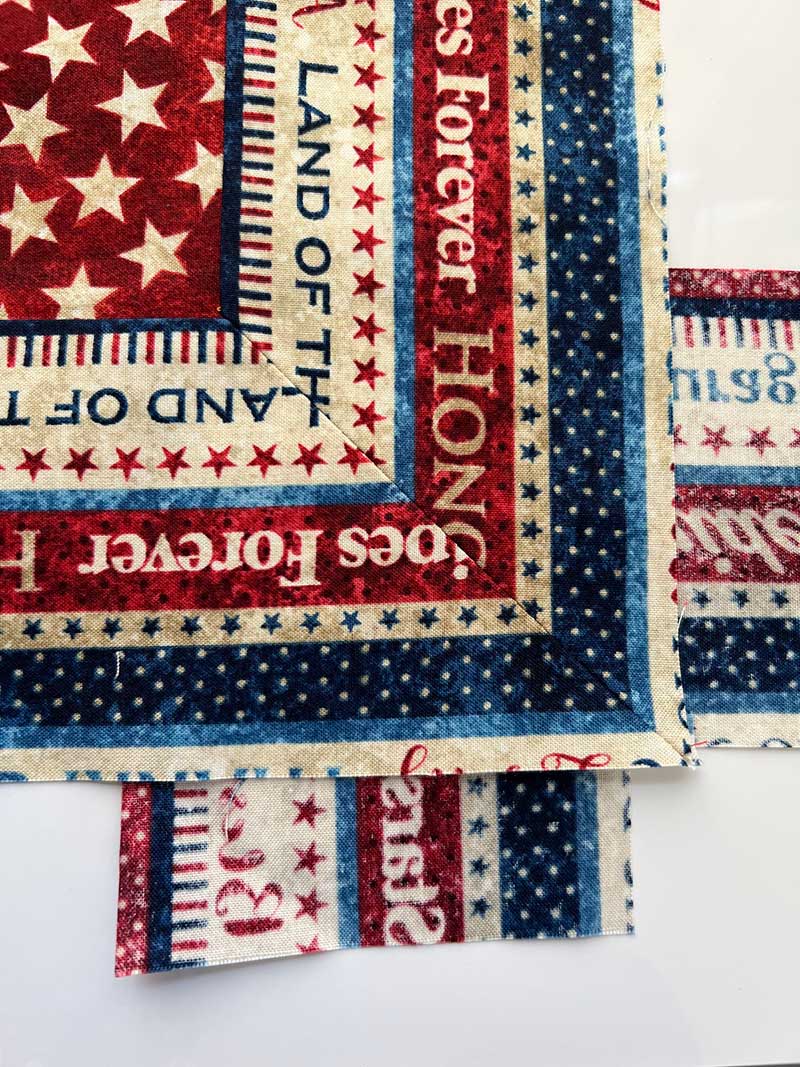
11. Open the quilt corner to check that the corner is accurate.
12. Open seam allowance and press.
13. Trim excess border, leaving a 1⁄4” seam allowance.
14. Continue in this manner until all four corners are complete.
15. You have now mastered the art of mitered borders!

This looks very nice, but it still leaves a raw edge. What do I do with that???
Why can’t I download
Great reading, love the professional look it gives the quilt. Thanks for sharing, Michele
Wish I could download
Excellent Tutorial!
Great info!
Love the information you give out. Could not doing any quilting this year. Plan on doing for next year. Our church is got a quilting class a couple times a week.
Is there a video of this - I've seen the taster but can't find a full tutorial.