After recently purchasing yet another ruler, I had to ask myself—why? Couldn’t one of the over thirty rulers I already have do what this new ruler does? This question sent me on a mission to critique the various techniques for piecing, and to determine which methods are the most accurate and efficient for creating the more common units used in quilting. Follow along as I share with you my findings in a new series on precision techniques for quilters.
The first installment of the series addresses the cutting of strips and the piecing of squares. There are two cutting procedures essential for an accurate end product: 1) cutting the pieces and 2) trimming the pieced units to their correct size.
Out With the Old
The first step is to square up your yardage. This is done by folding the fabric length-wise, selvedge to selvedge. Slide the selvedges along each other until you get a smooth fold.
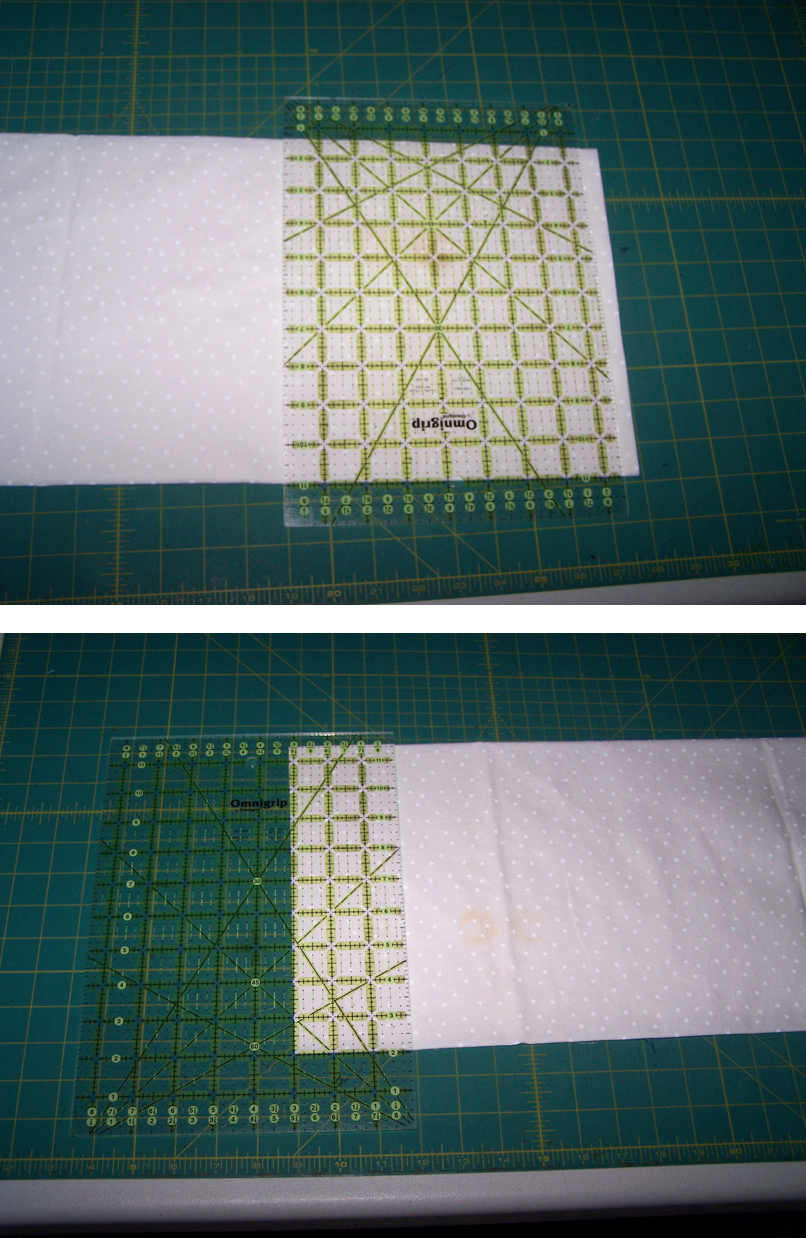
Next, place a ruler along one end to cut a straight edge. Most quilters will use an Omnigrip ruler for this. However, cutting with the Omnigrip requires placing the ruler on one end of the fabric for the squaring cut, then turning the fabric around to cut the strips, moving the ruler with each cut. This technique is not only inefficient, but can also lead to inaccuracy.
In With the New
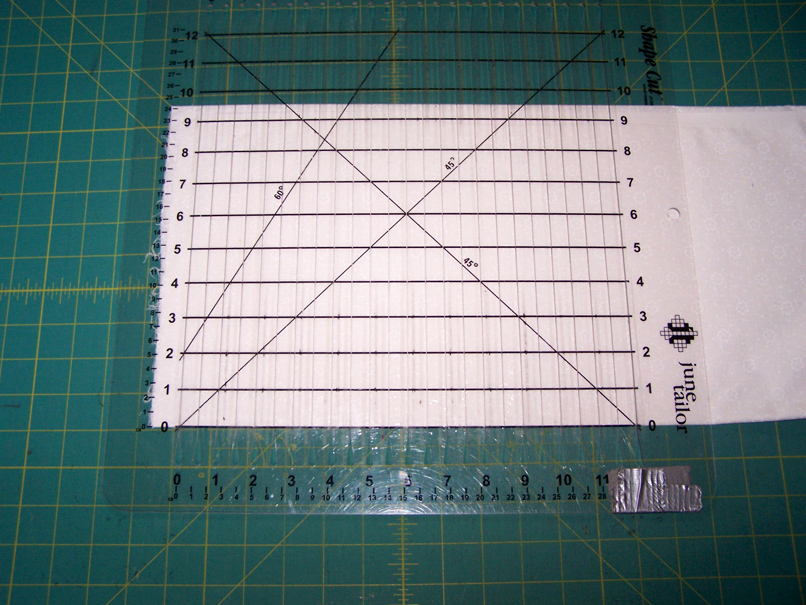
Cutting the PiecesStep 1: A more accurate and efficient method is to use the June Tailor Shape Cut ruler. Using this method, you will need to fold your fabric a second time, bringing the selvedges down to meet the first fold. Make sure this new fold is smooth. Align the zero horizontal line of the Shape Cut ruler along the fold of the fabric and align the zero vertical line alongside where you will make the first squaring up cut.
Step 2: After making the squaring up cut, without moving the ruler, continue along the ruler making each desired cut. You can square your fabric and cut as many as six 2” strips without moving the ruler. This method of cutting is more efficient and more accurate.
Step 3: To make a four patch, repeat this procedure using another color. Sew the two color strips right sides together. Many experts suggest sewing a scant ¼-inch seam for best results. Press to the dark and place the pieced strips one on top of the other, matching up the seams.
Step 4: Next, align the zero horizontal line of the Shape Cut ruler alone the edge of the pieced strips and align the zero vertical line where you will make the first squaring up cut.
After making the squaring up cut, without moving the ruler, continue along the ruler making each desired cut.
You can square up your strip set, cut your units, and have them paired up ready to be sewn, all at the same time.
Trimming to Size Step 5: After sewing the units together into four patches, using the scant ¼-inch, press the seams to one side.
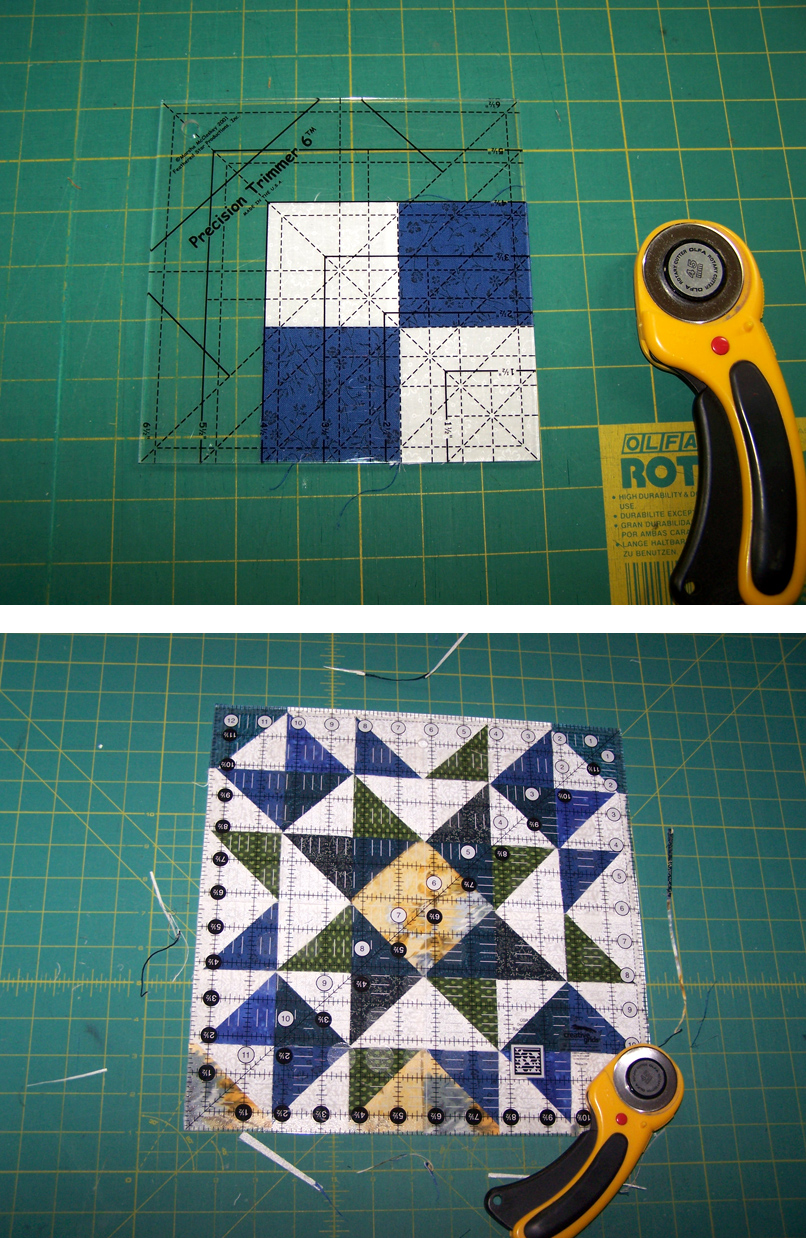
Now it is time to trim the units to their correct size. Trimming as you go along will assure you that your finished block will be the correct size.
I like to use the Precision Trimmer 6 by Marsha McCloskey. It is great for trimming other square units, such a four patches, nine patches, log cabin units, rail fence units, and much more.
For trimming larger units, I use the Creative Grid 12 inch ruler.
It is so sweet seeing your pieces drop neatly into place with points meeting and corners matching because of precision ruler techniques. See you next time when we will discuss half-square triangles.
Share tips, start a discussion or ask other students a question. If you have a question for an expert, please click here.
Make a comment:
Already a member?
23 Responses to “Precision Quilt Piecing Part 1: Squares”
Sandra gomez
Took me twice reading to understand but now I have a much better understand of how to best use the slotted ruler. How does one bookmark or mark this series for easier finding when I come back to the site? There seems no way I saw to “mark as favorite” if that makes sense
KATHY
I WANT A VIDEO ON HOW TO MAKE SQUARE IN SQUARE
Pamela
I have 5" squares of several different colors. I want to join 4 into a block. I have trouble getting the 4 points to align correctly in the middle. Can you help? I just recently found your site and as a beginner it is GREAT!
KATIE
Is there a way I can save this series to view at a later time
Merle Burkett
I recently bought your beginers' quilting DVD's and need to get the patterns that go along with them. How can I access the patterns if available?
ROSLYN
As for me, to stop that flipping the fabric problem which I agree is a problem..I taught myself to cut with both hands - problem solved.
Cathy
Very interesting
marie
very helpful tutorial ,inspired to try all ,
Ruth B
I own enough rulers already ..... been using mine for 20 plus years and with attention to detail have not encountered problems. 😊
Barbara Bordeaux
Is it necessary to use different rulers, or canone type do the trick?
Sign up for our free newsletter today
Get the latest instructional quilting videos, patterns, tips and techniques delivered right to your inbox.
Get exclusive premium content! Sign up for a membership now!
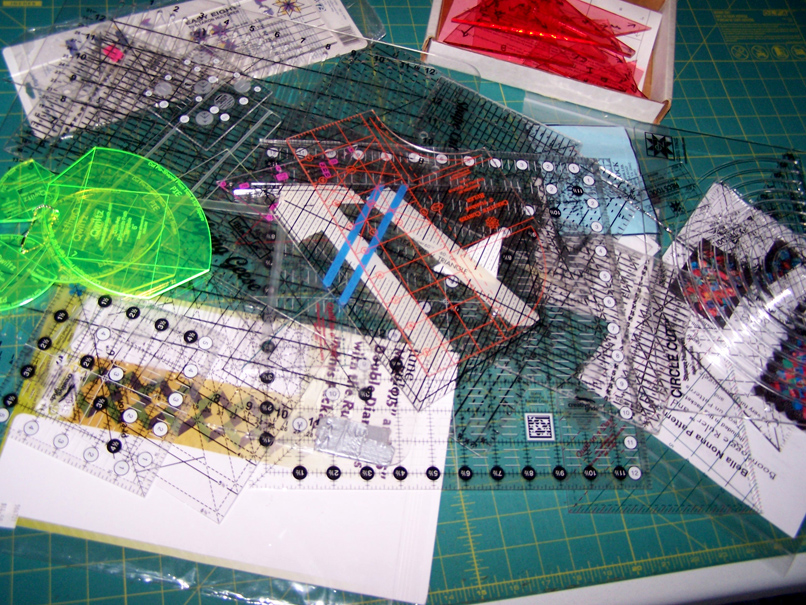 After recently purchasing yet another ruler, I had to ask myself—why? Couldn’t one of the over thirty rulers I already have do what this new ruler does? This question sent me on a mission to critique the various techniques for piecing, and to determine which methods are the most accurate and efficient for creating the more common units used in quilting. Follow along as I share with you my findings in a new series on precision techniques for quilters.
 The first step is to square up your yardage. This is done by folding the fabric length-wise, selvedge to selvedge. Slide the selvedges along each other until you get a smooth fold.
Next, place a ruler along one end to cut a straight edge. Most quilters will use an Omnigrip ruler for this. However, cutting with the Omnigrip requires placing the ruler on one end of the fabric for the squaring cut, then turning the fabric around to cut the strips, moving the ruler with each cut. This technique is not only inefficient, but can also lead to inaccuracy.
The first step is to square up your yardage. This is done by folding the fabric length-wise, selvedge to selvedge. Slide the selvedges along each other until you get a smooth fold.
Next, place a ruler along one end to cut a straight edge. Most quilters will use an Omnigrip ruler for this. However, cutting with the Omnigrip requires placing the ruler on one end of the fabric for the squaring cut, then turning the fabric around to cut the strips, moving the ruler with each cut. This technique is not only inefficient, but can also lead to inaccuracy.
 Cutting the Pieces
Step 1: A more accurate and efficient method is to use the June Tailor Shape Cut ruler. Using this method, you will need to fold your fabric a second time, bringing the selvedges down to meet the first fold. Make sure this new fold is smooth. Align the zero horizontal line of the Shape Cut ruler along the fold of the fabric and align the zero vertical line alongside where you will make the first squaring up cut.
Cutting the Pieces
Step 1: A more accurate and efficient method is to use the June Tailor Shape Cut ruler. Using this method, you will need to fold your fabric a second time, bringing the selvedges down to meet the first fold. Make sure this new fold is smooth. Align the zero horizontal line of the Shape Cut ruler along the fold of the fabric and align the zero vertical line alongside where you will make the first squaring up cut.
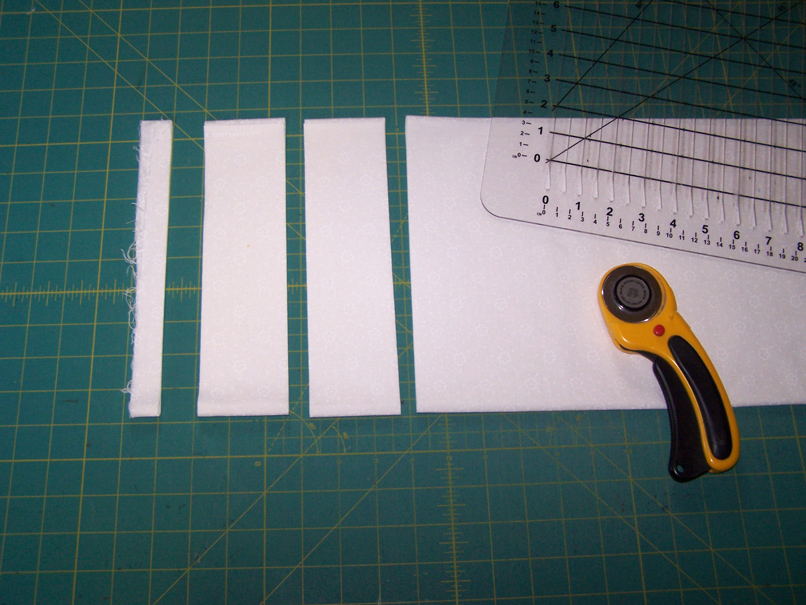 Step 2: After making the squaring up cut, without moving the ruler, continue along the ruler making each desired cut. You can square your fabric and cut as many as six 2” strips without moving the ruler. This method of cutting is more efficient and more accurate.
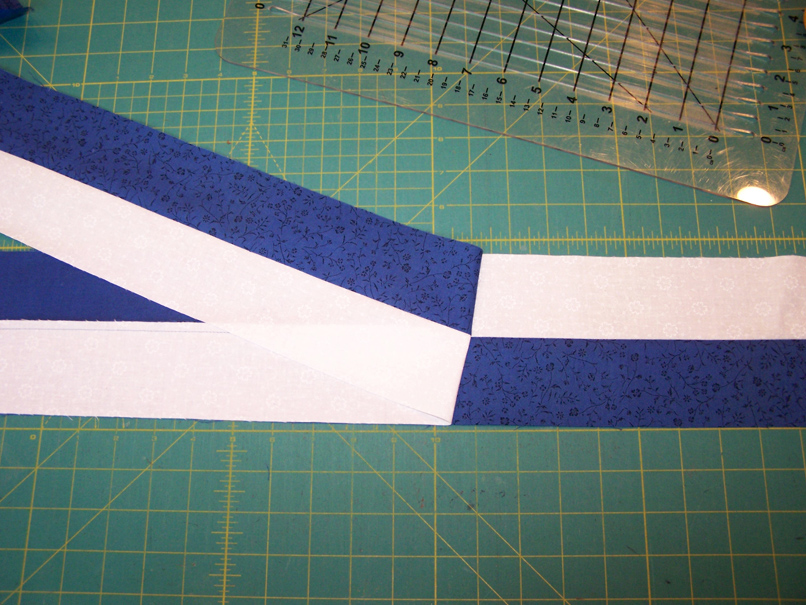 Step 3: To make a four patch, repeat this procedure using another color. Sew the two color strips right sides together. Many experts suggest sewing a scant ¼-inch seam for best results. Press to the dark and place the pieced strips one on top of the other, matching up the seams.
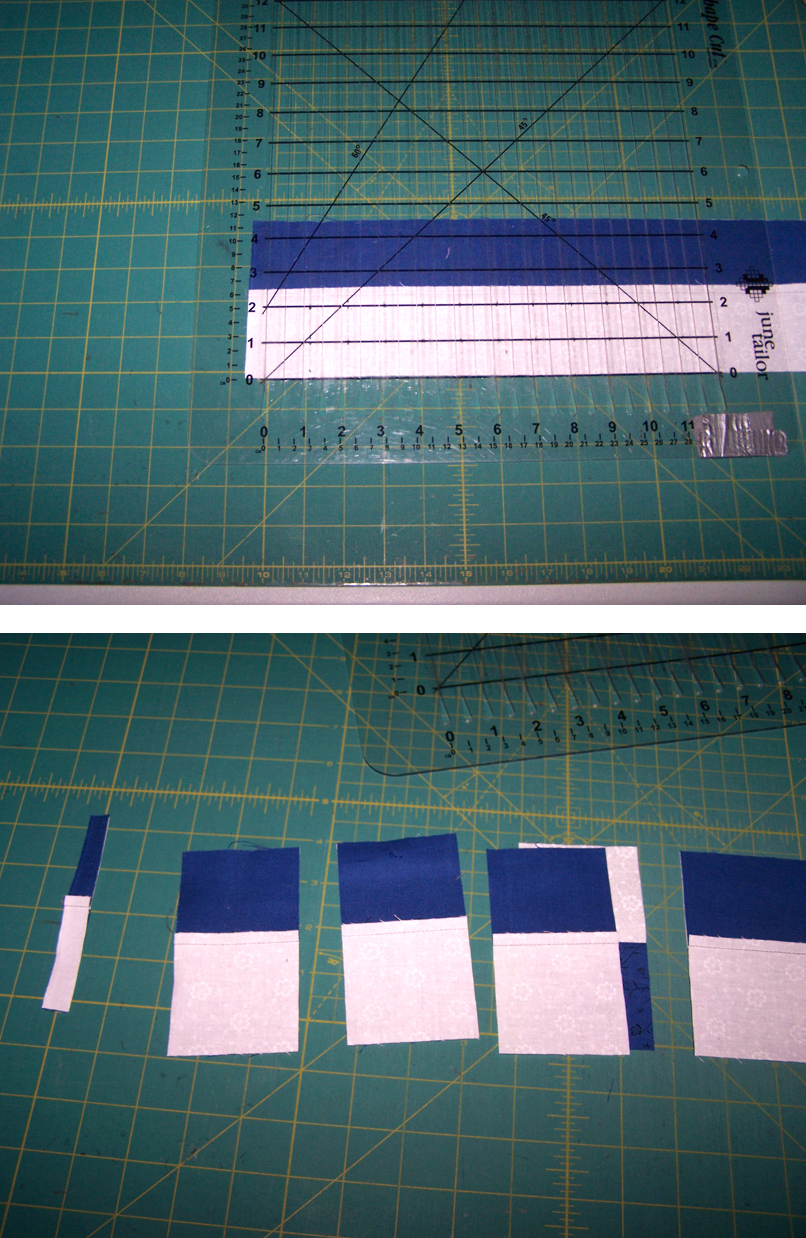 Step 4: Next, align the zero horizontal line of the Shape Cut ruler alone the edge of the pieced strips and align the zero vertical line where you will make the first squaring up cut.
After making the squaring up cut, without moving the ruler, continue along the ruler making each desired cut.
You can square up your strip set, cut your units, and have them paired up ready to be sewn, all at the same time.
Step 4: Next, align the zero horizontal line of the Shape Cut ruler alone the edge of the pieced strips and align the zero vertical line where you will make the first squaring up cut.
After making the squaring up cut, without moving the ruler, continue along the ruler making each desired cut.
You can square up your strip set, cut your units, and have them paired up ready to be sewn, all at the same time.
 Trimming to Size
Step 5: After sewing the units together into four patches, using the scant ¼-inch, press the seams to one side.
Now it is time to trim the units to their correct size. Trimming as you go along will assure you that your finished block will be the correct size.
I like to use the Precision Trimmer 6 by Marsha McCloskey. It is great for trimming other square units, such a four patches, nine patches, log cabin units, rail fence units, and much more.
For trimming larger units, I use the Creative Grid 12 inch ruler.
Trimming to Size
Step 5: After sewing the units together into four patches, using the scant ¼-inch, press the seams to one side.
Now it is time to trim the units to their correct size. Trimming as you go along will assure you that your finished block will be the correct size.
I like to use the Precision Trimmer 6 by Marsha McCloskey. It is great for trimming other square units, such a four patches, nine patches, log cabin units, rail fence units, and much more.
For trimming larger units, I use the Creative Grid 12 inch ruler.

Took me twice reading to understand but now I have a much better understand of how to best use the slotted ruler. How does one bookmark or mark this series for easier finding when I come back to the site? There seems no way I saw to “mark as favorite” if that makes sense
I WANT A VIDEO ON HOW TO MAKE SQUARE IN SQUARE
I have 5" squares of several different colors. I want to join 4 into a block. I have trouble getting the 4 points to align correctly in the middle. Can you help? I just recently found your site and as a beginner it is GREAT!
Is there a way I can save this series to view at a later time
I recently bought your beginers' quilting DVD's and need to get the patterns that go along with them. How can I access the patterns if available?
As for me, to stop that flipping the fabric problem which I agree is a problem..I taught myself to cut with both hands - problem solved.
Very interesting
very helpful tutorial ,inspired to try all ,
I own enough rulers already ..... been using mine for 20 plus years and with attention to detail have not encountered problems. 😊
Is it necessary to use different rulers, or canone type do the trick?