Creating patchwork can be so much fun. But what can quickly turn fun into frustration? Inaccurate measurements and improper cutting tools. Accurate cutting is not only a foundational skill that makes life as a quilter less stressful and more pleasant, but it’s also the key to a smooth piecing experience.
The goal of most quilters is to enjoy the adventure of creating something new. In order for that experience to be peaceful, the “pieces” must be accurate. The basics come into play very quickly. Our measuring techniques and skills are crucial for the best outcomes. So, whether you’re new to quilting, returning to quilting, or even a seasoned quilter, let’s step back and take a look at the foundational skills for success.
Measuring Up
Rulers and tape measures were introduced to us as kids in elementary school, and we practiced measuring everything our parents would allow. Those numbers were accurate to a point, and “close” counts when you’re nine years old. We all quickly realized that winning the broad jump or being taller than a sibling was fun, so every fraction of an inch counted.
Quilting is no different. When patterns are written, math is the language for success. So, we need to see the challenge of measuring and cutting with the same faithfulness.

The tools used for the measuring and cutting process include the cutting mat, rotary cutter, and a wide range of acrylic rulers on the market.
First, many quilters take note of the grid provided on the cutting mats, then automatically gravitate to those numbers and the grid for cutting. I use those for cutting backing fabrics and curtain panels, but these are items that don’t require much precision. Try to avoid using those markings if you can.
Second, your rotary cutter needs to comfortable in your hand. Whether you select a curved handle, straight handle, a push-button blade release, or a slide-lock blade release, try out a variety of rotary cutters. Your local quilt shop or quilt friends can assist you in finding one that is right for your abilities. In order to cut patchwork for any length of time, it really does come down to fit and comfort.
Third, we have the wonderful world of rulers. Here are the things to consider when selecting rulers:
- The color of the markings
The color of the markings can either enhance the visual reading or distract from it. Color can have a different effect for each individual. I have rulers with black, yellow, and orange markings. Find a style that is easy for your eyes to tolerate.
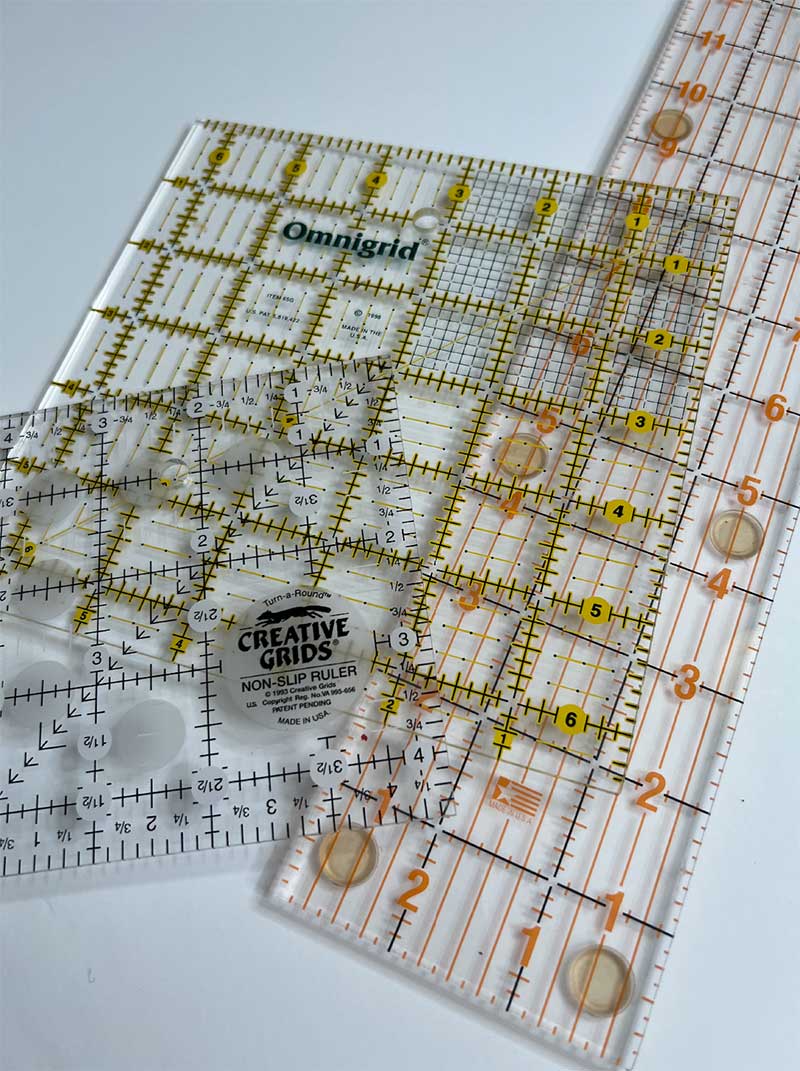
- Clear or frosted acrylic
If you have issues with glare or reflected lighting, choosing a ruler with a frosted or matte surface may help reduce glare and improve visibility when measuring.
- Non-slip style or smooth surface
To prevent rulers from slipping during the measuring and cutting process, some rulers are designed with a non-slip feature. This is helpful if you have encountered your ruler shifting during the cutting step.
- Size/shape of the tool
In general, a 6-1/2” square, a 12-1/2” square, and an 8-1/2” x 24-1/2” rectangle are the most common types of rulers purchased. These cover the wide range of shapes that most of us quilters cut for our patchwork creations.
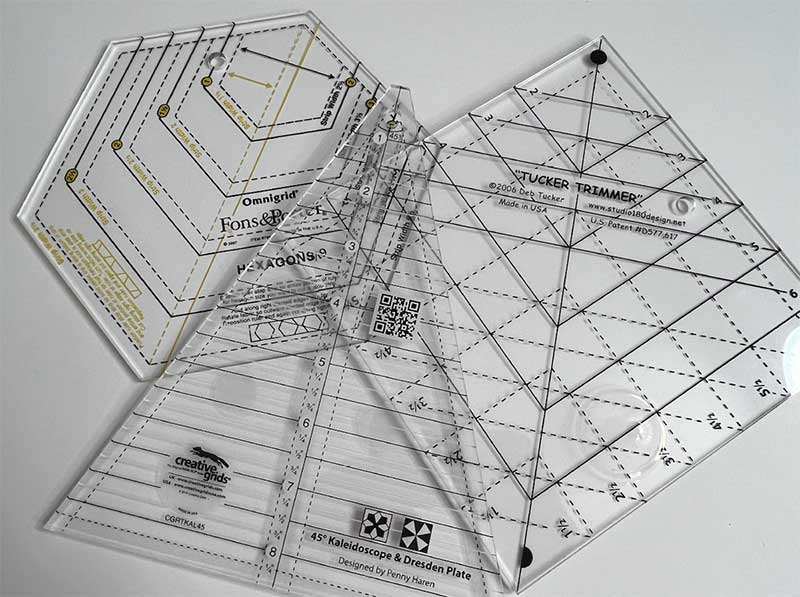
- Single-use or multi-use (specialty rulers)
Additional ruler styles for trimming, making specific blocks, and cutting patchwork units are available. These become investments and can be very helpful in creating units that are complex or more difficult to piece. While they are pricier, these rulers provide a service that avoids the need for confusing math that can quickly become messy.
It’s important to consider how many times you’ll be able to use these specialty rulers in your patterns to determine if they are a good investment for your personal quilting style.
Squaring Your Fabric
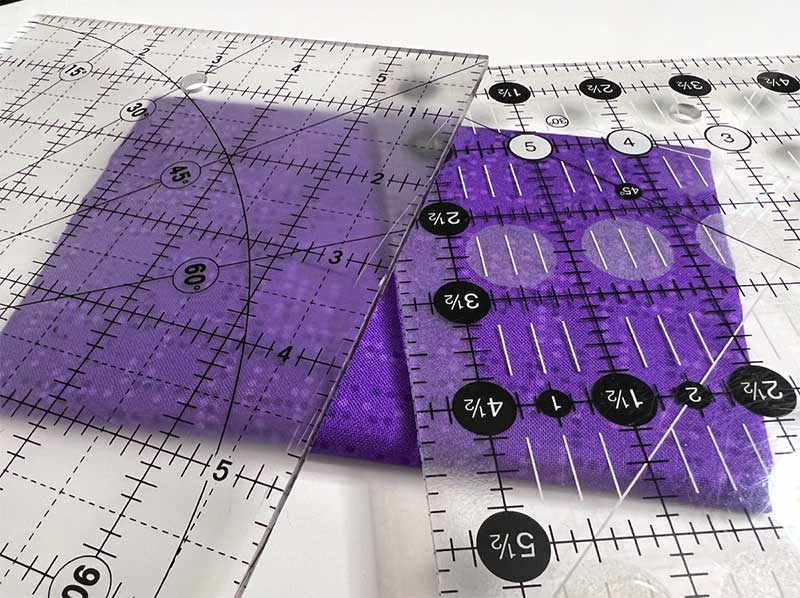
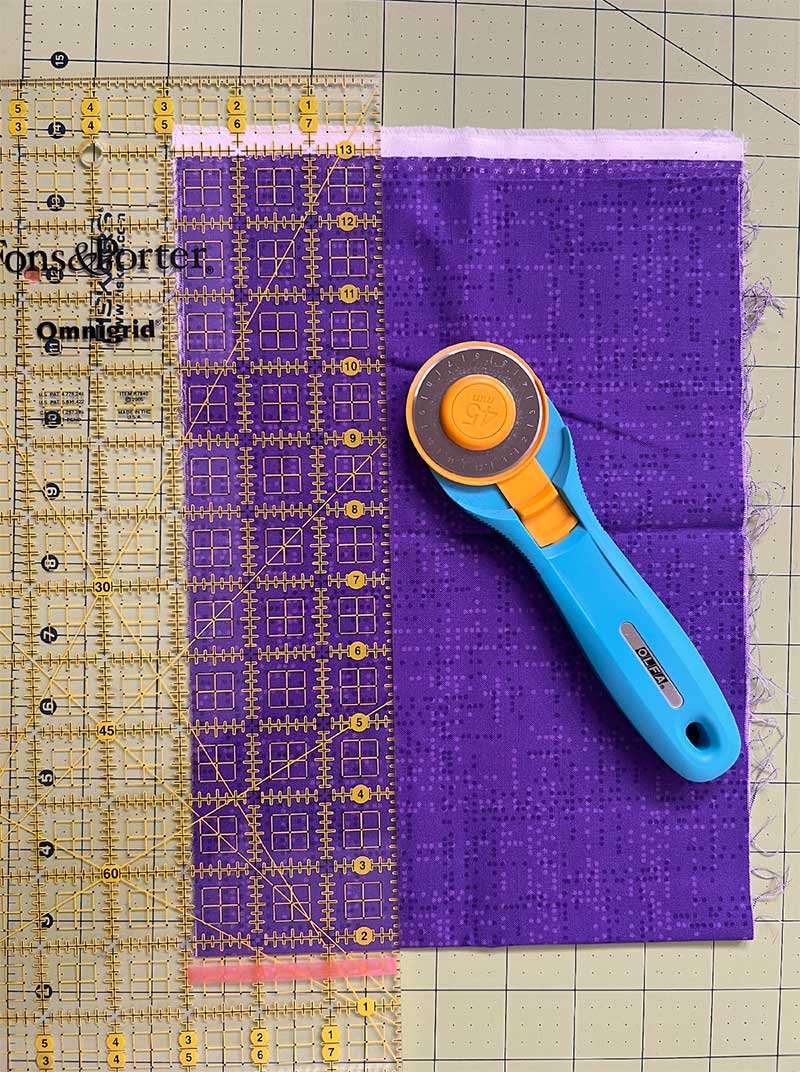
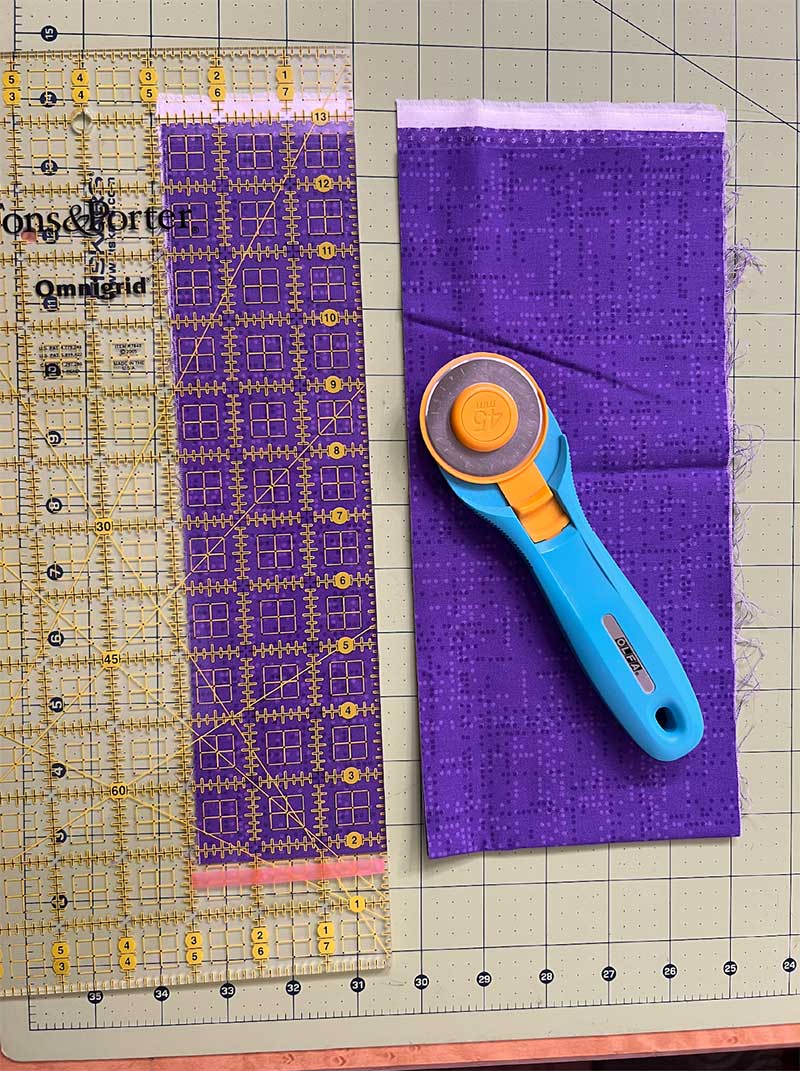
Whatever the ruler, whatever the dimension you’re are cutting, it all boils down to concentration. When placing the ruler on your fabric, always make sure to square the fabric end. I usually “over-cut” the first strip in the series. By making that first strip wider, but squared with the fold, I can then go back and cut the strip to the exact desired width.
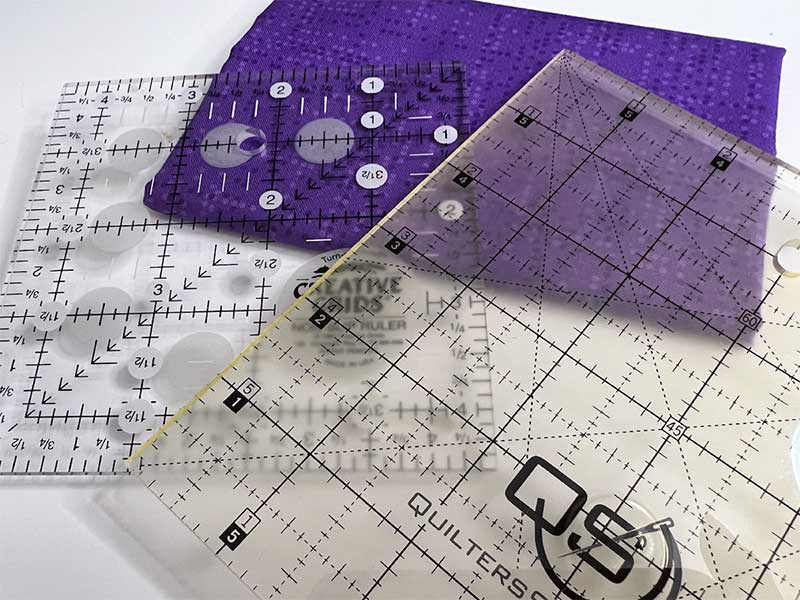
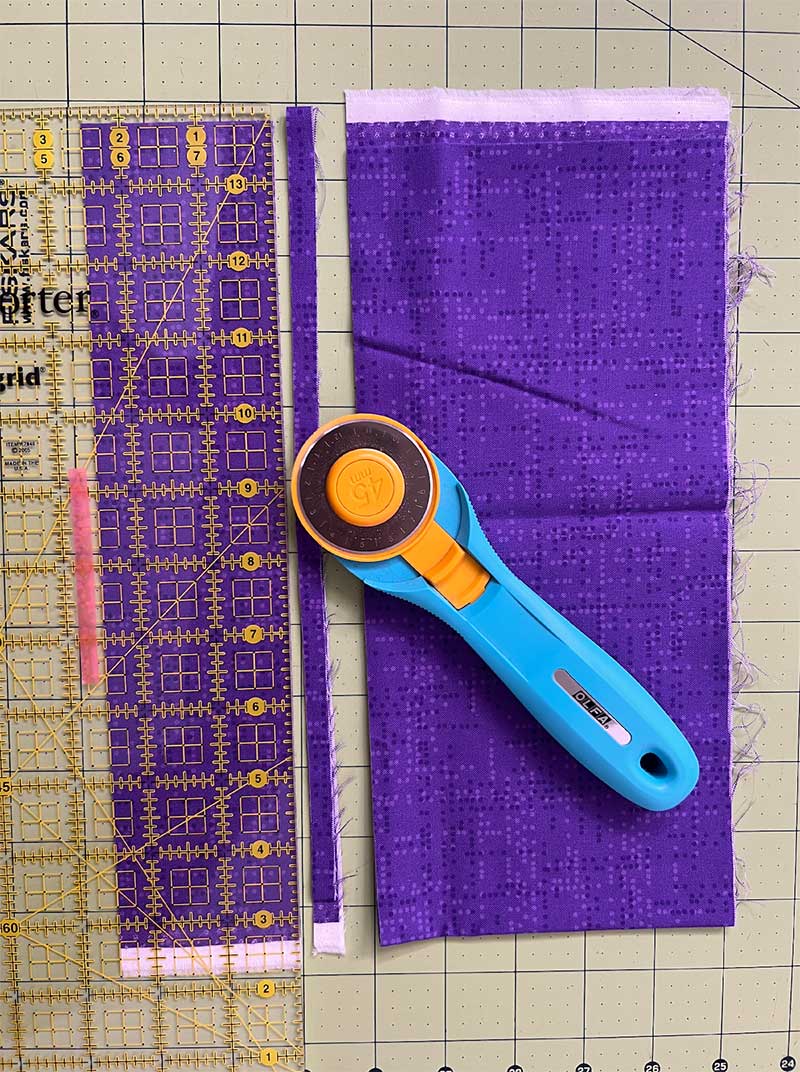
Note that in photo 3, the strip is re-positioned (selvage down). Always make sure the cut edge is directly under the desired marking of the ruler. Then, if sub-cutting is to occur, I can proceed down the strip cutting units that are needed (photo 4 and 5).
- Align lower fold with ruler
- Overcoat strip width
- Cut width to exact size
- Over-cut first unit from strip
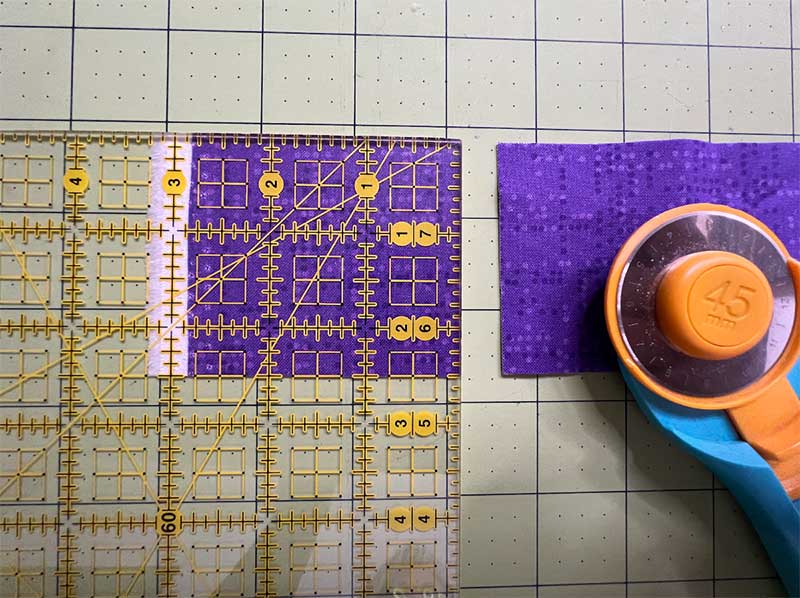
- Exact cut first unit

Finding your “measuring mojo” will make you a happy quilter, even if cutting isn’t your favorite part of the process. Now, let’s go make some patchwork!

Thanks for the great tips on accurate cutting and measurement! I really appreciate the reminders about proper tool selection and using the ruler measurements instead of the gridlines on the cutting mat. <a href="https://sewingbecomeasy.com/">Squaring the fabric</a> first before cutting strips is an especially helpful tip.
So about the markings on the ruler: cut right on the line or should the fabric cover the line when you cut?
I'm more "video" oriented. I don't understand all the written instructions, either. Maybe if I took a lot more time with each step then it might seem clearer. I do appreciate pictures.
Am I the only one who doesn't quite follow these instructions?