
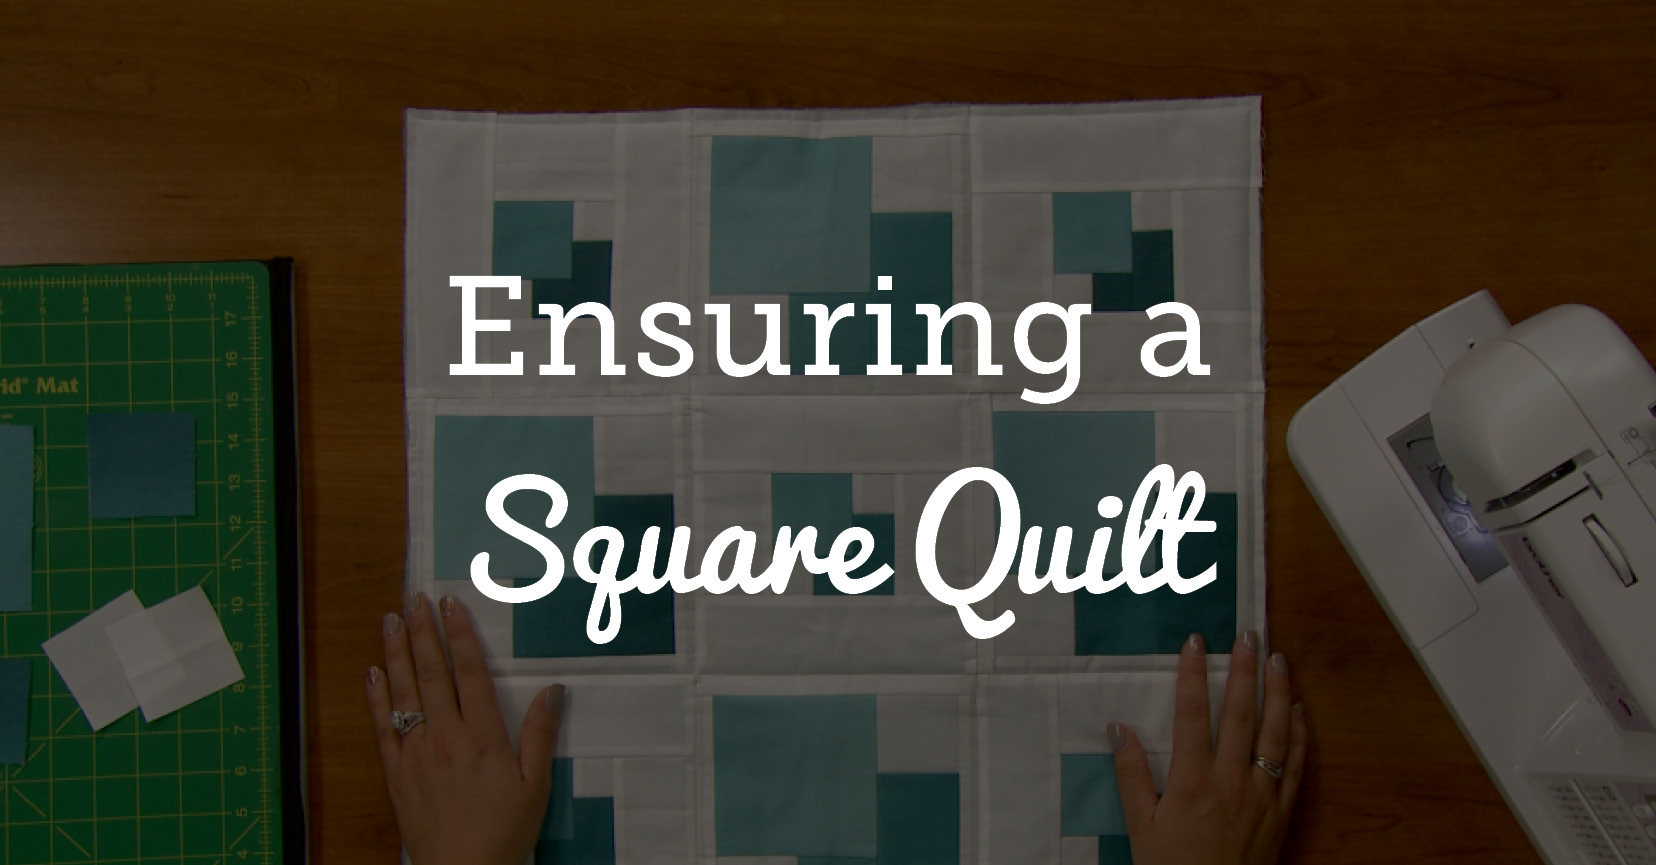
Do you want your quilt to be square? Having a square quilt doesn’t always mean that your quilt is literally square in shape (unless of course you want it to be), but rather that your quilt will lie perfectly flat with no puckers, tucks, or unwanted pleating after it has been quilted. So how do you achieve this? Here are some helpful hints.

First, be very careful when cutting your fabric. Precision is key! Do not use your cutting mat for measuring – it should be used as merely a surface for using the rotary cutter. You will want to invest in a quality quilting ruler such as an Omnigrid or similar.

Then once you have cut your fabric, you’ll want to ensure precision in your piecing too. If possible, use the same sewing machine for the entire quilt as every machine has their own ¼ inch allowance. This may sound strange, but when machines are assembled they can be off ever so slightly. If sewing on multiple machines you can end up with varying block sizes depending on the number of pieces in each block. Every time a seam is made, it can increase or decrease the size of the block depending on where the needle is coming down.

The next thing you will want to do is square up your blocks once they are all pieced. You will want to be sure not to cut off any star points or flying geese points, and always leave a quarter-inch from any points so each point will be properly displayed in the finished quilt. And of course ensure that your blocks are the same size using your quilting ruler.

A common mistake that many quilters make is neglecting to measure sashing and borders. Too often, quilters will take a strip of fabric and begin sewing it onto their quilt or block and then cut it when they reach the edge. Unfortunately this is not a reliable way to build your quilt. Fabric will always have some stretch to it and when applying borders or sashing you can end up with what we refer to as “wavy quilts.”
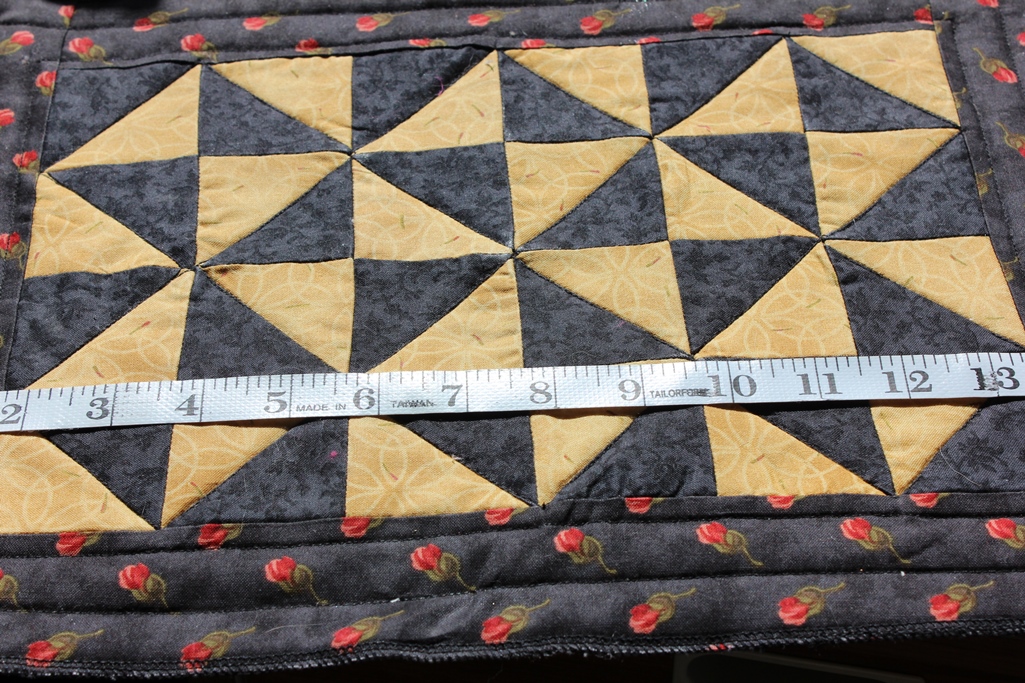
The proper way to size the sashing or borders is to measure through the center of the quilt lengthwise and then again between that measurement and the edge of quilt on both sides. (Do this for the width as well.)
You can also lie your strip through the center of your quilt and cut it there. Once you have it cut, you will want to pin the center of the strip to the center of the side, pin the ends to the ends, and insert extra pins as needed. As you sew, be careful not to pull or tug on the fabric.
What are your best tips for ensuring square quilts?
Get in touch! Leave a comment or email editor@nationalquilterscircle.com.
Thank you for the tips. I’m going to use it for my next quilt.
It was a good reminder the ways you recommended to square up the quilt. I wanted to know how by measuring the sashing length and with to be right for the sashing?
Hello Pat,
Thank you for contacting us, you will have access to our expert’s knowledge. With your membership you will also receive discounts on products and hundreds of hours of Premium content.
If you are interested in renewing your membership, please log into your account and click on the offer below:
https://www.nationalquilterscircle.com/?add-to-cart-multi=1&products=1161&skipcart=1&coupon=asr12
Thanks!
How to you make sure not to cut off points of geese/star points? If you cut fabric as directed, see you 1/4 inch seam, where does this 1/4 inch extra for points come from? I don’t get it.
Thank you.
Hello Linda,
Thank you for contacting us. We have sent the response from the expert to your email: lmsmithson@hotmail.com.
Sincerely,
Sarah
National Quilters Circle Video Membership
Thank you!
Very much help for my life to get better with you doing it now lol Aline
My problem is with the sandwich. I do quilts for charity and we get all types of fabrics that we use. I get the top and back squared, but they do not seam to work together. It seams one corner is wonky. Not sure why.
I am always interested in hints or tricks to be a quilter accurately. Anxious to hear any that you quilters have to offer.
Four things for a square quilt. 1. Measure, measure and measure again before you cut. 2. I always make an oversize block and cut it to the rightsize. 3. Sew with a walking foot. 4. Square your quilt every time you add another border. The final border most of the time comes out square i.e. the diagonal measurements are equal.
I was expecting information on how to square up a quilt before binding.
I mark a true quarter inch allowance on my machine with tape (measured from the needle with a ruler).
Secondly, for blocks that have sub-blocks, I square each sub-block. For the first example, making a log cabin, I square after each two logs.
I’ve been noticing a lot of you and myself included have problems with getting wonky cuts on your strips, circles and such. I’m NOT an agent or salesperson for this product but I’ve seen people use it and I’m getting one in a couple months once I finish healing from my recent leg surgery, cuz I can’t do the stairs yet in my house and my craftroom is two flights of stairs down. Anyway the product is from Accuquilt and is called a fabric cutter. Some can cut through 6 layers of fabric and there’s one that will go through 10. So those of you who need some help with getting straight lines and circles that are all the same you might want to try this out. I can’t wait to get mine!! Their website address is http://www.accuquilt.com .
I saw things about how to help have a square quilt but not how to square a quilt which is what I need the most help with.
Hello Kathryn,
Thank you for contacting us. I hope this is what you are looking for: https://www.nationalquilterscircle.com/?s=how+to+square+a+quilt
If you have any other concerns, please contact us at 1-855-706-3538, or chat with us on our site.
We greatly appreciate your business!
Sincerely,
Joan
National Quilters Circle Video Membership
Thanks, great information
Thank you
Thanks for the advice about the cutting mat and the 1/4″ foot I thought something was wrong when one Janome wouldn’t the otherJanome
My tips for avoiding wavy borders are to cut border strips from the length of fabric (parallel to the selvedge) and to use a walking or even-feed foot to attach long borders. There is very little give in the length of fabric, so you are less likely to stretch the borders.
I have just discovered this very friendly site and hope I’ll be able to join in regularly. As far as square blocks or quilts are concerned, I have learned what I think is an excellent method – hope I can describe it properly!! To check out whether your machine is “producing” accurate 1/4″ seams, try this. Cut 3 completely accurate strips of fabric at 1/12″wide – on the lengthwise grain of some cotton fabric – perhaps 4/5″ long. set your machine to what you THINK is a 1/4″ seam and put 2 of the strips of fabric together and make a 1/4″ seam. Take it out of your machine and very gently PRESS (lift iron up and down on the seam) it to one side – never “iron” your fabric as this can stretch it out of shape. Now join the third length os fabric to the first two, using the same method.Then measure ACROSS the width of the finished 3 strips. If your seams are an accurate 1/4″ then your finished width should be 4″ wide. If it is more or less than this then your seam allowance is wrong!! Take 3 new pieces of fabric and try adjusting seam allowance fractionally up or down – sometimes we are talking about virtually a hairs-breadth – and measure it again!! You should be using what is called a “scant” 1/4″ seam allowance to allow of the “width” of your thread itself plus what you lose when you fold it to one side – have a look and see what happens then. If you do this, then your block should be the size it was meant to be. If you swap machines – eg using a different machine at a group – then you really need to do this again to make sure both machines are giving you the same seam allowance. I know it seems like a lot of work but, once you’ve done it a few times, it honestly is easy. As regards to starching, I use a spray starch lightly before I cut my pieces out and I have never had a problem with my machine. If I am making a really special quilt then I will sometimes be extravagant and use Mary Ellen’s Best press – a bit more expensive but very gentle and effective at the same time. Hope I’ve explained this in an understandable way.
I measure and sew with a scant 1/4 inch seam but the blocks always seem to come out wonky because of the way the fabric is cut. Sometimes I think starching it to keep it really crisp might help but what does that do to your sewing machine? I tried to square up the blocks on my latest project (curved pieces) but if I trim a little here then I’ll be short there. They measure 8 1/2 inches in one place and a little more than 8 1/4 in another so can’t be trimmed square. Argh!!! Its so frustrating!
Susan check out my response to Anna Resto, it might help you too.
This has helped to read and learn what I was doing wrong all these years. Can’t wait to to what happens on my next project.
I use an O’Lipfa quilting ruler which I love, but I must not hold my rotary cutter the same all the way through cutting a strip because my stips sometimes come out wonky. I have tried slowing down as I cut and that seems to help. Any other suggestions will be greatly appreciated.
Hi Ann,
Here is a great tutorial with several tips on holding and using a ruler that should help you:
https://www.nationalquilterscircle.com/video/how-to-use-quilting-rulers-properly-012118/
Cheers,
Ashley
National Quilters Circle Video Membership
We’d love to have you be a part of our community. We are convinced you will enjoy the benefits of becoming a member and having access to the best instructional how to videos and professional tips. We would like to offer you a special promotion for your first-year membership.
https://go.nationalquilterscircle.com/C14628
I find that pressing is a huge problem in quilting. Each step needs careful up and down motion. If not..it changes the shape just enough to change the measurements.
Anna Resto, have you tried using a machine by Accuquilt? It comes in different sizes and has so many different dies to cut fabric with it could save you getting wonky cuts and them always being the same size and depending on which machine you got it could cut them 6 at a time or even 10. It might help. I’m looking at getting one, because I have a similar problem with arthritis and shaking hands. When my hands are tired it gets worse and my hands cramp so cutting lots of blocks and strips can really put too much stress on my hands. The prices aren’t bad and they have a lot of sales and free shipping with special codes. Check them out.
I love my Accuquilt set up, I’ve got over 40 dies and you just get perfect pieces every time. It’s great for someone whose got arthritic hands!
I purchased the acuquilt big, because I had difficulty cutting long strips (vision trouble). Excellent investment.
A trick for making sure your cut line is always straight… put a 5 lb hand weight onto the far end of your ruler. It keeps the ruler solidly on the fabric as you rotary cut up the ruler.
Trying to learn how to cut fabric and set it together. I hope this helps
I carefully cut and then keep a close watch on the 1/4 seam and still find my blocks come out small. I find it frustrating and would welcome suggestions to get perfectly sized blocks regularly. This article helps to explain why our quilting group gets different sized blocks when members create them at home.
Gail Burk, have you tried using a scant quarter inch seam? I was having this problem and my sewing instructor showed me how to adjust my needle so I use a scant quarter inch for most of my quilts. This seems to work for me. I have a foot with a quarter inch guide but my seams still come out to big unless I use the scant quarter inch.
Both of these comments are interesting as I have a Janome and a Husqvana machine and have found the latter machine has a much smaller 1/4 inch. So I always stick to one or the other machine when piecing. I still have problems with blocks being different sizes even though I square up each time.
Apparently this is a thing with Janomes. I played with mine, and have written myself a note on what my setting should be, now it’s the proper measurement each time.
Measure the actual seam. It may be ever so slightly off. I have to use a “scant” 1/4″ for my seams. I use the foot as a guide & sew just inside the outer edge. …and when cutting, I tend to cut a smidge larger than needed. Usually I come out with the correct size block. So cut a hair bigger & sew a hair smaller.
You might also want to look at how you are pressing seams – while you don’t want to stretch the pieces after sewing, you do want to ensure there isn’t a “lip” of fabric on the front after you’ve pressed each seam.
If you can adjust your needle position, move it one tick to the right. that is a 4.0 on mine instead of the default 3.5. Also when cutting your fabric make sure your measuring line on the ruler is on the fabric not along the outside edge. These help me.
I love to stretch my quilt layers individually on a hardwood or tile floor, taping each layer to the floor, as I smooth and gently/slightly “stretch” (the operative word is gently/slightly)each layer, to ensure the seams have no folds. Then, I pin the corners of the blocks, using quilting safety pins in an X…two pins per location, crossed. When completely pinned, the quilt lays smooth, and can be transferred to my frames…I quilt by hand..and stays nice and flat through the quilting process.
Thanks
Thanks for the tips. I struggle with making exact square quilt. I’ll certainly try this in my next project.