There are many ways to finish or “frame” a quilt. As quilters, we find ourselves altering patterns and trying to determine the answers to several questions when adding borders:
Do we use a border? How many?
What size is appropriate?
Will borders be added to all four sides or just three?
Is it possible to make the quilt larger but maintain proportional borders?
So many questions. The dilemma slows our finishing as we mull over the options.
If your goal is simply to make the quilt larger, the easy answer is to make additional patchwork blocks. However, by doing this, you are restricted to increasing your quilt top to the size of the blocks, which means adding width and/or length. Many antique quilts don’t have borders. Quilters simply made blocks so the top was appropriately sized and ended with binding.
But what are the answers when it comes to borders? Quilting doesn’t have strict rules—the choices are as endless as stars in the sky. However, there are a few different methods we can use to assist in the process. Here are some common techniques many quilters embrace.
The Golden Ratio
The golden ratio occurs in nature and is widely considered to be the “perfect proportion.” Objects that adhere to the golden ratio appear balanced and pleasing to our senses.
The ratio, in its simplest form, is 1.6 to 1. This is applied so that each border should be 1.6 times larger than the previous one.
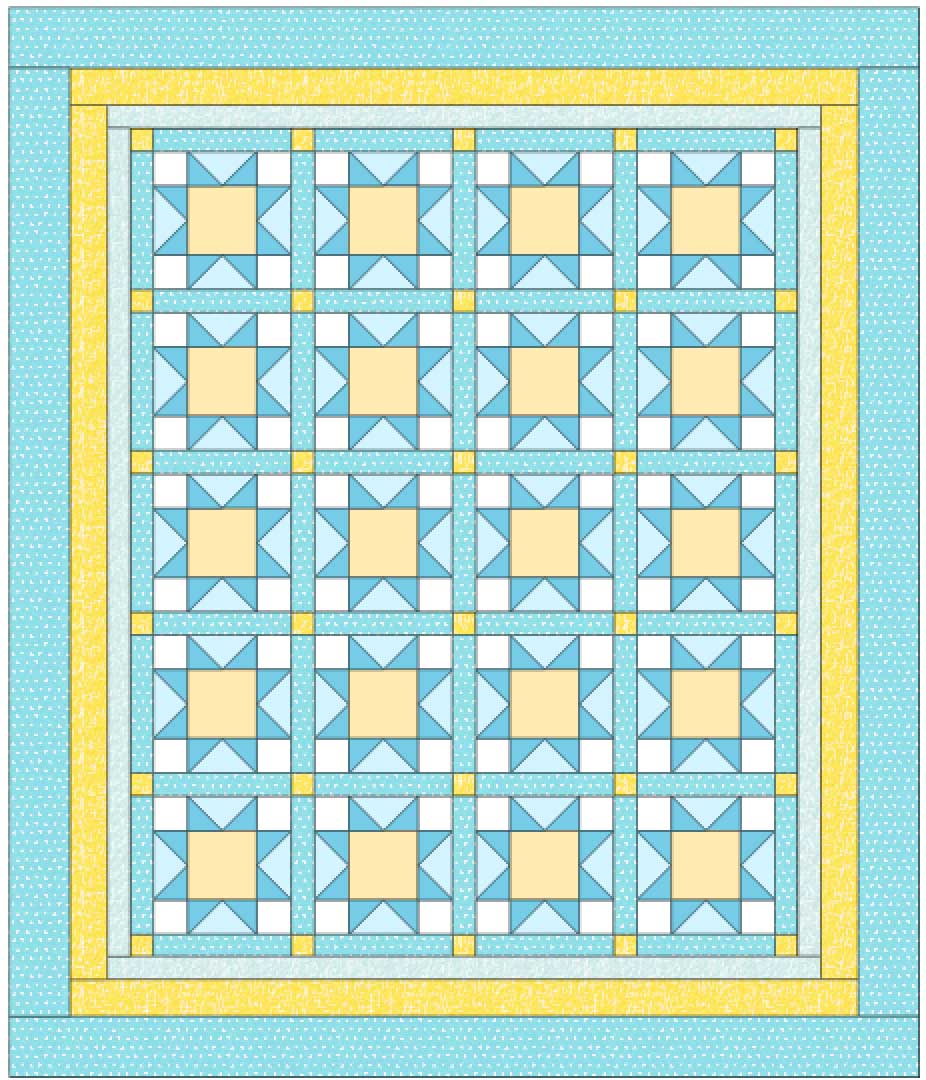
One border is 2”, and the next is 3.25" (rounding to the nearest 1⁄4” makes cutting nicer). These are finished widths. Always remember to add seam allowances before cutting.
2” first border
2” x 1.6 = 3.2" or 3.25” second border
3.25” x 1.6 = 5.2" or 5.25” third border
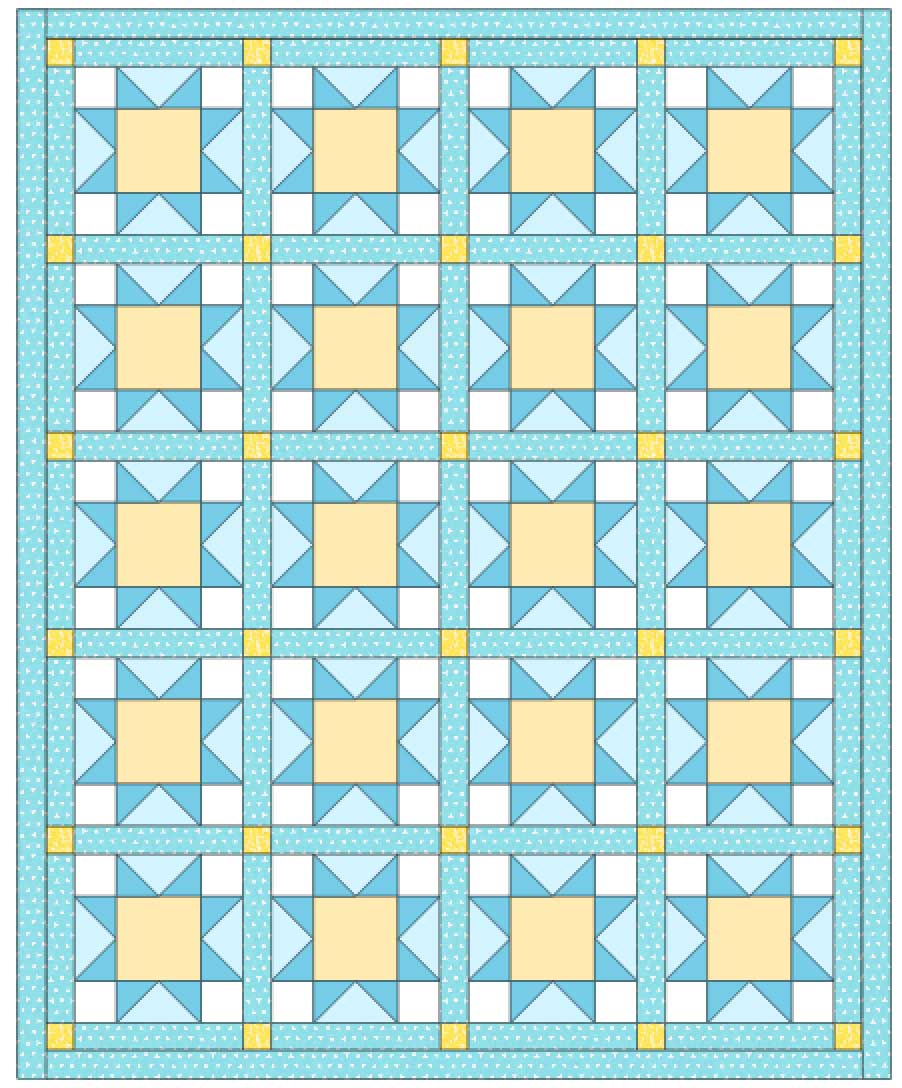
The quilt shown here demonstrates the golden ratio. (Note: the blocks are 10” and the quilt finishes 77” x 88”.)
Proportioned to Patchwork
This method uses a fraction of the patchwork size used in the body of the quilt. Using 1⁄4 to 1⁄3 or 1⁄2 to 2⁄3 of the block size can be used to determine border width. Yes, there are different opinions regarding the widths and proportions.
An example is a quilt using 12” blocks—the border can be either 3”, 4”, 6”, or 9”. The size you select is a personal choice and can be determined by the type and scale of the print you may want to use. In the following examples, you can see the proportions and how they fit the patchwork top properly.
Doll Quilt (16” x 16”)
4” blocks
1⁄2” sashing and inner borders
1” borders
Small quilts need small borders.
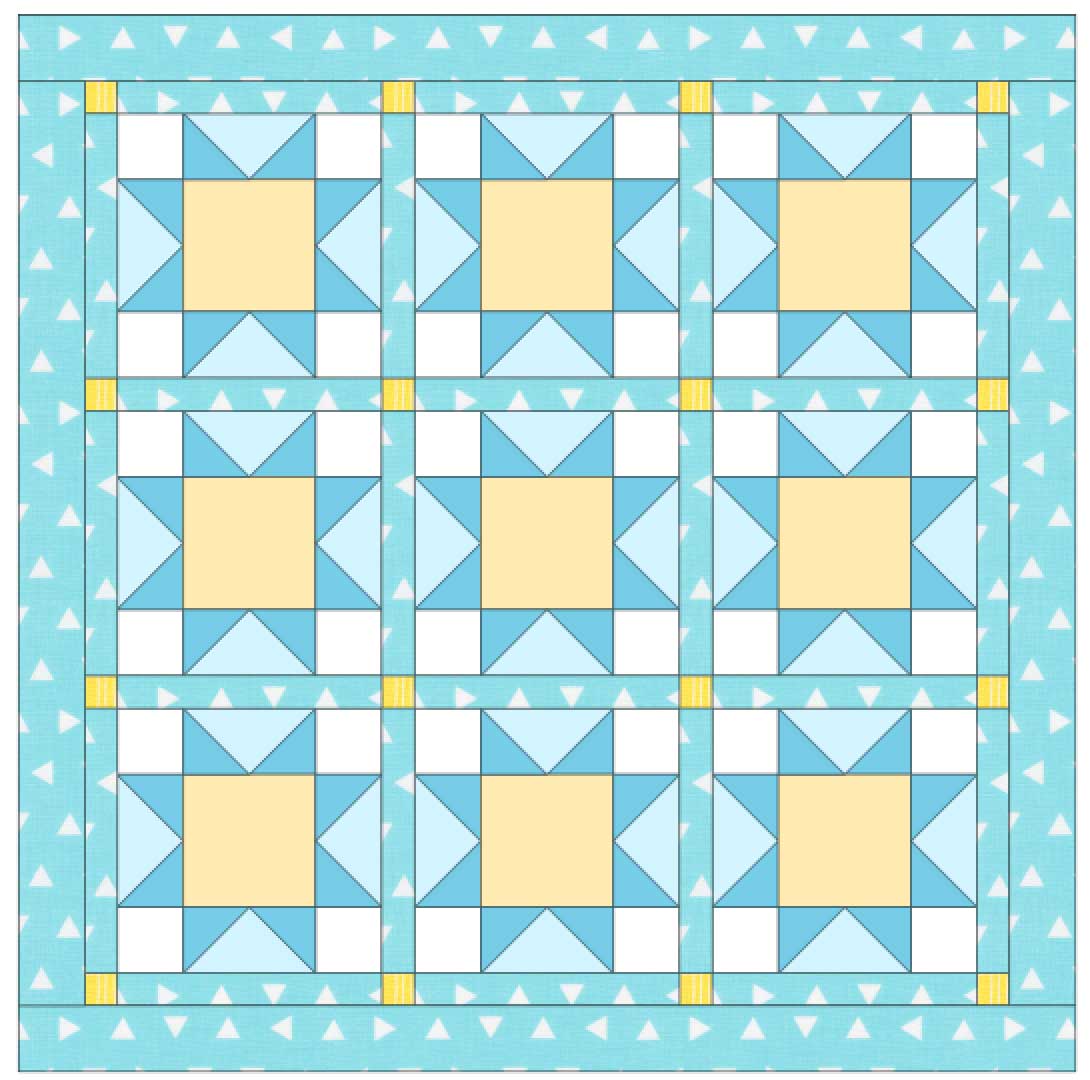
Throw quilt (56” x 70”)
12” blocks
2” sashing
2” inner border—matches sashing size
4” outer border—1⁄3 of block size
Well proportioned. The combination of borders and the width of the border strips pleasantly surrounds the patchwork center, leaving the viewer intrigued by the quilt blocks that are the focal point.
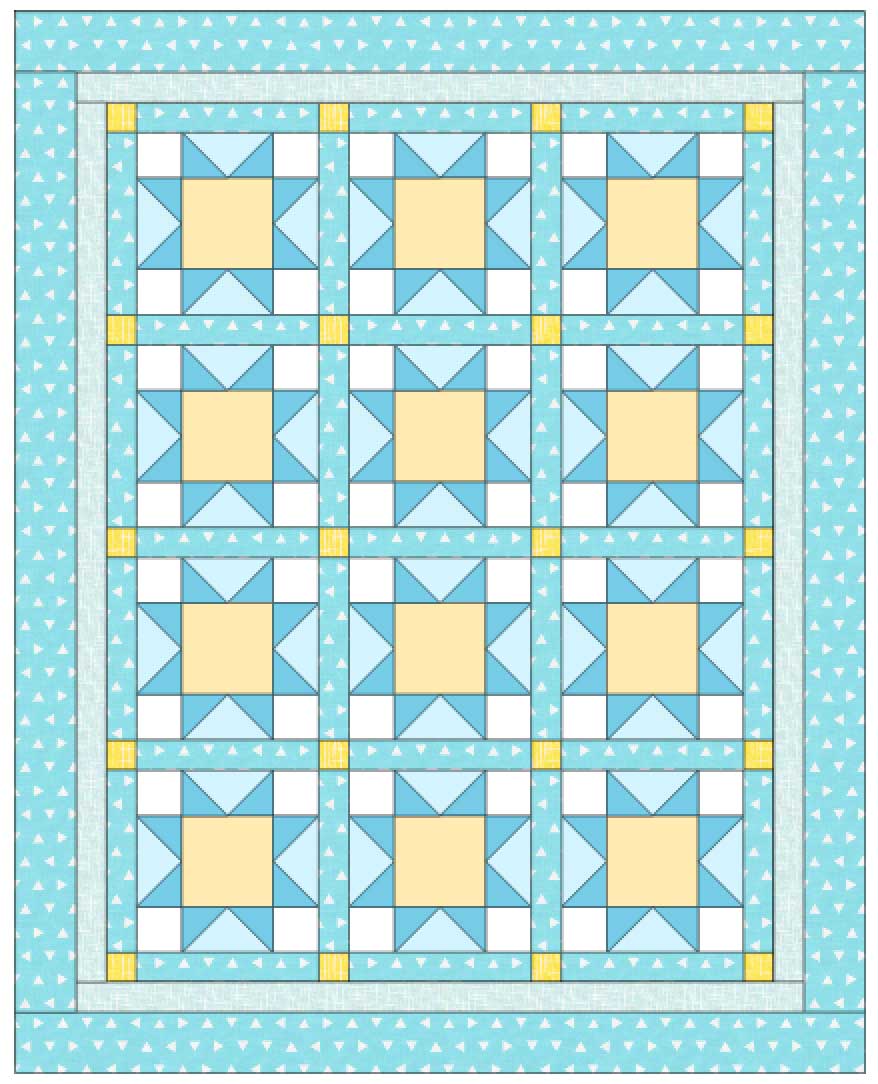
Throw quilt (62” x 76”)
12” blocks
2” sashing
9” outer border
Not proportioned. The border overwhelms the patchwork center and distracts the viewer looking from the border to the patchwork and back to the border. In this case, making more blocks might be a better choice rather than excessively wide borders.
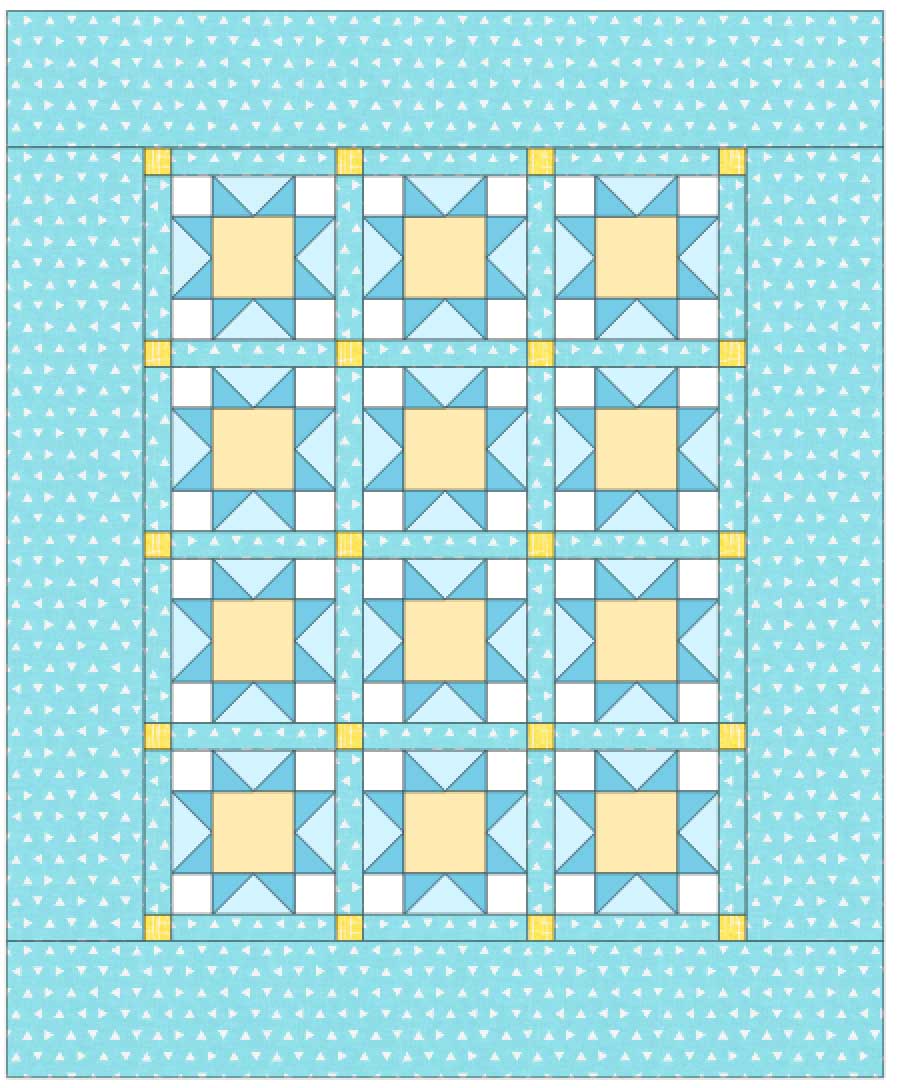
Throw quilt (62” x 76”)
12” blocks
2” sashing
2” outer border
This small border appears lost and doesn’t seem to frame the patchwork.
Borders Proportioned to Quilt Size
This method references the finished size of the quilt for determining border width. This method can be combined with both A and B above. It was considered when creating the sample quilts above.
This guideline suggests that a small wall quilt should have a border that totals less than 6”, but that a king-size quilt can total up to 12” to 14”. Borders that become too wide overwhelm the quilt’s center design. All quilts that fall between this range should be proportioned properly in this manner.
Here are some suggestions:
Wall quilt: 3” or less
Crib-size quilt: 3”
Twin-size quilt: 4”
Full-size quilt: 5”
Queen-size quilt: 6”
King-size quilt: 6” to 7”
No Borders
This is the simple finish of a quilt with just binding. The binding can match the background fabric or contrast with the quilt center. This is a very traditional finish for a quilt. Borders were not commonly used before the 20th century. Since early quilts were created out of necessity, large amounts of fabric in a given color or pattern were not as available as they are today. Many have returned to this way of thinking and considered them part of the modern quilt movement, but it could be that it is just a step toward another style of quilt—the borderless, artistic influence.
Borders Cut from a Large Print Fabric
In this case, the width is pre-determined by the print of the fabric. There are times when a printed border-style fabric is selected. In this case, determining how and where to cut borders is purely a subjective call on the part of the quilter. Keep the golden ratio in mind as well as proportions from the patchwork top in order to create a pleasing balance when the quilt is completed.
Pieced Borders
The width of these borders is determined by the block or piecing that will be used. Oftentimes, this can be altered in proportion to the border width desired. Pieced borders can beautifully frame the center patchwork, but they can also pose a challenge in creating a perfectly fitting border. This type of border is used when creating medallion-style quilts.
Whether you are designing, altering, or just learning to quilt, borders are a topic you will undoubtedly encounter. Learning about ratios, proportions, and how to apply some simple math can lead to a picture-perfect finish.
What are your go-to quilt border tips? Share them with us in the comments below!

Is there a printable format?
Thank you. This is the best information about quilt border sizes on the web!
Thank you for the Golden Rule of borders! Excellent!
I am trying to add a 7 in border to a quilt but having trouble any suggestions
Love this article. Thank you for writing it and publishing it.
Thank you for the great information. I especially appreciate the examples of each technique. It is extremely helpful to actually see how it looks as it is applied.
So much valuable information. I especially like the examples so we can actually see how it looks!
I too am a new quilter and frequently ponder border size. The ratio will be a significant help with a current quilt top needing its border. Thank you for the valuable information.
Thank you! Very useful information!
Great information about borders. I am a beginner quilter and the golden ratio is very useful to me.