How many times have you had a friend or your long arm quilter make you a binding for your quilt? Being a long arm quilter myself, I have had the honor of doing this task more times than I’d like to admit. For some reason this last step in your quilt leaves many quilters in a cold sweat. Luckily Dana Jones helps clear the air in this helpful video on making quilt binding.
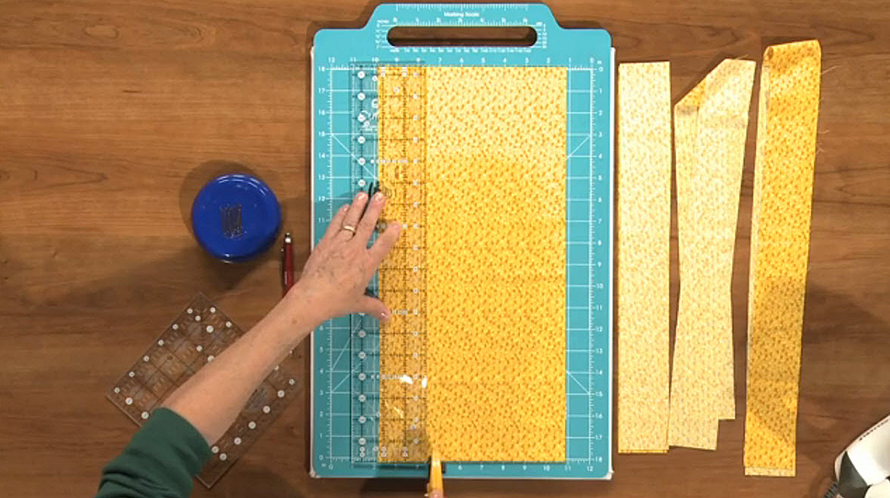
Dana starts the video with clear instruction and demonstrates the cutting of strips for your binding. She suggests a 2¼-inch strip for her quilts, but you will need to find what length works best for you. (I’ve seen them cut anywhere from 2-inch to 2 ½-inch strips.) There is no right or wrong width as long as all the strips are the same width. My suggestion would be to start with a 2¼ or 2½-inch strip when you are first learning bindings and then start to play around with it.
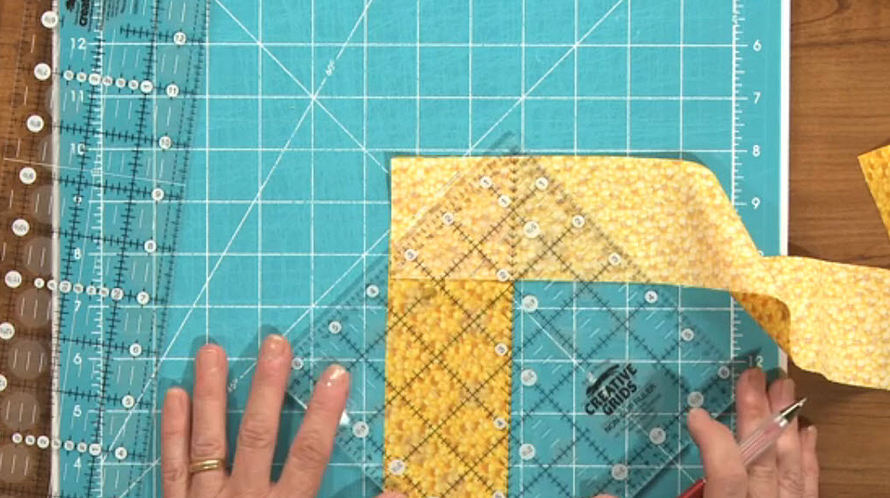
The joining of the strips seems to be a difficult concept for many quilters. We need to remember that when we join the strips we do not want bulk at the joining point. Bulk will make it difficult to turn the binding from the back of a quilt to the front and sew down without the seam being noticed. Dana shows us a joining technique that will avoid any bulk issue.
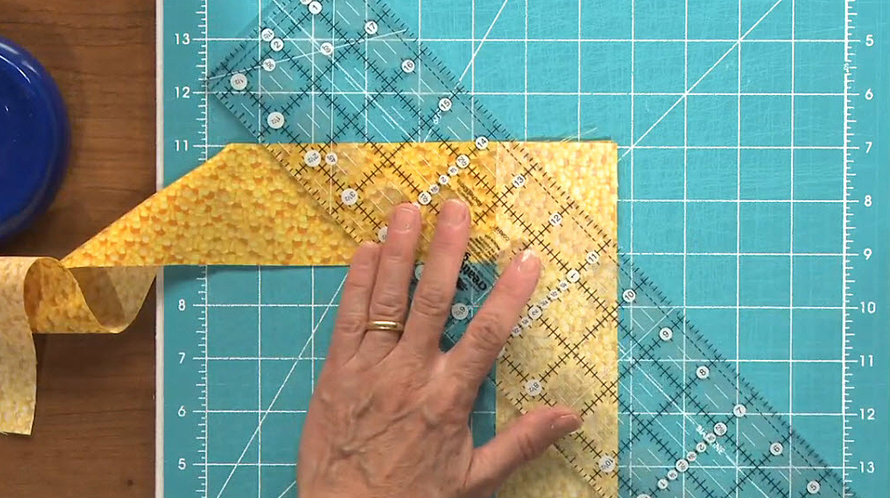
Once we have the joining seam in place we are ready to cut away any excess fabric. Put the ¼ inch mark of your ruler on your seam and cut the excess fabric. You will need to be careful not to cut on the wrong side of your seam or you will cut your strips apart.
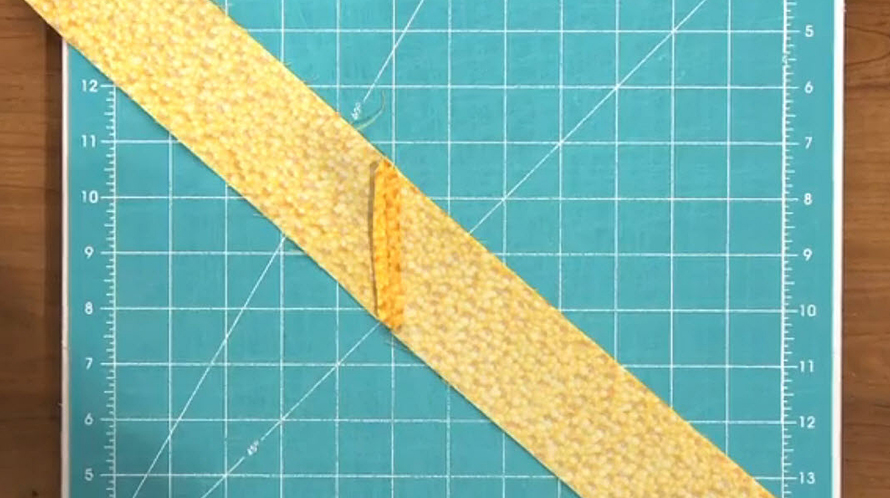
Now that our seams are sewn we need to take them to the pressing table. To further avoid bulk, we will press the seam open.

The final step in the preparation of the binding is to fold it in half lengthwise, make sure the corners match up, and press.
Hopefully with a little instruction and practice, this tricky quilting step will be tricky no more! Make sure to check out the full video for Dana’s demonstration, and let us know in the comments if you have any questions or have tried making quilt binding yourself.
Happy quilting!
Related Video:
How to Make Quilt Binding
Get in touch! Leave a comment or email editor@nationalquilterscircle.com.

I have forgotten how to figure out how much binding I would need for a quilt. I know that there is a easy way to do it. But I have forgotten how to do it.
Great bag, will make this!
I want to make the prettiest and most professional quilts possible; learning every day.
I have no comment at this time
I am new in quilting and need your help.
Is there a faster, easier way to blind stitch the binding to a quilt? It seems that I am constantly looking to make sure I did not go through to the front of the binding. I am making a larger quilt (out of my comfort zone!) and it is taking me days to complete the binding. Suggestions would help since I am fairly new to quilting. Thanks!
Great
I always make my own binding and sew it on completely by machine. I sew my doubled binding to the right side, then pin from the right side and sew in the ditch, still right-side up. (The trick is in the pinning. I like flower-head pins or quilting pins. See below.) I prefer to use 2 1/2inch wide binding as it's slightly easier on my arthritic thumbs - that little bit extra to grasp - so I move my needle to the left and use my standard (ie not quilting) foot. I butt the cut edges to the right edge of the foot. (I have a Bernina 440, which has 11 L-R needle settings, so I move it two spaces. On my old machine, which had fewer settings, I'd have moved it only one.) This is how I pin for the second pass: With the edge facing towards me, the binding folded along the seam, and my non-pinning hand holding the (underneath) edge flat against the folded binding underneath, I stab a pin at right angles through the ditch. I swivel the pin to lay flat to the quilt, at right angles to the ditch and pointing towards me. Just before it lies flat, I catch the folded binding about an 1/8 inch from the edge and push the pin through from underneath. I swivel the pin to face in the opposite direction, ie pointing away from me but still flat and at right angles to the edge, and push the pin through the quilt from underneath, perhaps 1 inch from the ditch. I move my hand up to 2 inches to one side and repeat. When I reach the corner, I like to pin close to it, then turn the quilt at right angles, fold the binding diagonally under and pin close to the corner on the new side as well. (Check the under-fold before you sew it down, while it's still possible to adjust it.) I didn't see this anywhere, but came up with it myself about 4 quilt bindings ago. (I used to sew the second pass from the wrong side. It was secure, but not beautiful.) Does anybody else do it this way?