If you were to take a poll among quilters, you may find strong opinions when it comes to the style of binding they like best. No matter what camp you fall into in the straight of grain binding vs bias binding debate, there are a few things to consider when you reach that final step in the creation of a quilt. Let’s go over both methods.
Straight of Grain Binding
This type of binding uses strips that traditionally are cut off the width of fabric so that there are fibers in the weave that extend the length of the strip. Using this method requires a bit less yardage to be purchased. The strips are approximately 44”–45” in length, selvage to selvage, and then are linked with a diagonal seam to produce the appropriate number of inches needed to surround the quilt’s outer edge.

Straight of grain binding can also be cut in the lengthwise direction of the fabric, parallel to the selvage of the fabric. Doing so creates a binding with a bit less stretch and can be cut in longer strips if more than 11⁄4 yds are used. In some cases, there are times when a border is cut lengthwise and the accompanying binding is also cut from the same fabric selection. This also reduces the number of joining seams that need to be created to make the total number of inches of binding required.
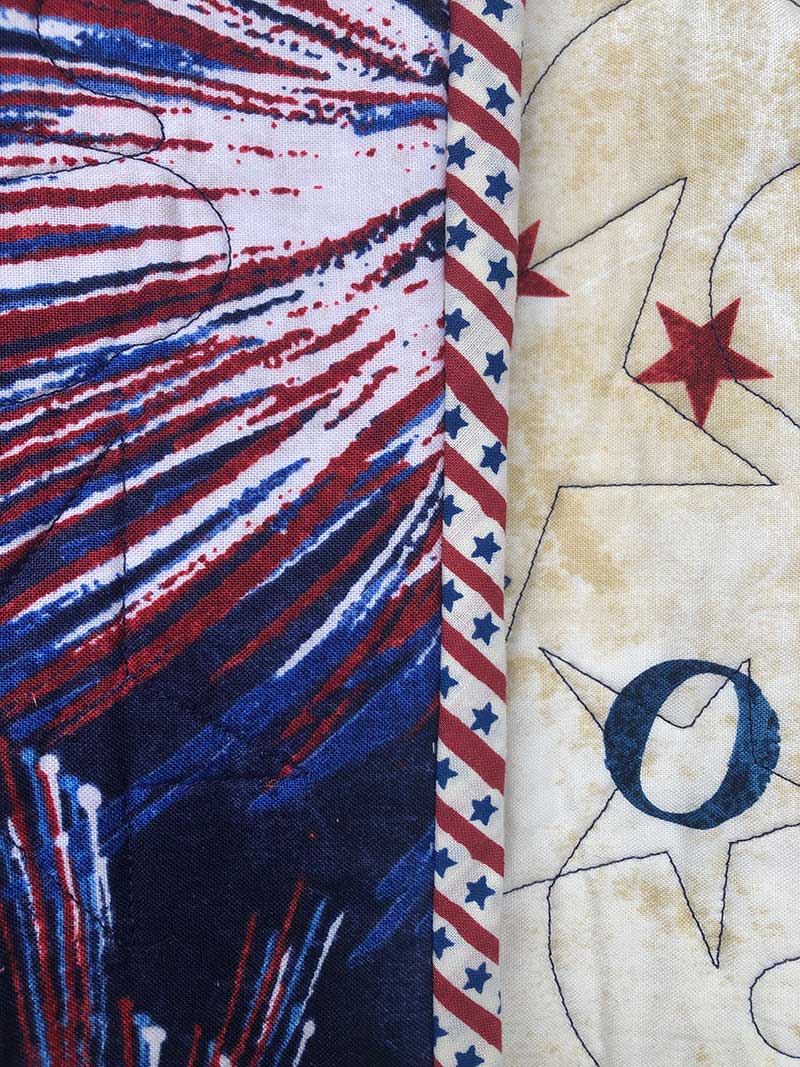
Straight of grain can also be part of a design element when the design of the binding fabric can add interest and texture. Stripe fabrics can assist the quilter in making the decision for straight of grain binding to accent the outer edge of a quilt as shown below.
Both types of straight of grain binding are suitable for finishing a quilt, but only a quilt with straight sides. No curves, scallops, or wavy edges can be bound properly with this type of binding.
Bias Binding
Many quilt traditionalists consider bias binding the best style of binding. They feel that it is the easiest to apply and manipulate when making corners on a quilt. Cutting bias binding can require more yardage and a bit more time to create.
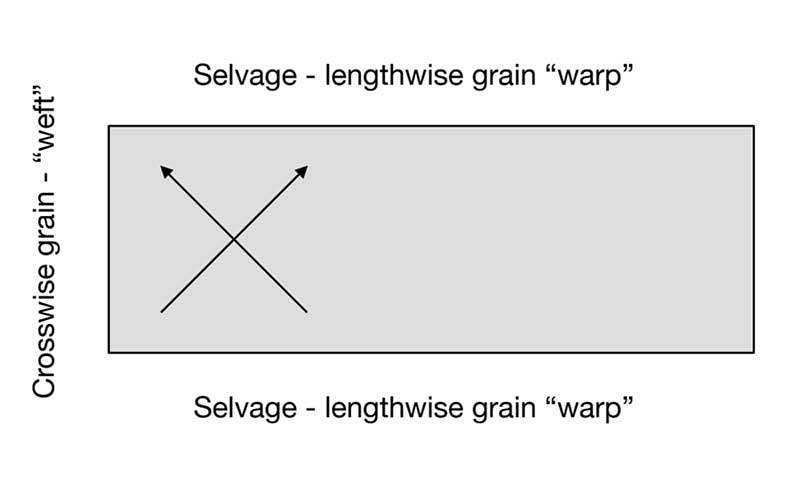
There are a variety of shortcut methods for making bias binding, but that topic is for another day and another discussion. Bias binding is cut on the true bias of the fabric at a 45° angle to the weave of the fibers. This runs in either direction shown by the arrows in the diagram below.
To cut those strips of bias, open the fabric up to one layer and then cut diagonal strips across the fabric. Then, continue cutting diagonal strips until you get the right inches of bias. Long strips are preferred by quilters, which in turn leaves triangle shapes as waste in this method.
There are continuous bias methods, but while they’re efficient, they contain numerous seams. Bias strips are linked to make one continuous bias strip of binding. A bit more caution is needed when handling bias strips, to not distort the lengths.
The bias does contain more stretch than either the weft (slight stretch or give) or the warp (the least stretch of the three). A light amount of stray sizing or spray starch can assist in reducing the distortion if applied to the fabric before cutting.
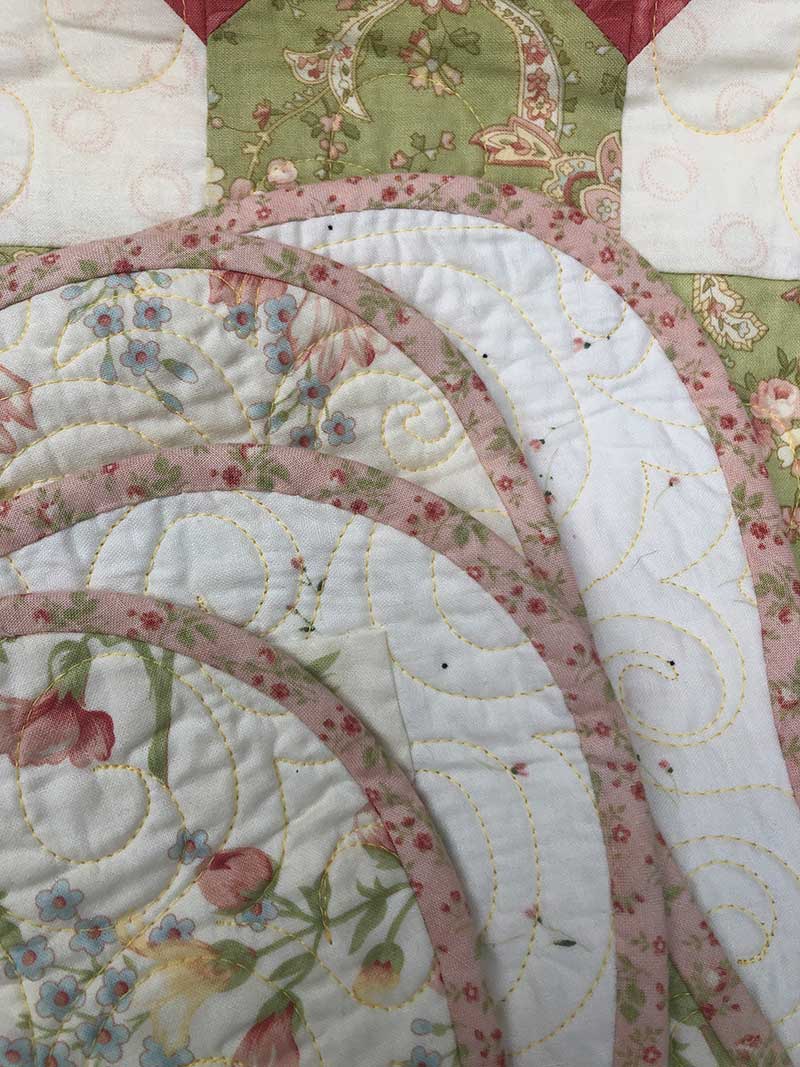
Bias binding is always recommended for any quilt edge that contains a curve, wave, or scallop. The slight give of the diagonal fibers accommodates those edges beautifully and creates a smooth, turned edge.
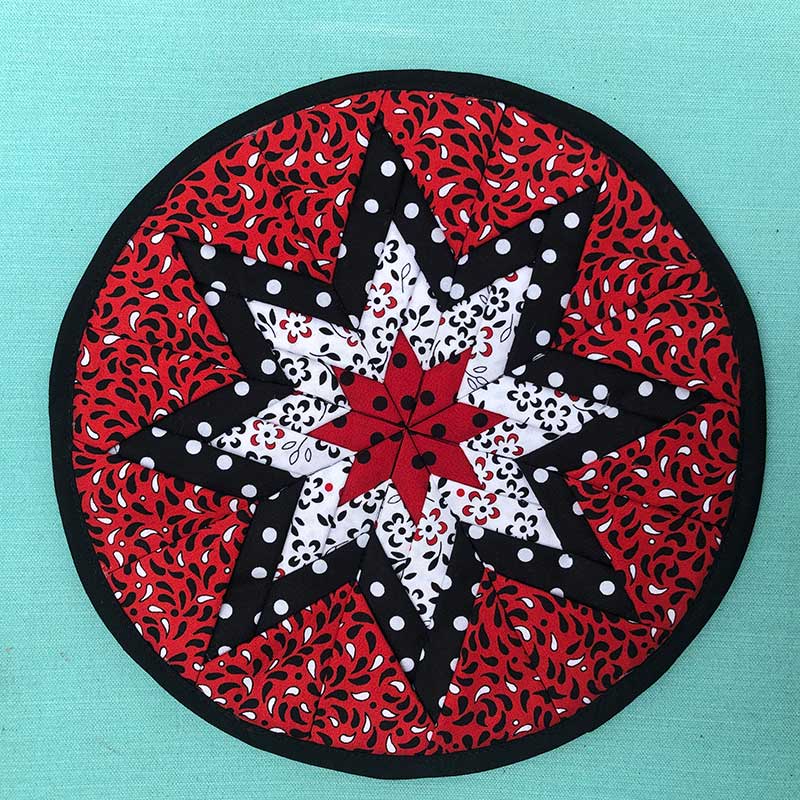
Another time when bias binding may become a priority is when you are using a striped fabric and would like the stripes to appear as a design element in your binding, such as a peppermint-twist diagonal stripe to surround the outer edge of your quilt.
Many quilters would also suggest that the crossed fibers on the outer fold of a binding create a longer lasting edge. The outer fold of the binding traditionally has been praised for its longevity over an extended number of years.
Since many fibers are involved in the outer fold, stress and abrasion aren’t placed on only one or two warp fibers that straight of grain binding carries.
The binding debate will continue as long as quilters have opinions. I like to use straight of grain binding unless there is a curve involved. Otherwise, I’m off to make bias binding. In the end, selecting a binding style you enjoy is a purely personal decision.
Please show the making of the bias tape binding please. Thanks so much.
Wish I knew this information 11 years ago when I made my son's wedding ring quilt. I had a heck of a time making the curves with straight binding. Oh well, lesson learned. It turned out looking good but a bit bunched in the inside corners. They still loved the quilt and the new father-in-law called it an "heirloom quilt". What a compliment. Thanks for all you do in teaching us quilters the tricks of the trade.
When I was a young girl, I spent part of the summer learning how to slipcover furniture. I was in charge of making the covers for the cushion, and they all had a binding edge. The only way I learned was bias binding, because it curved around the cushion well.
Boy! Did this clear up some cobwebs! Thank you!
This is such a good analysis of 'binding'.
I always use bias binding for the strength and abrasion resistance it offers. The outside edges of a quilt always suffer the most wear. If you have put time into the construction of your quilt, you should want it to last undamaged for as long it can.
bias binding is the best