When I began sewing, I had little to no idea what it took to maintain my sewing machine. I thought that a needle stayed in your machine until it broke, then you replaced it with whatever you had on hand. Within two months of purchasing my Bernina 440 QE, I ran to my local dealer in a panic. I had accidentally moved the needle plate and disrupted the felt-like rug that surrounded my feed dogs.
Imagine my dealer’s surprise when I asked if she could order me a new one: turns out it was not a felt-like rug—it was actually an accumulation of thread and fabric lint! It was from then on that I made it a point to clean and maintain my machine regularly to keep it in great running condition (and felt-rug-free!).
TIP: Make sure to clean your machine after every large project or about 8 hours of sewing.
If you have a needle that has sewn through multiple projects, a machine that has not been cleaned or oiled, or perhaps you haven’t had your machine in for a servicing in some time, then it’s time for some routine machine maintenance and cleaning. Read on for the steps on how you can do it yourself.
What You Will Need
Before we dive in to the “how” part of how to clean and maintain your sewing machine, let’s talk about the “what.” Here’s a list of the supplies I like to have on hand when working on my machine:

- Screwdriver. These usually come with your machine.
- Small brush. I like to use a 1” inexpensive paint brush from my local hardware store to dust out all those tiny areas. Many machines have a brush included.
- Vacuum attachment kit (optional). I purchased my kit at a hardware store—it’s great for getting in tight spaces.
- Tweezers.
- White pearl cotton, cotton balls, and cotton tips.
- Rubbing alcohol.
- Magnifying glass. You may find you don’t need one, but I find it helpful for seeing in tiny crevices!
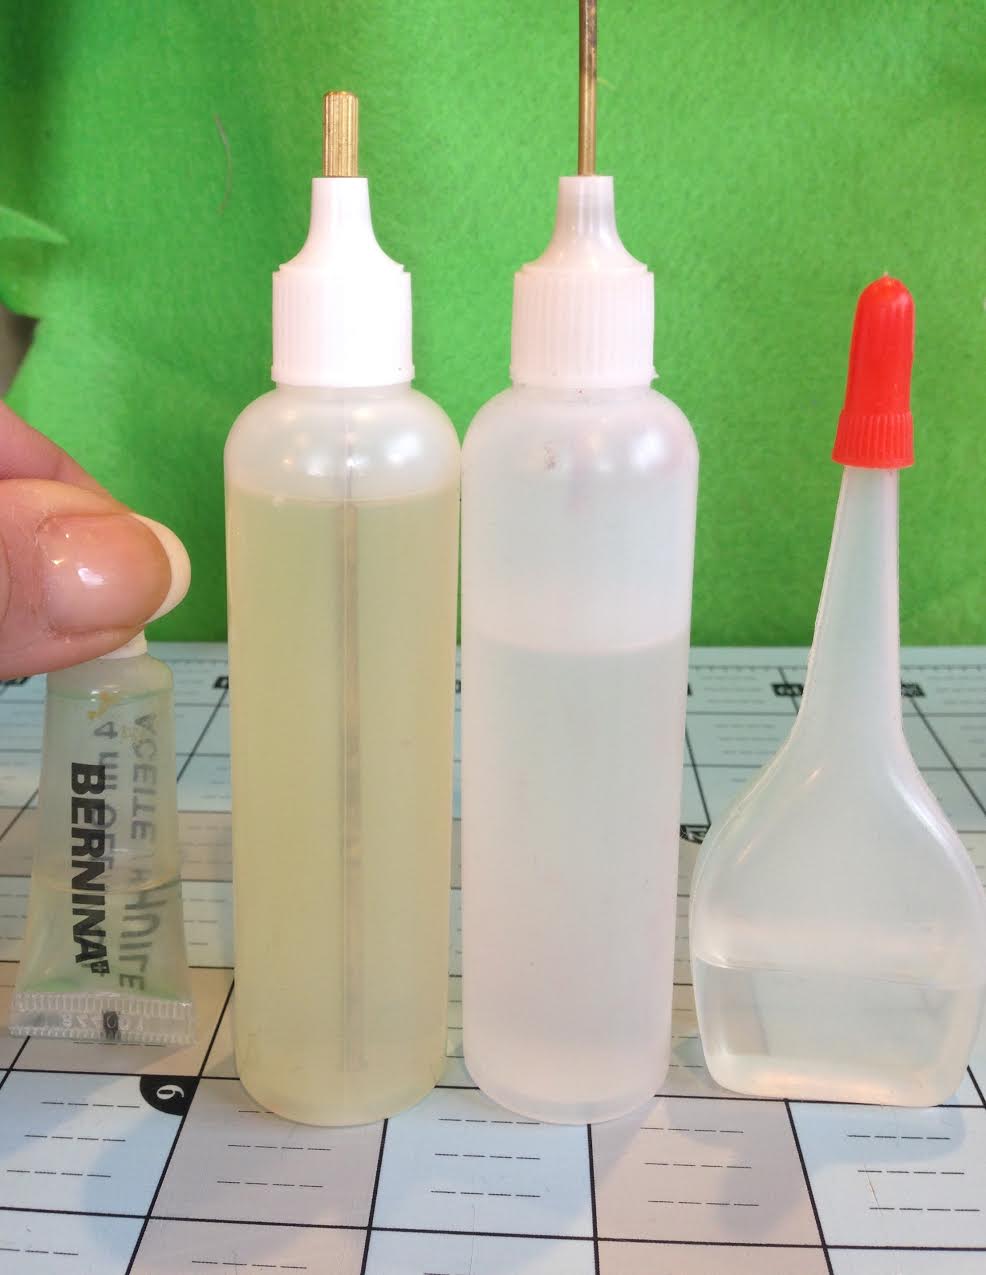
- Machine oil. This can be purchased at your local fabric shop. Make sure your oil has not discolored!
- Sewing machine manual. If you’ve lost track of your machine’s manual, try checking online. Most manuals can be downloaded now.
- Replacement light bulb. If it is one that you are able to replace yourself—some machines need to be serviced to be replaced.
- New needles.
- Fabric scraps.
How to Clean Your Sewing Machine
Once you’ve gathered your supplies, you’re ready to start cleaning. The following steps will require you to disassemble your machine, so if you find you’re a bit nervous that you may forget how it goes back together again, try taking photos as you go. Then simply refer back to the photos if you ever have a question while reassembling.
Step 1: Unplug your machine. A very important step!
Step 2: Remove the presser foot and needle. Refer to your manual for the proper way to do so.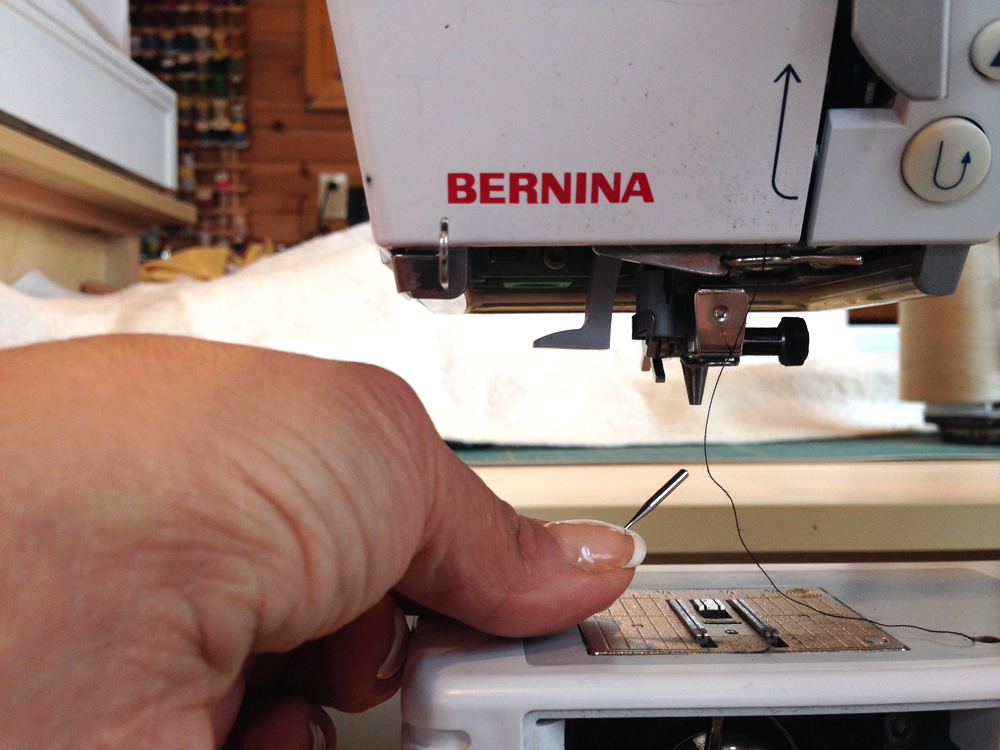
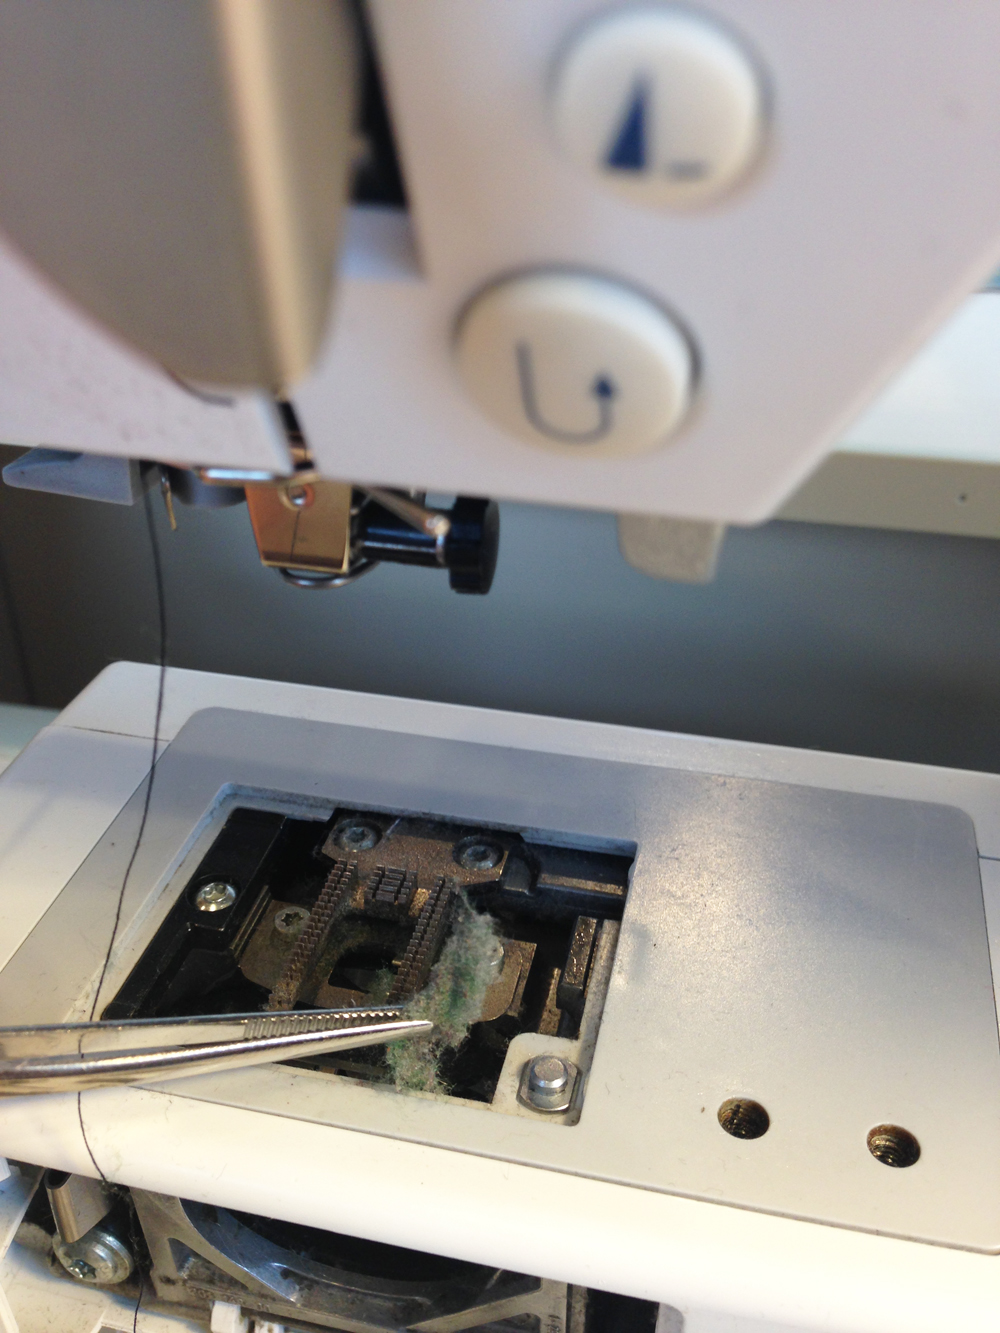
Step 4: Remove the bobbin casing and clean with your brush. If there seems to be a bit more lint or is difficult to reach, grab your vacuum kit that I sent you to the hardware store to buy. Some people like to use canned air here, but my service person instructed me never to use it because the air can blow the lint toward the back of your machine, rather than out of it. All that lint will build up like concrete and eventually lock up the components in your machine.
Step 5: Clean any tough spots with alcohol. This is a great time to use some cotton balls or cotton tips and rubbing alcohol to remove any gooey substances that may have accumulated on your machine, like old machine oil.
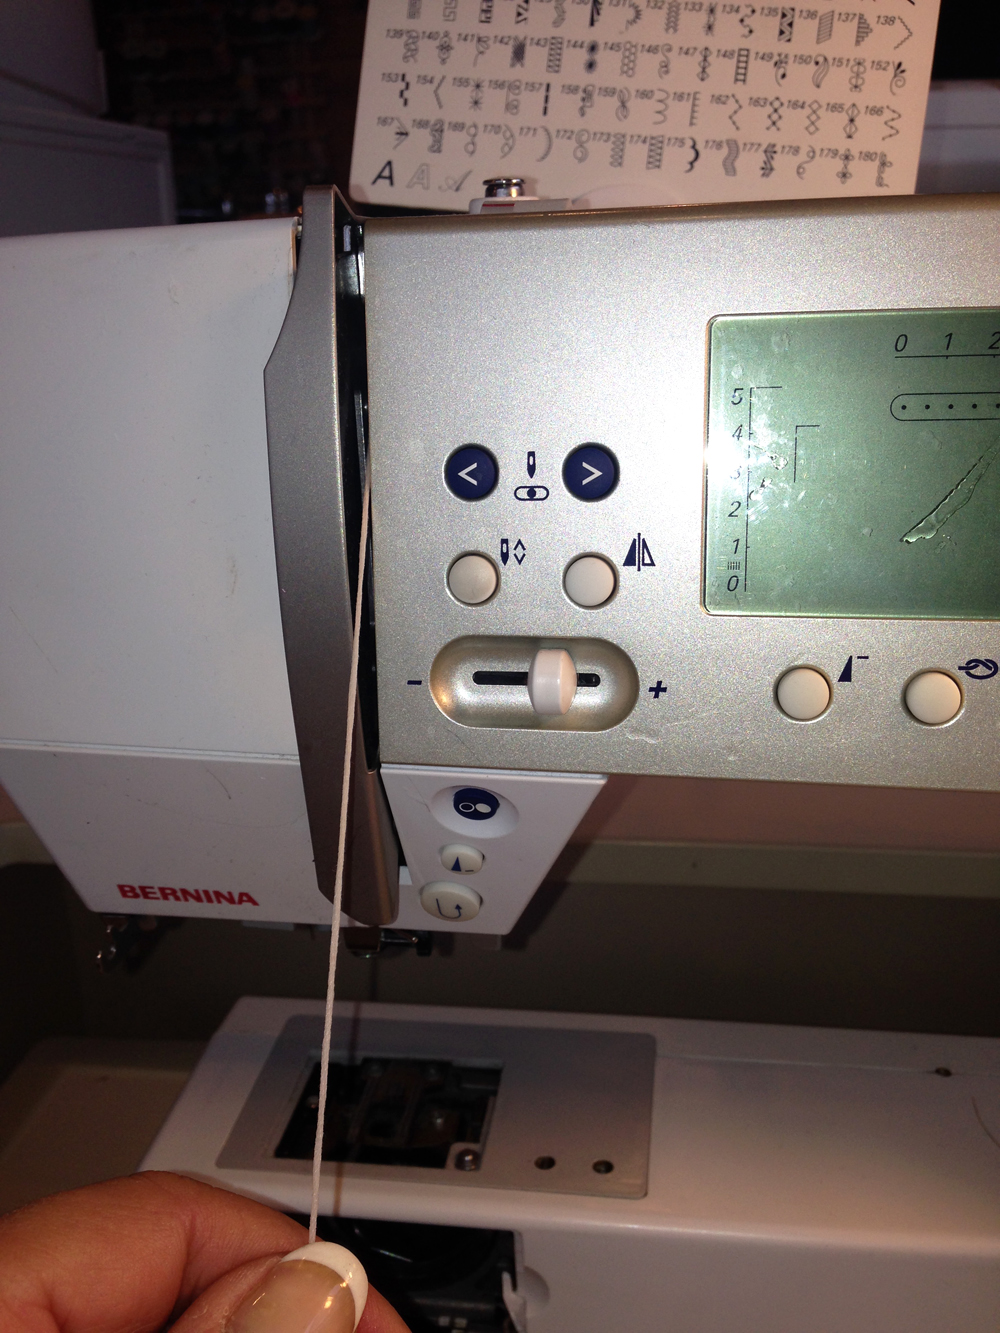
Step 6: Clean the tension with alcohol. Dip your pearl cotton in alcohol and run it through the tension of the machine. It should run through easily; we are just trying to pick up any left-behind lint. Another way to do this is to use a small fat quarter of fabric (muslin works best) and gently slide it along your tension guide to remove any lint.
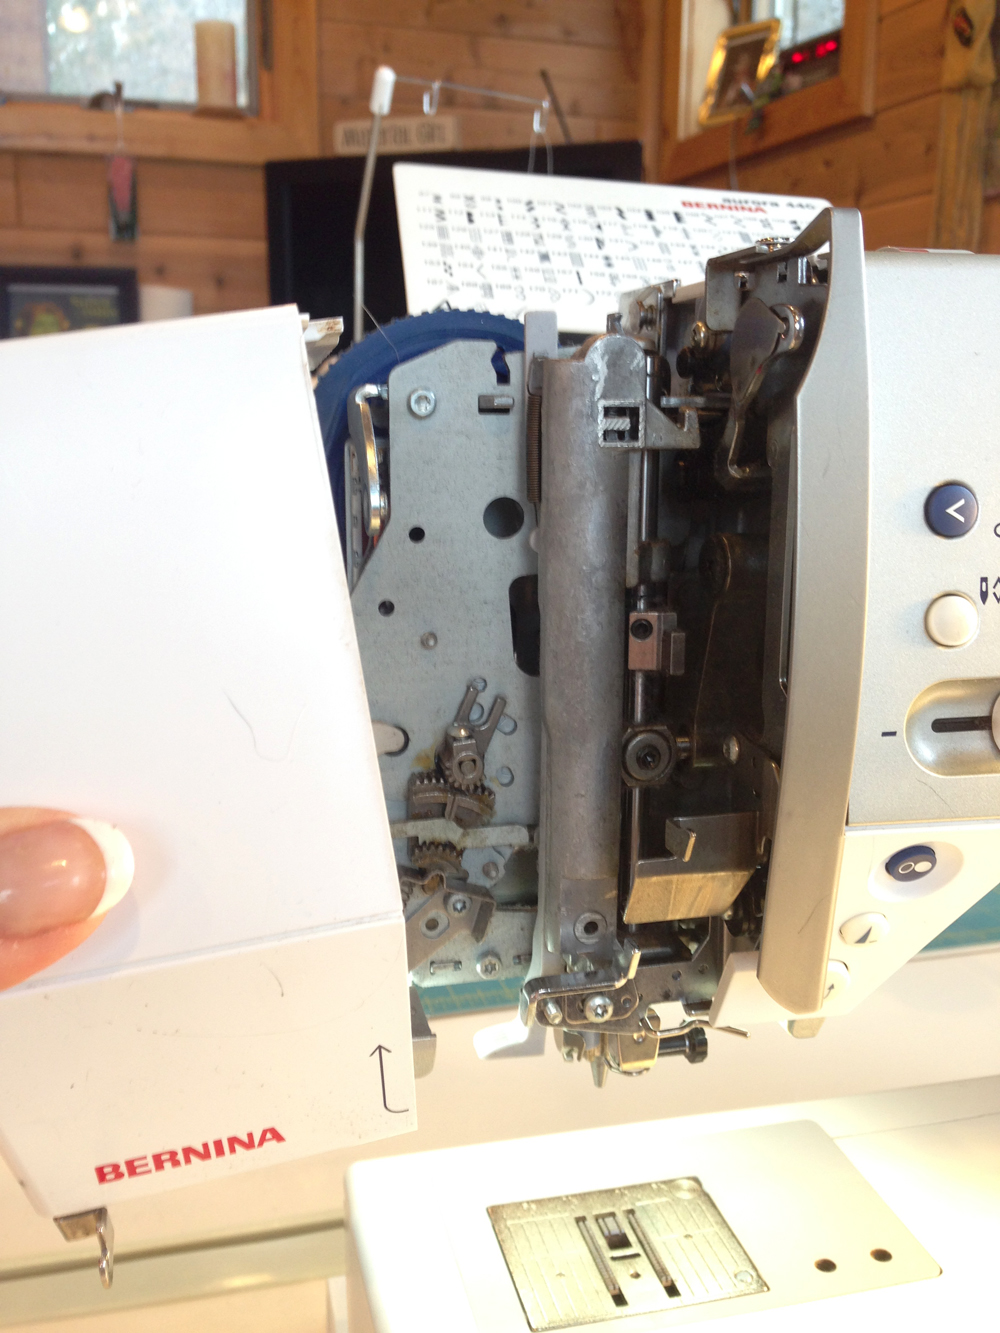
Step 7: Remove the head and clean, if accessible. If you have a portion of your head that can be easily removed, now is the time to do it. Use your brush to clean out this area.
NOTE: If this part of your machine has a screw that takes a special tool to remove, leave it be. This should only be accessed by a service professional. (Removing it would void your warranty.)
Step 8: Refer to your manual for oiling. Now let’s now look at your manual for instruction on where to oil your machine. Every machine is different and your specific manual will tell you exactly what parts should be lubricated.
NOTE: You should only use sewing machine oil, which can be purchased at any fabric shop. Always make sure your oil is clear, too! If your oil is yellowed or discolored at all, it will cause your machine more harm because it gets gooey and acts more like an adhesive than a lubricant.
NOTE: Some newer machines do not need oiling. These machines use a synthetic lubricant and are oiled by certified service persons only. Oiling may void your warranty in this case.
Step 9: Replace your light bulb (if applicable). Some machines may need to be serviced to do this. Your manual should let you know either way.
Step 10: Reassemble your machine. Once you are all cleaned up and oiled, it’s time to reassemble your machine. I tend to work backward from the last to the first section that I cleaned. Refer to your manual (or photos if you took some) for help with reassembling.
NOTE: This is also a good time to replace your needle! Once you’ve changed it out, try a couple runs on a scrap of fabric to make sure everything is running smoothly.
Most importantly, take your time and be meticulous. And remember, you will want to clean your machine after every major project, or about 8 hours of solid sewing. Once your machine is cleaned and running smoothly again, using good quality thread, fabric, and needles will also enhance your sewing experience.
Happy quilting (and cleaning)!
Related Links: Sewing Machine Troubleshooting Choosing the Right Sewing Machine Needles Sewing Machine Maintenance Tips – links to National Sewing Circle website Tips for Cleaning Your Sewing Machine – links to National Sewing Circle website Get in touch! Leave a comment or email editor@nationalquilterscircle.com.
I owe a janome s7 and this machine always goes out of balance
Thank you, that was very helpful.
Thank you 😊
Thank you so much for sharing this information. My Manuel does not give me all that information. I am thankful for your information. Now I can do a better job cleaning my machines
You mentioned that if your sewing machine hasn't been cleaned or oiled in a while, it has to go through some basic maintenance and cleaning. This drew my interest. My husband and I forgot to do this, and as a result, the sewing machine that his late mother left for us rusted and suffered damage. Now that I want to use it, I'll make sure to get it fixed by a specialist and follow your advice going forward.
Please help me I have a Empisal space setter it keeps on knotting cotton and I can't seem to o get the setting right for the bobbin please can you give me advice
Very good information.
Also helpful- I clean my mascara wands thoroughly and use them to help clean my machine. The bristles grab lint and dust and the end bends to reach tight spots.
Vacuum kit - how do you attach to vacuum cleaner?
This is an excellent article, for both "newbies" and "oldies". As and "oldie" who uses many different machines, modern and vintage, I'd like to add a little something. "Newbies" who love and use vintage machines should know that it's possible to do much of their own servicing. Vintage machines can be opened up more than modern so one can easily oil them everywhere that metal rubs on metal (always one drop only). Belts can be adjusted and replaced, gears can cleaned and re-lubricated. Motors can be tuned-up. Very often, you can find maintenance manuals on the internet which will help this process. There will always be a need for machine techs to fix serious problems, but if I can maintain my vintage machines (I'm a 71-year old retiree), anyone can. I realize that not everyone would want to do this. Still, you can if you choose, it's just not that difficult and it's very rewarding.