Quilting Undulated Lines with Circles
Heather Thomas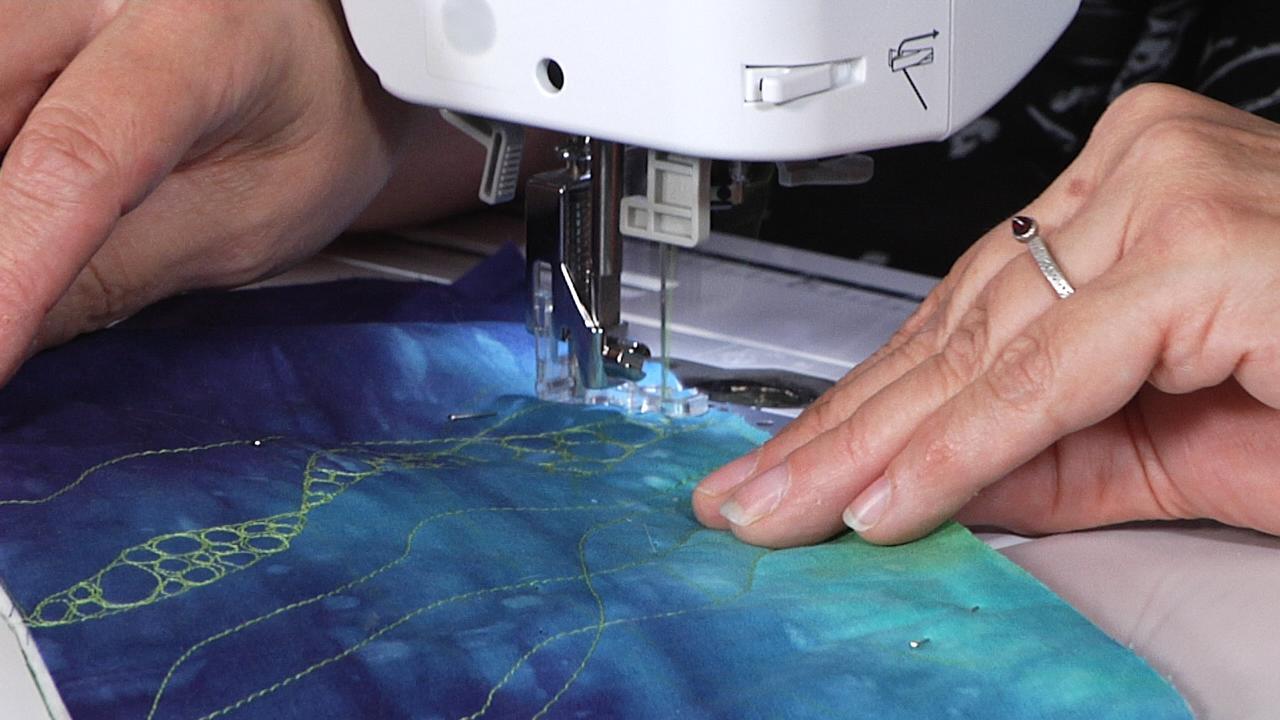
Video Player is loading.
Small circles can be fun to quilt; however, they can be tedious to do and take lots of time to complete. Heather Thomas shows you how to quilt a combination of undulating lines and small circles that creates a striking look when finished.
Undulating Lines
Before you start quilting any circles, you must first lay out your undulating lines. To undulate means to move in a smooth, wave-like motion, which is how you want your lines to look. Quilting lines in this manner is much easier than trying to quilt straight lines or a grid pattern because you don’t have to do any measuring or marking before you start quilting. Heather shows how she starts at one edge of her quilt and stitches a gentle wavy line across to the other side. She then pivots at the edge and quilts another undulating line across to the side she started at. Heather continues stitching several lines, explaining why she pivots at the edge of the quilt rather than traveling along to start at another section. She also shows how you can connect the lines or have them cross one another to make smaller sections to fill with other quilting later.
Circles
Once you have quilted all of your undulating lines, you can begin quilting with design elements, which in this case are the small circles. Heather explains how to use the lines as boundaries for the circles so that the entire area doesn’t have to be covered. She shows how she stitches the circles, beginning at one end of a section created by the undulating lines and working her way to the other. Heather gives tips on what sizes to stitch your circles and how to make your circles look as clean as possible. She also gives tips on how to decide which sections to fill with quilting design elements and which to leave empty. Check out other great videos for more quilting tips and techniques.
I really love quilting little circles. And once you get good at little circles, you'll probably love them too. They're kind of addicting. However they take forever. So I'm always looking for things to add in with those circles and still have that wonderful effect.
My favorite thing is this combination of undulating lines with circles, and I love to do it in borders. So I've got this long piece of fabric and I'm gonna kind of show you how I do those long undulating lines with circles. So I'm gonna start at one side of what would be the border and I'm gonna sew a long undulating lines from side to side. And when I get to the other side, I'm not gonna stitch down that border. I'm simply going to stitch across, like so.
Then I'm gonna stitch across again. I'm not stitching down. So I have a point every once in a while. And now this time I'm gonna stitch a line that overlaps this last line, and possibly the line before it. So I've got some undulating lines here that are interacting with each other, that are crossing over each other.
I'm gonna go ahead and clip this thread and get it out of my way. And now I am gonna stitch up the side just a bit so I can make another line. And now I'm going to come back down and do another kind of line that comes over that line, like the last one, so that they're interacting with each other. And I'm gonna do that again. Okay.
So now I have a series of undulating lines that are interacting with each other in some places and simply next to each other in others. And what I've created is space, and it's that space that's important to all these little undulating circles. So I've got little spaces here, here, a little space here, kind of a bigger space here, a smaller space there, smaller space there. And it's in those spaces that I can put the circles, instead of trying to put circles everywhere and taking forever to do. So I'm gonna stitch down here, which would be the edge of my quilt.
And in this small space here, I'm gonna put circles. Now the key to circles is making sure that they touch each other. Touching is important, because that makes it look neat and tidy. If I don't touch them next to each other then it looks kind of messy. I want my circles to be lots of different sizes, little tiny ones, medium size ones, large ones.
You wanna make sure that they're touching each other. So there's my first section filled with circles, wonderful texture, visual interest. Now I'm gonna do this section here. All right. So, now we've got a plain section, then a circly section, then a plain section.
So the next area we'd put circles in would be this section here. We'd leave this one plain and this one plain, and then we'd put circles in these little sections here. So we're alternating a plain section and a circle section. It's a fun way of adding circles into your quilting without having to fill up the whole space. A nice mixture of undulating lines and circles.

Hey guys, I was wondering if you could share any Information about the fabric itself. I would love to recreate sth similar. It's the perfect oceany print :) Any chance you still know what line this came from?
Great idea. Thanks!
I appreciate the Information and would love it even more if we could see what you are doing. Perhaps the next free-motion quilting video could show a closeup of what you are sewng.
I wish the camera was at an angle where we could actually see the stitching, above the work instead of to the side
Great video! Thank for the tips and demonstration. My problem is always how to make that work on a large quilt. Any tips for working a large quilt and manuevering the quilt when doing this?
This a fantastic little video, I've just done lots a practise squares using this method. As a complete beginner, I find this technique easier to do - still got a long way to go, and having fun along the way.
do you need a special machine to control the stitches?
I just notice that you are sewing over the pins while doing the stitching across and the bubbles. Pins look smaller; can you provide the size or type of pins? Thanks.