
Painting and Stitching Silhouette Watercolor Quilts
Heather Thomas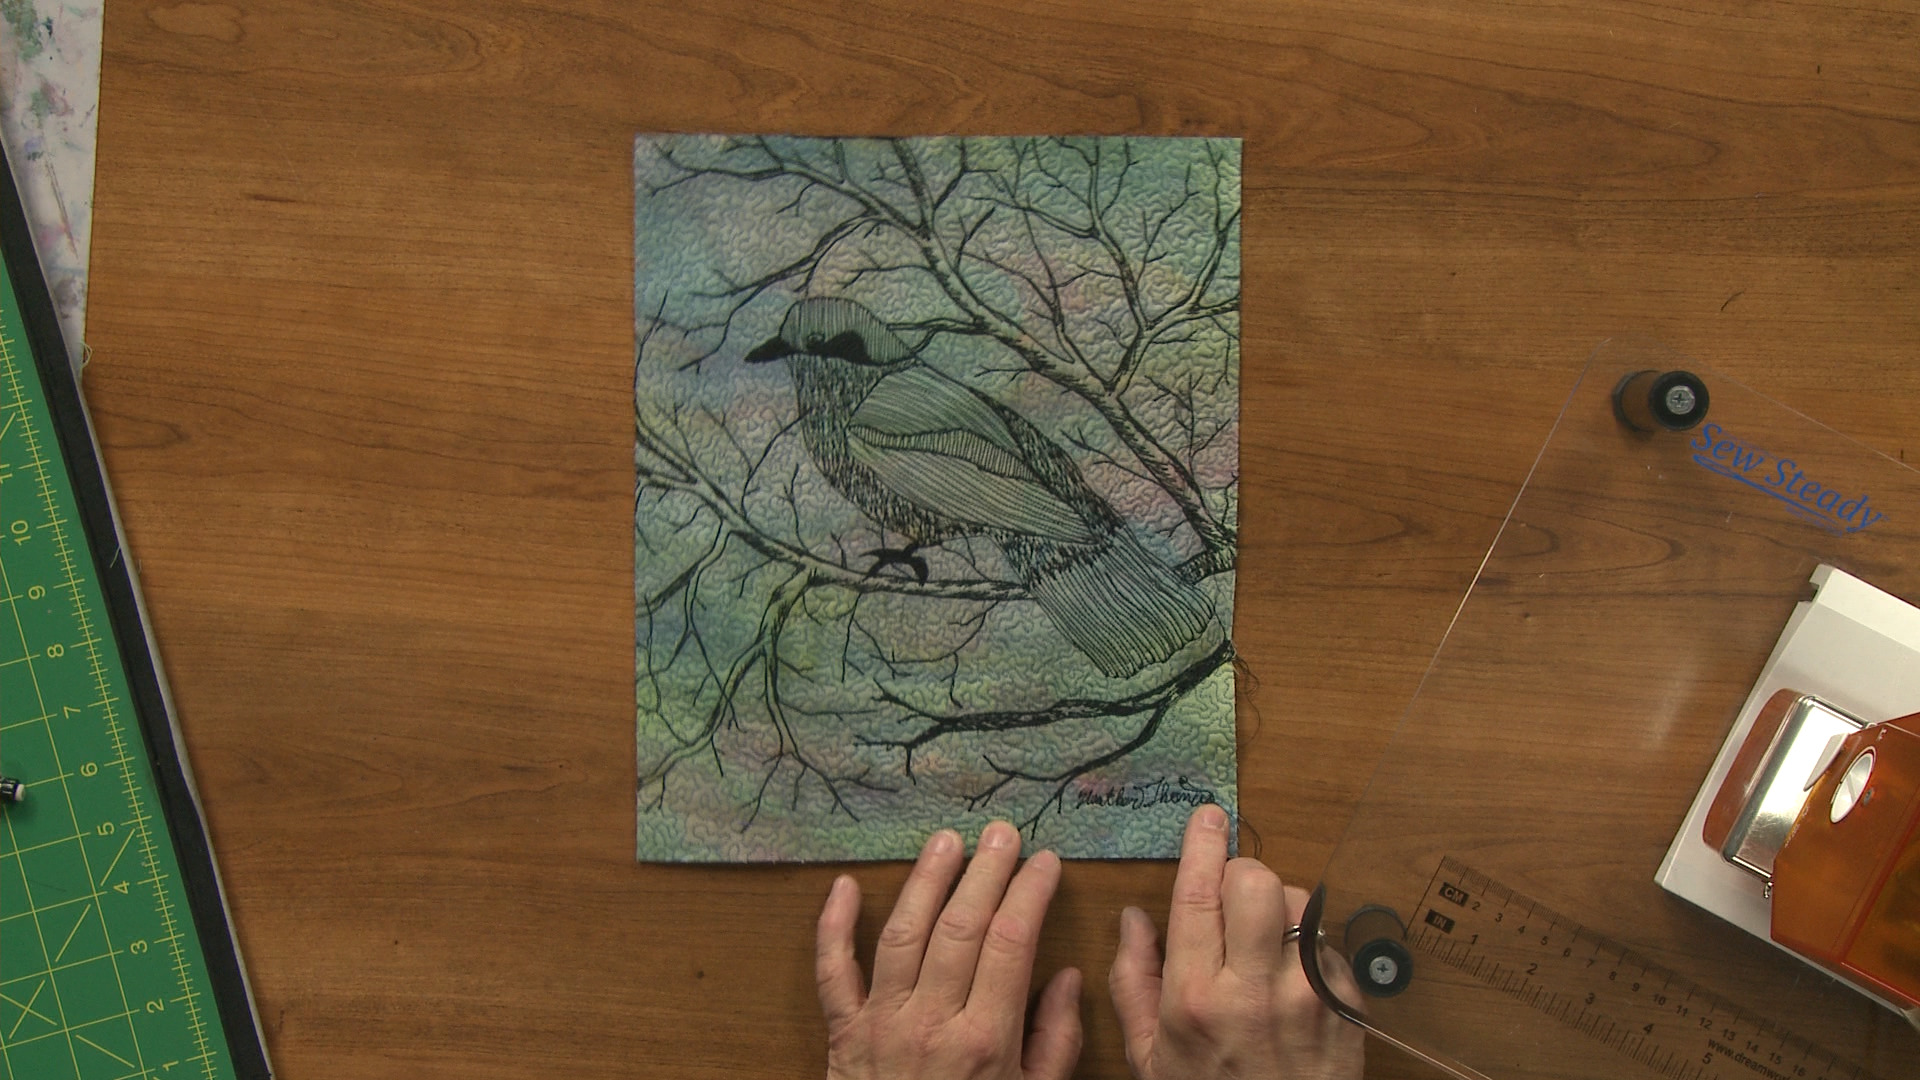
Video Player is loading.
When creating a quilt, sometimes the piecing is the main focal point and sometimes it is the quilting. In this fun watercolor quilt technique, Heather Thomas shows you how to paint a fabric background and then quilt a design over the whole piece.

Tools for Watercolor Quilts
To create a watercolor quilt you need fabric paint, stabilizer, paint and brushes. Heather shows what kind of paints she like to use and explains why. She also shows how she changes the hue of the colors she uses slightly to create a different look.
To begin, Heather applies her paint to fabric that has been stabilized. She explains that you can buy fabric that already has stabilizer on the wrong side and is meant for painting, or you can add your own stabilizer like a waxed paper to the wrong side. She then demonstrates how to paint fabric for the background, making sure that all areas of the fabric have been covered and that the colors are even distributed. Once the fabric has been painted, simply set it aside to dry and then you are ready to begin stitching.
Quilting Watercolor Silhouettes
For the main focal point of her watercolor quilt Heather chose to stitch a silhouette of a bird on a tree branch. She explains that to get the general shape of the bird she uses a stencil and traces the outline onto the painted fabric. After the outline has been stitched she explains how to add other stitching to different areas of the bird.
When stitching areas of the bird that are near each other Heather does different styles of stitching so each area stands out. Once the main design has been quilted she shows how to add more design stitches to the surrounding areas and then how to add stipple or other fill stitches to the background.
