KH
Caring for Your Self-Healing Cutting Mat
Kelly Hanson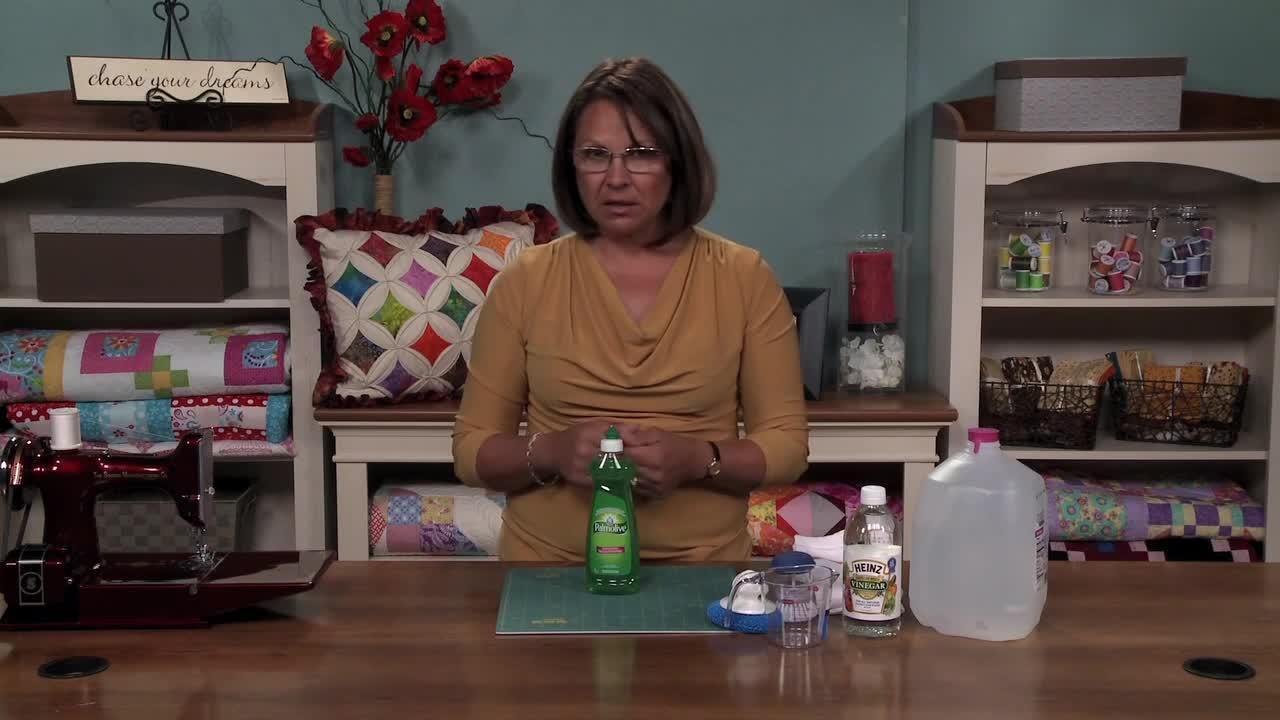
Video Player is loading.
I love my self-healing cutting mat. It’s one of my best friends in the sewing room.
Did you know that your mat needs some regular care in order to keep it in tip-top shape? Otherwise, it will begin to look like my old mat here. Eek!

But, don’t worry! Caring for your self-healing cutting mat is easy. Here are a few tips on how to care for your self-healing cutting mat.
Cleaning Your Mat
1. Every now and then you will want to take a little dish scrubber and brush off your mat to release any caught threads. You don’t need to rub too hard, just a light touch is sufficient.
2. Once you have the excess fibers removed, it’s time to moisturize your mat and bring that surface back to life.
A quick bath in a solution of vinegar and dish soap will do the trick. Plus, it should also remove any surface stains on the mat. (Except for ink stains – those are a little tougher.)
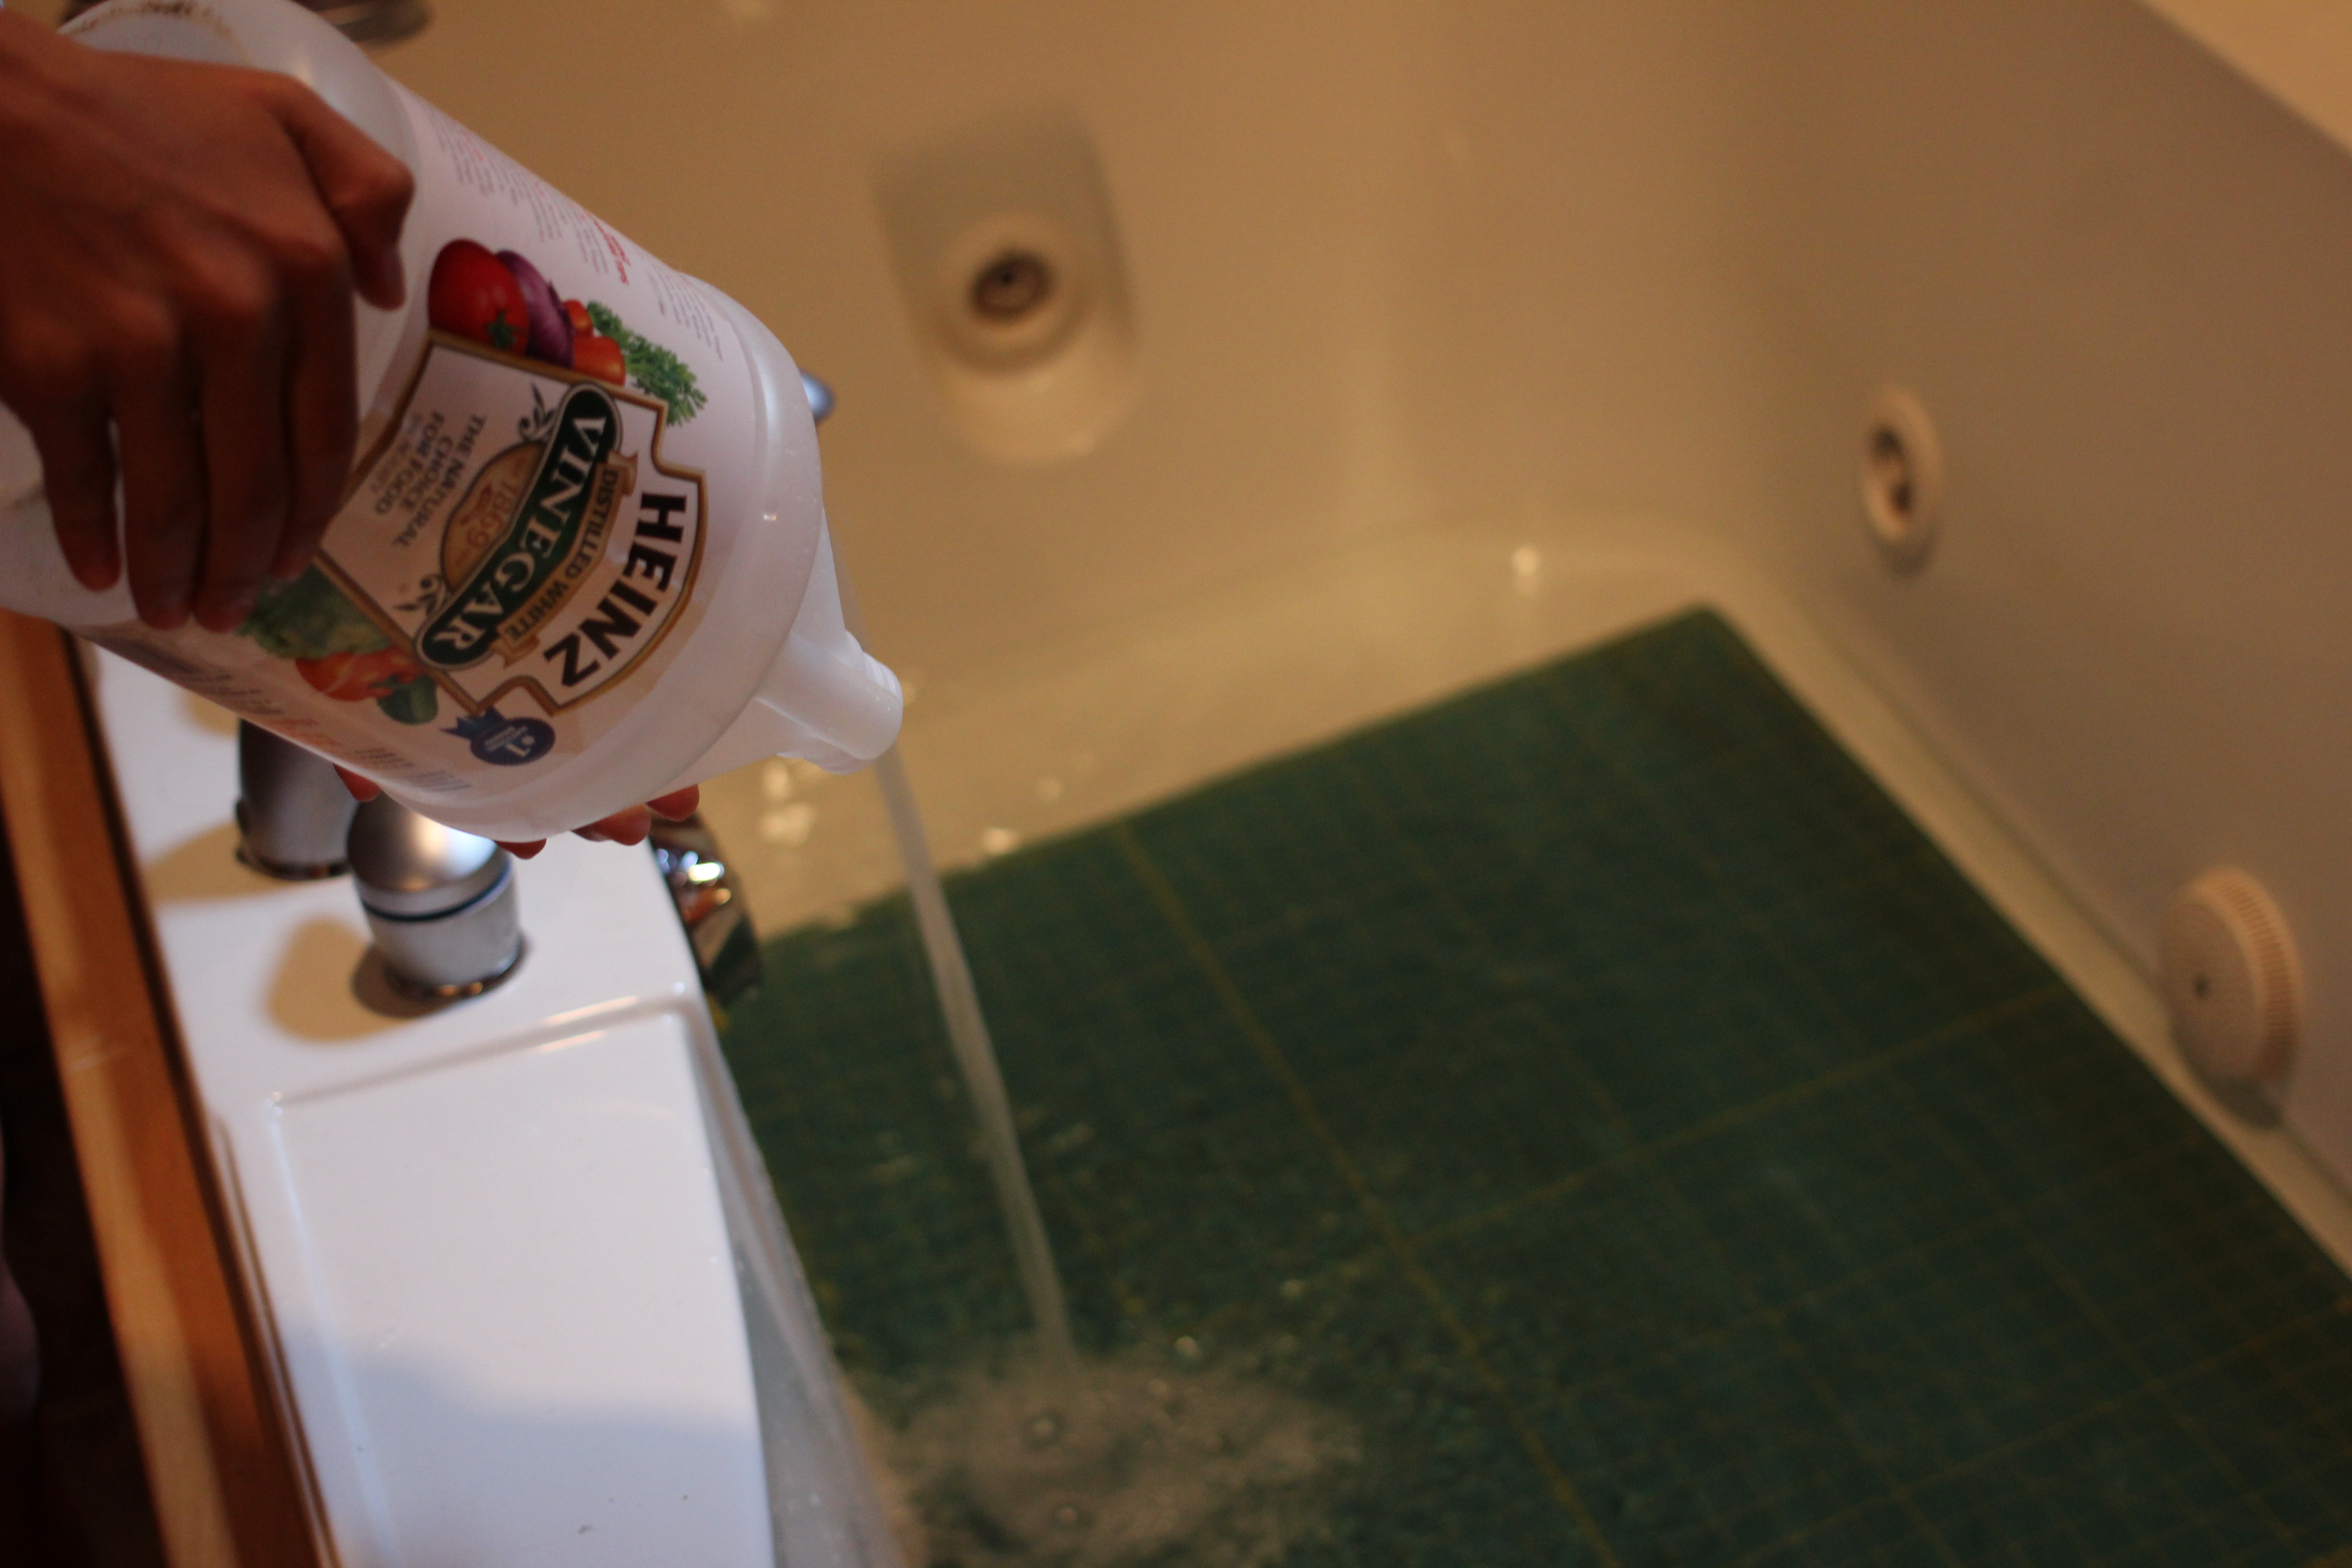
To soak your mat, place it in a bathtub or container that is large enough so your mat can lie flat. Add a solution of ¼ cup white vinegar per gallon of cool water and let it soak for 15 to 20 minutes. Make sure the water is cool! Warm or hot water can warp your mat.
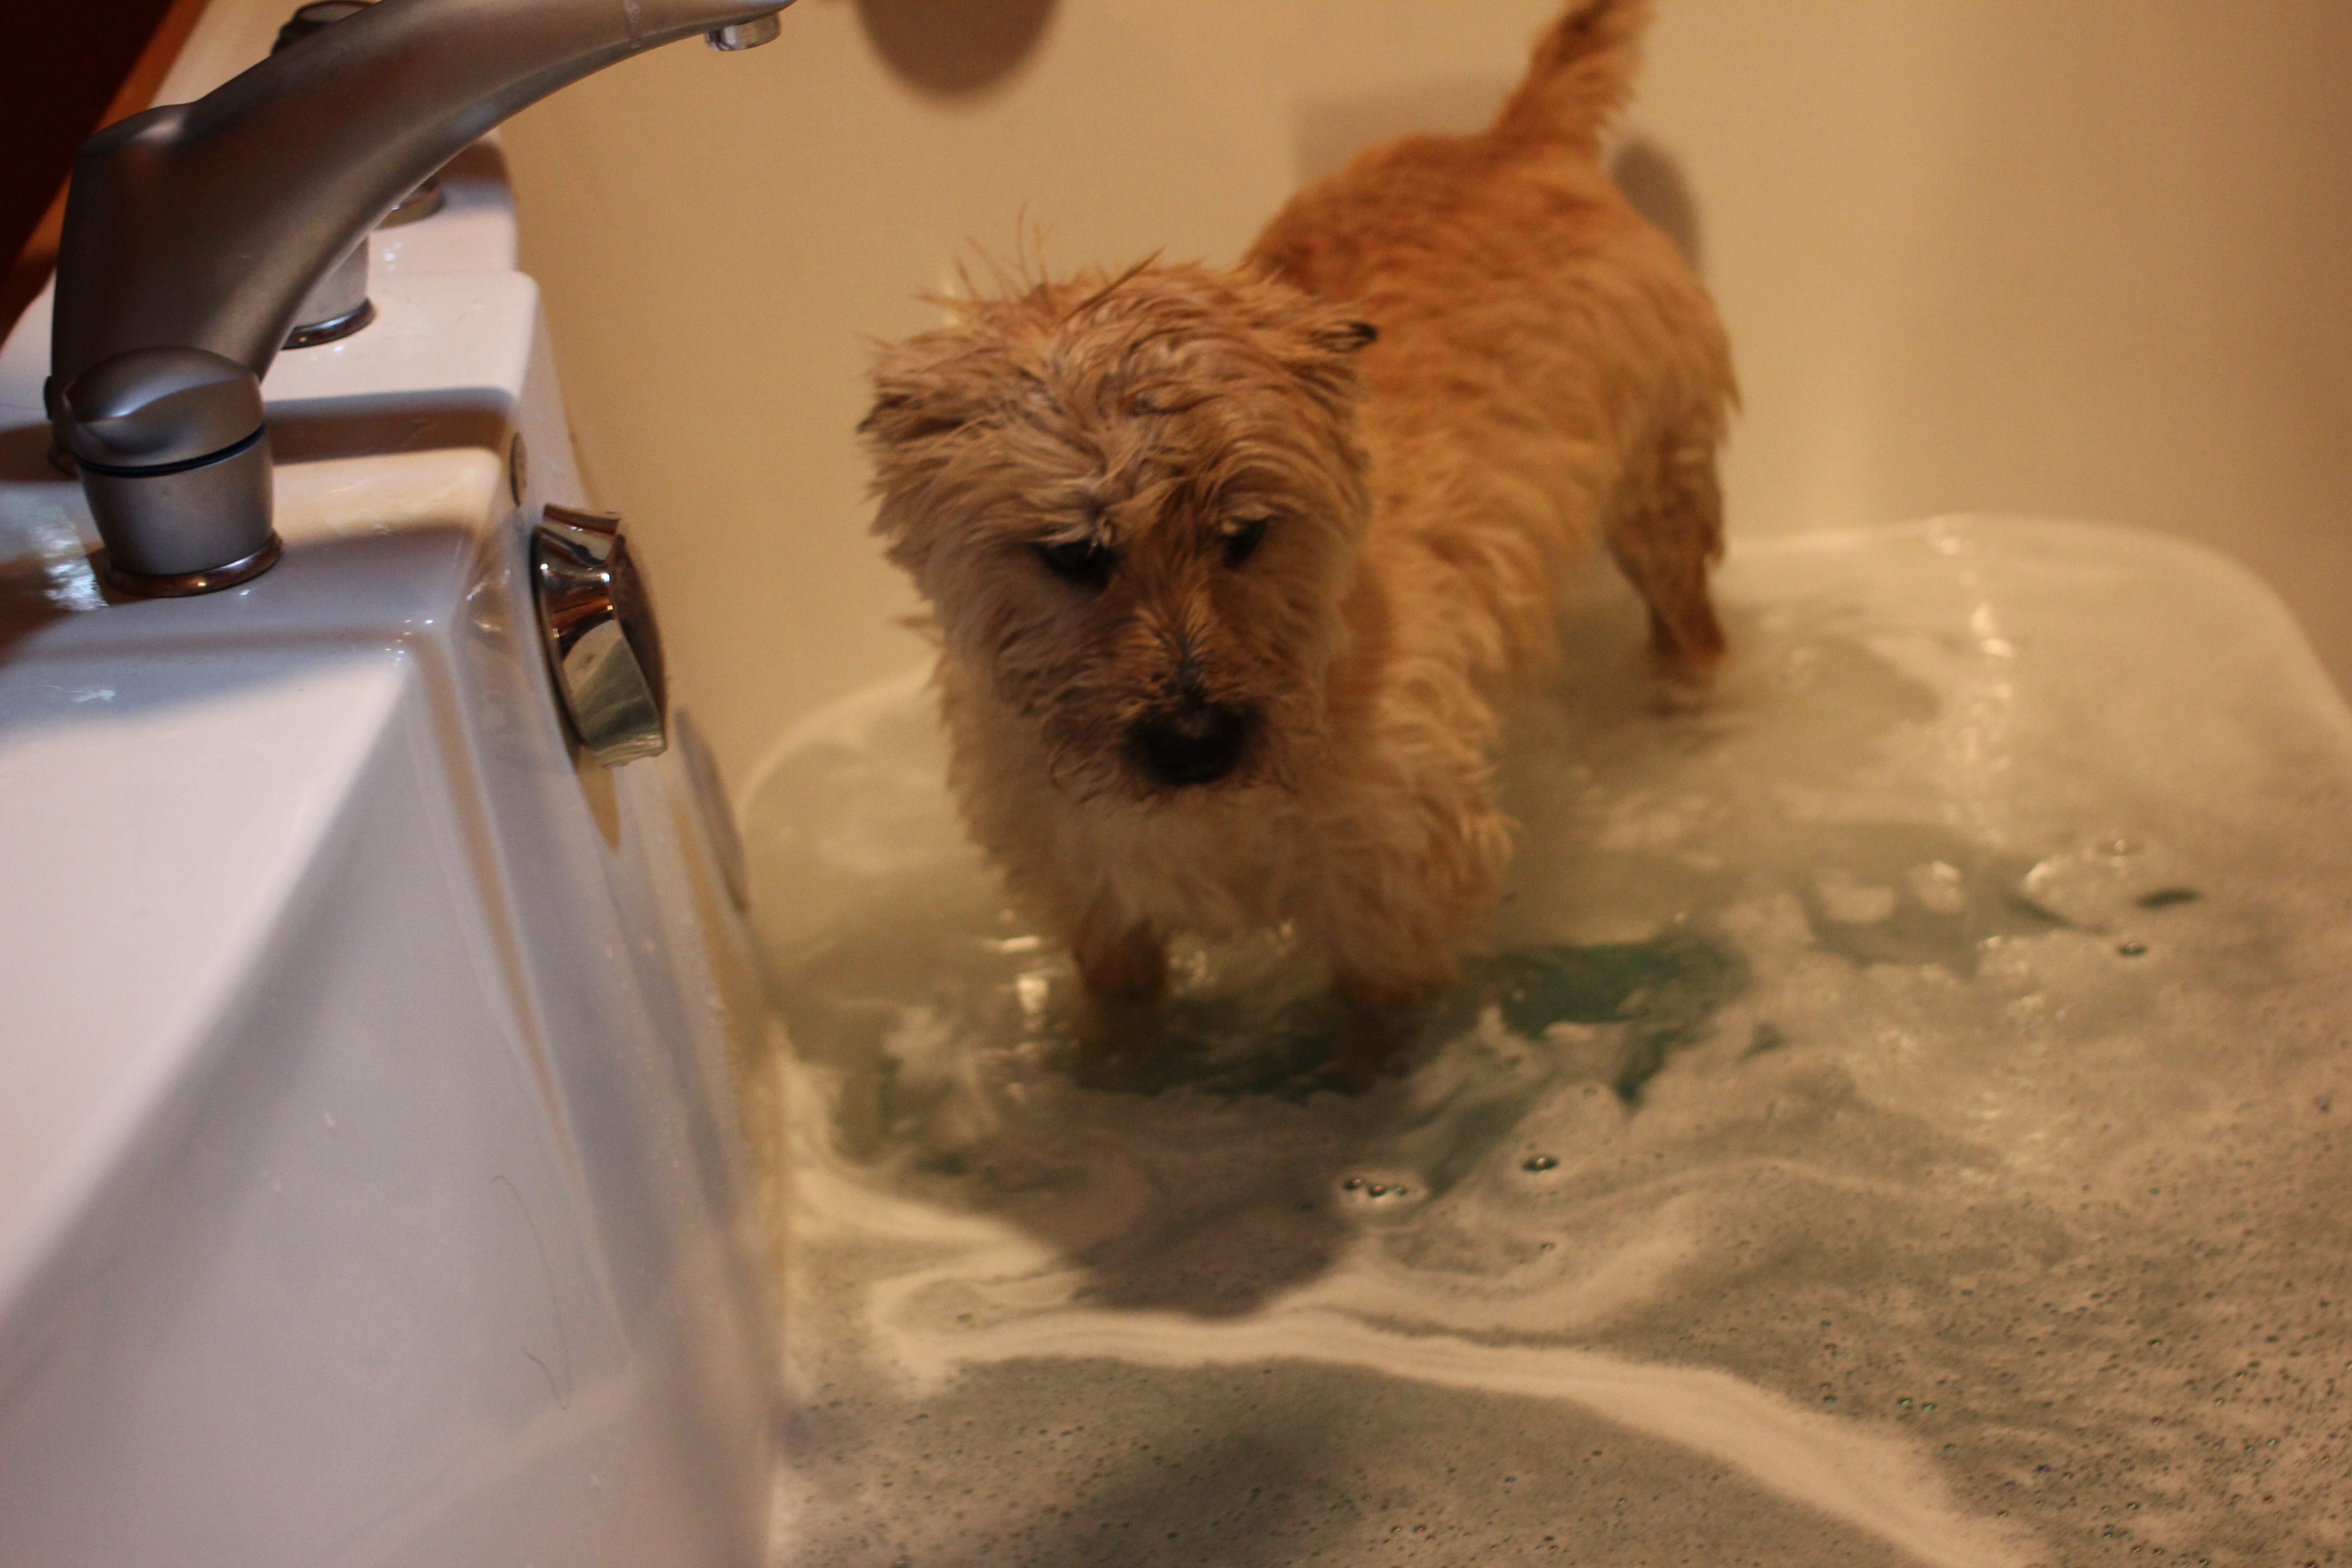
3. Add a bit of mild dish soap and gently scrub the surface of your mat with a soft brush. This will remove any straggler fibers that may be trapped in the cuts on your mat that prevent it from self-healing. (Note: you’ll have to keep an eye out for any hitchhikers who may decide to join your mat bath. Baxter thought he needed a soak too.)
This special solution will absorb into your self-healing mat and make it nice and supple again.
4. Dry the mat with a cotton towel or let it air dry flat. Just make sure it’s flat too – you don’t want it to warp as it dries.
That’s it!
Just remember, keeping your mat clean, flat, and away from excess heat will preserve it for years to come. Happy quilting!
Photos by Author
There's been a lotta talk lately about how to care for your cutting mat. So today, I decided that I would bring in my cutting mat and some of the supplies that you're going to need to be able to totally care for that mat and keep the moisture within it. I brought my little rotary mat. The nice thing about that is you can take it off from its base and you'd be able to clean the mat without any problem. The first thing that we wanna do before we start cleaning the mat is I take a little scrubby like this and I just move it around, trying to get off any excess anything that's on it.
It could be threads. It could be maybe a buildup of a chemical or something. I oftentimes will use my glue stick on my cutting mat surface, knowing that I can wash that off. The next thing that we do is we take this to a kitchen sink or perhaps a bathtub. That's what I have found works best, especially if you've got one of the larger mats.
What we want is we wanna use a mushroom brush for vegetables. We don't want the bristles being too hard because we're going to be scrubbing it once it's inside the tub. What we are going to use, and I have an example here, this is one gallon of distilled water. Now, if you put it in your tub, you're gonna be using your water from your tub, so you need to kinda make a guesstimate as to how many gallons you've used. Then we are gonna take white vinegar, and this is the container that white vinegar will come in, and we're gonna take our nice little handy measuring cup and we're going to measure 1/4 cup of vinegar, white vinegar, for every gallon of water.
We're gonna put that in the water and it's cool water, not hot water. Hot water will make our mat warp. Even warm water will. So we wanna make sure that it's cool water and it's lying flat. As we let it sit, we let it sit for approximately 20 minutes.
After 20 minutes, you're going to go and you're going to take a very, very delicate and soft detergent, something that is very mild. I have Palmolive here. I also like Ivory. Those are two very mild soaps. Ivory, the nice thing about that is, it's just white and clear and not gonna make any color in the tub, so you don't have to risk staining your mat at all.
I used green today because with the Dove, because it was green and I couldn't find any other in the area that I was at. And I thought, well, the mat's green, so this is all good. And we're gonna put that inside the tub water. Now, we don't have to let it sit or anything at this point. Now what we do is we're gonna wanna scrub it.
Once you've scrubbed it down and you've rinsed it in cold or cool water, then you're gonna take and you're gonna take two towels and you're going to place your mat, your wet mat, on the towel. And then you're gonna place a towel on top of it. And you're just going to blot it dry. Another thing you can do is air dry it, but the problem is, is that it has to be flat. You don't want it being sitting on its side.
And so if you're lying it flat, the bottom may still have moisture. And so that moisture won't come out. It'll start getting smelly and maybe change color. So we wanna make sure that it's dry before we do anything else with it. And then once it's all complete, just put it back together if you've got one of these mats or if it's a mat that you just normally will cut on that isn't a rotating mat like this.
And I want you to take a before and after picture. It's really interesting when you see exactly how clean your mat has gotten or how dirty it actually was. It will take out any discolorations from fabrics. It will take out any discolorations from ink. I did have one instance where the ink was so set in and it wasn't because of me.
I had a customer that came up and was writing something and her ink pen broke, so that was just a situation, but it took out so much of it that I could not believe it. I was very thrilled. But the best thing of all is that it moisturizes your mat. Now here's another little tip. After you get that mat out of your tub, if you have a smelly dog, throw him in.
That's what I did. It ended up making my dog smell better than he's ever smelt before. The vinegar took all of the excess smells out of him.
My mat is 32 x 55 and at 83 it would be very difficult to get it into a tub and clean it. Any way I can clean it while it is sitting on the cutting table?
There are at least 2 typical mat plastics: the green (e.g. Olfa) or the gray (e.g. Fiskars) and the translucent white(often very large table mats). Does this apply equally to both types? This is such an unexplored area of not-so-common knowledge. Thanks!!
Does the self healing mat have to lie flat to soak in the tub? I don’t have a tub wide enough for that. Thanks!