
Best Supplies for Learning How to Hand Quilt
Ashley Hough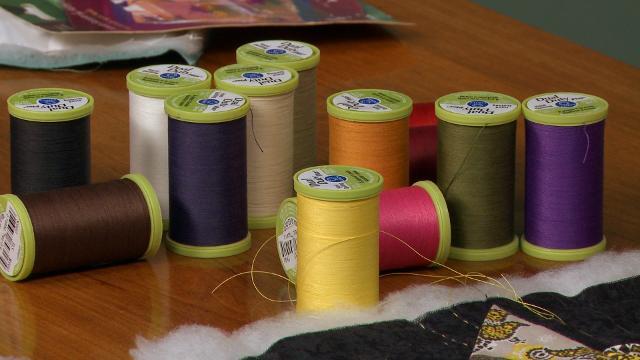
Video Player is loading.
Hand quilting is a great way to add a personal touch to your next quilt, big or small. Learn how to hand quilt as well as get tips for what kinds of thread, needles and thimbles to use.
Hand Quilting
Many people may shy away from hand quilting because they haven’t done much hand sewing in the past. However, Ashley Hough shows you how to hand quilt. Once a quilt top is ready to be quilted is layered with batting and a backing fabric. Depending on the size of the quilt you may choose to either pin or baste the layers in place. Once the quilt sandwich is prepared, Ashley shows you the basic hand quilting stitch. She begins by demonstrating how to tie a knot in the thread end and bury it within the layer of batting. Next, she shows you how to make a quilt stitch by starting with the needle perpendicular to the quilt surface. The needle is then pushed through the fabric, rocked to the side and pushed back up through the fabric, forming the stitch.
Hand Quilting Tools
When learning how to hand quilt it is important to use the right tools. Ashley shares the basic tools needed for hand quilting, which are thread, a needle and a thimble. Ashley shows how to thread the needle as well as demonstrates how to form a stitch both with and without a thimble. When hand quilting it is important to use thread made especially for hand quilting. Hand quilting thread is thicker than standard piecing thread which will make it stand out on the quilt top. It also has a coating on it that makes it easier to thread on a needle, as it won’t separate as easy, as well as keeps it from tangling or knotting while you quilt.
Whether you're working on a small heirloom or art quilt piece or maybe even a really large quilt that's gonna be used on your bed, a fun option is to do some hand quilting. And I know a lotta people might shy away from hand quilting because they think it's too difficult or it might take too long or much longer to complete. But it really is a way to add a nice, personal touch to your pieces. So when it comes to hand quilting, it's important to have the right tools to help make quilting easier. And that comes down to needles and thread.
Now, first thing I wanna talk about is thread. You wanna make sure if you're doing hand quilting that you're using a hand-quilting thread. Now I have hand-quilting thread here by Coats & Clark. And, as you can see, hand-quilting thread is a little bit thicker, a little more robust than just your regular thread for piecing or hand sewing. This thread also has a nice finish on it, which is going to help you while you're stitching and even make threading the needle much easier.
Which is really handy because threading the needle can be difficult, especially when you are using your hand-quilting needles, which you'll wanna use. Hand-quilting needles have a very small eye on them which can be really difficult to thread if you're using just an all-purpose thread because it can tend to fray a little bit and be tricky to get through the eye of the needle. But this hand-quilting thread here. If I take off a piece I'm going to use for sewing and I'm going to just cut it. You can see there is no frayed edge on it, making it really easy to thread through the tiny eye of our needle.
So all I have to do is put that right through here and you can see it went through, first try, really easy. I didn't have to put any sort of wax or coating or anything on this thread because this Coats & Clark hand-quilting thread already has that finish on there. So if I'm going to be doing some hand quilting on my project, the other thing I may want to have is a thimble. I know a lotta people like to use them. Some people don't.
I personally don't like to use a thimble, just because I find I can hold the needle a little bit better without one. So I have my needle threaded here. And all I'm gonna do is start by tying a knot in the end of my thread. I like to do that by wrapping it around my finger, twisting and then pullin to create a little knot right here on the end. So I have my knot.
I have my thread tail. And what I wanna do is bury my knot into the layer of batting between my quilt top and my backing fabric. So here I have a fun little just 3D pinwheel square that I've made. This can be a fun little wall hanging or something, but something that I wanted to put some hand quilting on, versus some machine quilting. So I'm just gonna start over in this little quadrant here that I haven't done any work on yet.
And we're going to start with some hand quilting. So what I wanna do to bury my knot is I want to start either here in the middle and work my way out. Or I can start on the edge and work my way in. Either way, I want to take and start by putting my needle, and I'm going in at an angle here, through my top layer of fabric and batting. And I went at an angle so I didn't go all the way through to my backing fabric.
I don't wanna grab any of that. What I want to do is take a little stitch and I'm going to pull until I hear a little popping sound or I can feel my knot going through. And now it's secured in my layer of batting. Now I have a tail here. I could cut it off, but I'm not worried about it because that will all eventually be trimmed off.
And now I can start with just a simple hand quilting stitch. So what I wanna do is take my needle. I wanna go perpendicular to my fabric. Put my needle through until I can just feel it coming through on the backside of my other hand. I'm going to do a rocking motion.
This is where if you like to use the thimble, you could put your thimble on. Have it on the top of your needle and rock your needle using your thimble. Or you can use sort of a pinching motion and you're going to just pinch your needle like so and then rock it over and then push it out through your fabric like that. And you've created your first stitch. Bring my needle all the way out and pull tight.
Now I'm not pulling it super tight. Just to where it lays flat across the top surface of this quilt top. And you're just gonna repeat that process. Again, I'm perpendicular to the quilt top. My rocking motion, and bring it straight back up to the top.
Now, if you've ever done any sort of hand sewing or embroidering or anything before, you find that your thread tangles up on you a lot or you get knots while you're going. That's one good thing about using this hand-quilting thread when you're doing hand quilting is that it has that finish on it that is going to make it less susceptible to tangles and knots as you go. So you can see as I'm pulling it, nothing is getting tangled. I'm making nice stitches and I don't have to worry about anything while I'm doing my hand quilting. Now this means you can even have a longer piece of thread that you're working with as you're going.
And, again, you don't have to worry about anything tangling up. The thread is also resistant to any sort of abrasion. So that means you can use this thread, not only on small heirloom wall-hanging quilts, but you can also do hand quilting with this hand-quilting thread on a big quilt that you're gonna put on your bed. And you can feel comfortable that it is going to stand up to repeated use. I have a color here that matches with my work.
But you can see that this thread comes in a variety of colors. So no matter what project you're working on, what color that project might be, there's a hand-quilting thread out there that you use. And really give it a try and try out some hand quilting on your next project. I think you'll really like how it turns out.

Share tips, start a discussion or ask other students a question. If you have a question for an expert, please click here.
Already a member? Sign in
No Responses to “Best Supplies for Learning How to Hand Quilt”