I discovered mug rugs a couple of years ago as part of a quilt exchange. What a wonderful idea to make little quilts that can be completed quickly and can use up those scraps of fabric I have been storing in bins! I immediately started coming up with designs.
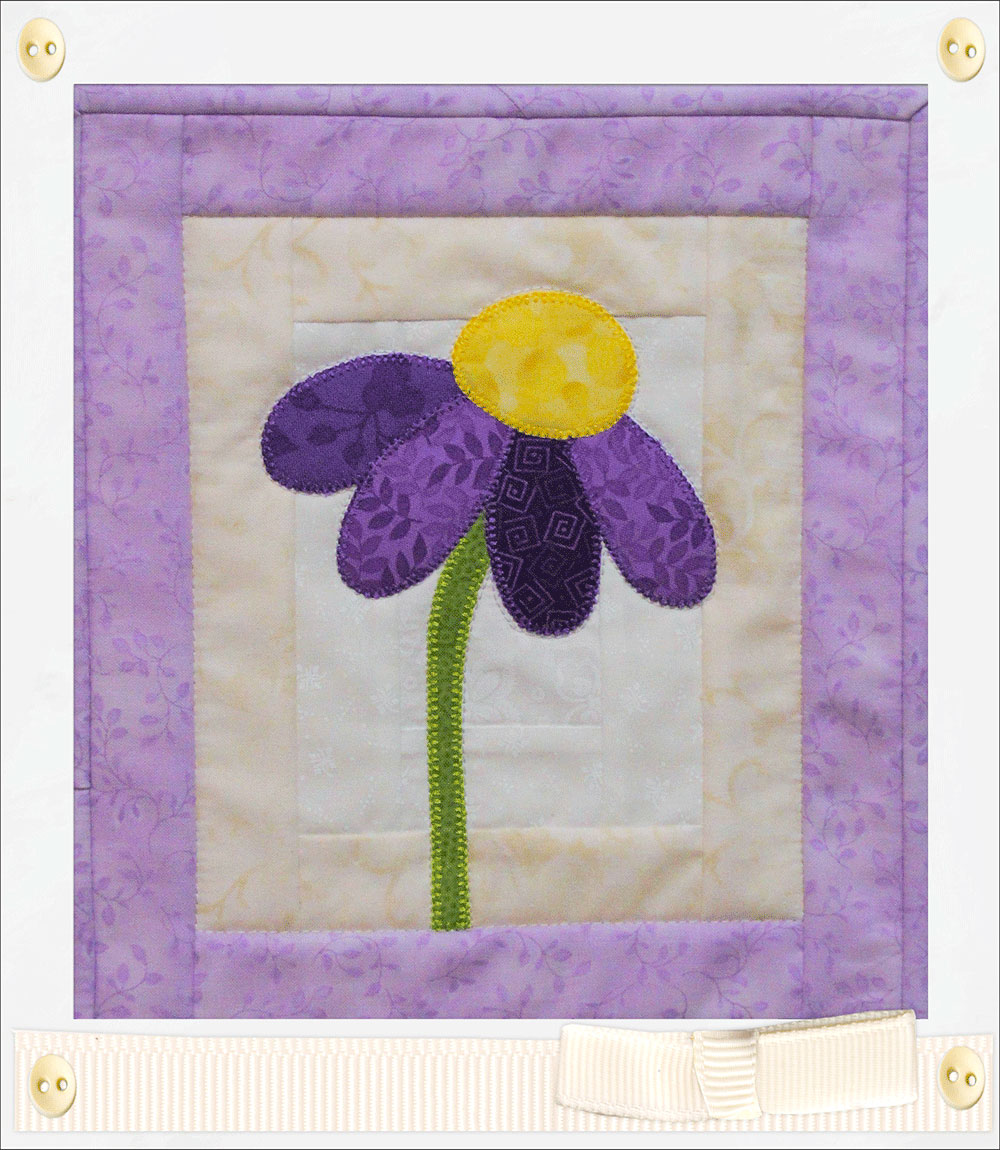
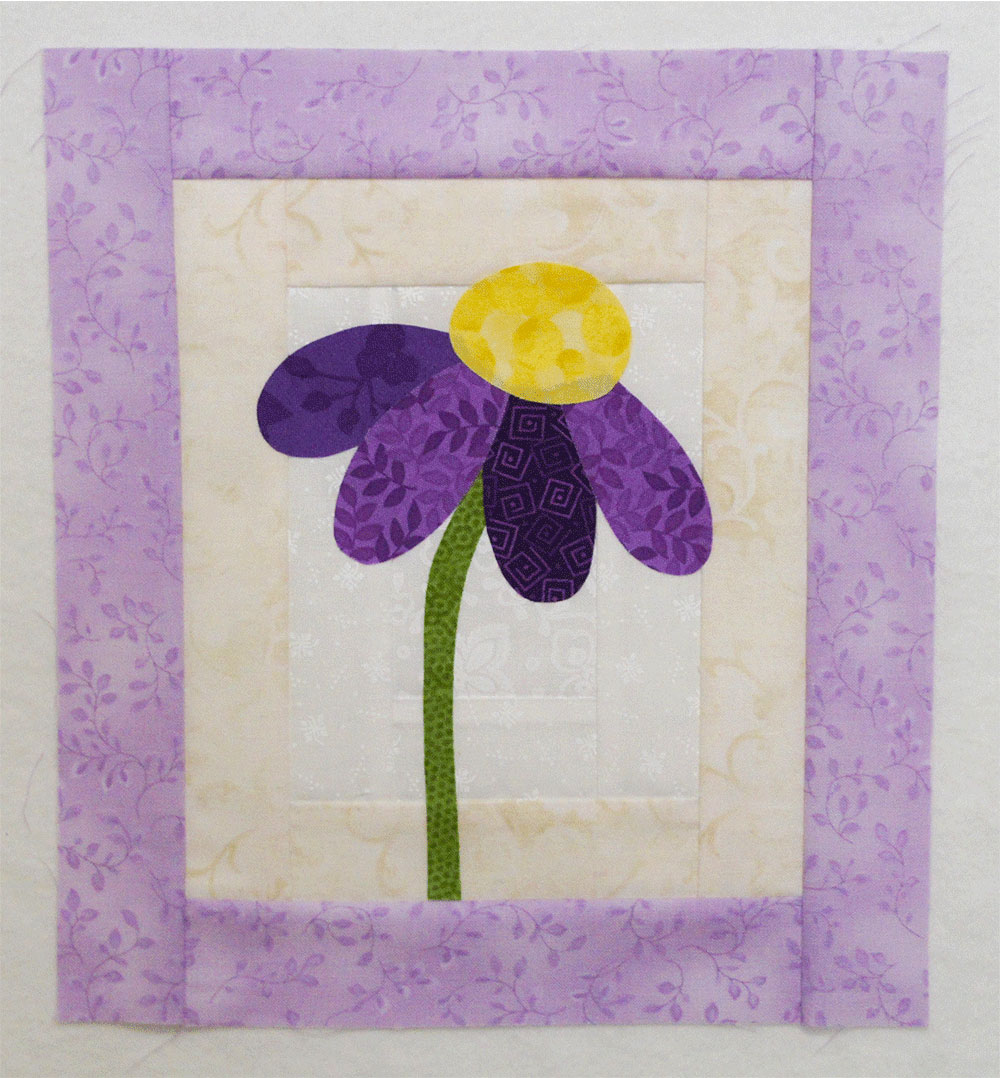
This Purple Coneflower Mug Rug is great for beginners. The pieced background is based on the Courthouse Steps block which is one of the easiest to learn. The appliqué pieces are large enough to have gentle curves making them perfect for those who want to try fusible appliqué for the first time.
A free PDF download of this pattern is available on my website, Tuning My Heart. Refer to this for a supply list, yardages, cutting list, and full size pattern pieces. Download it here!
Piecing the Background Block
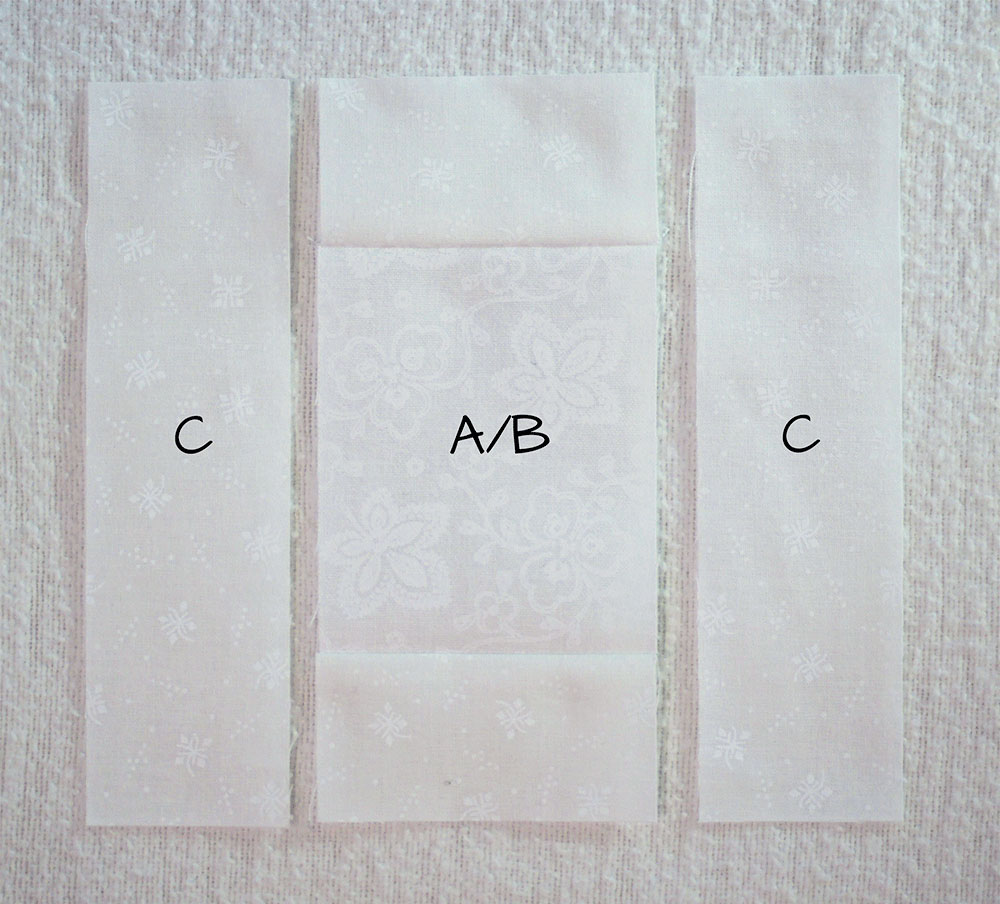
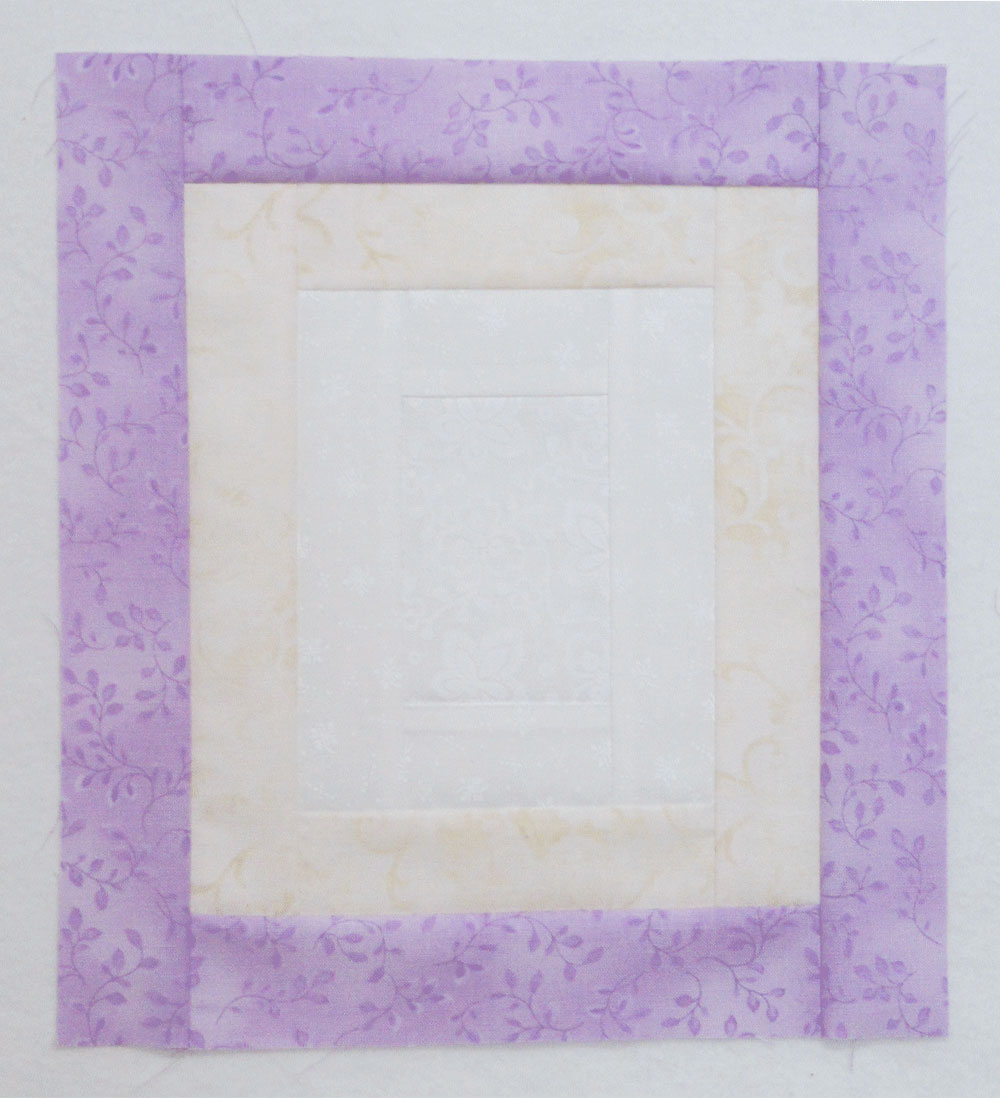
We begin by sewing the background together. This is the layout for putting the block together once all the pieces are cut.
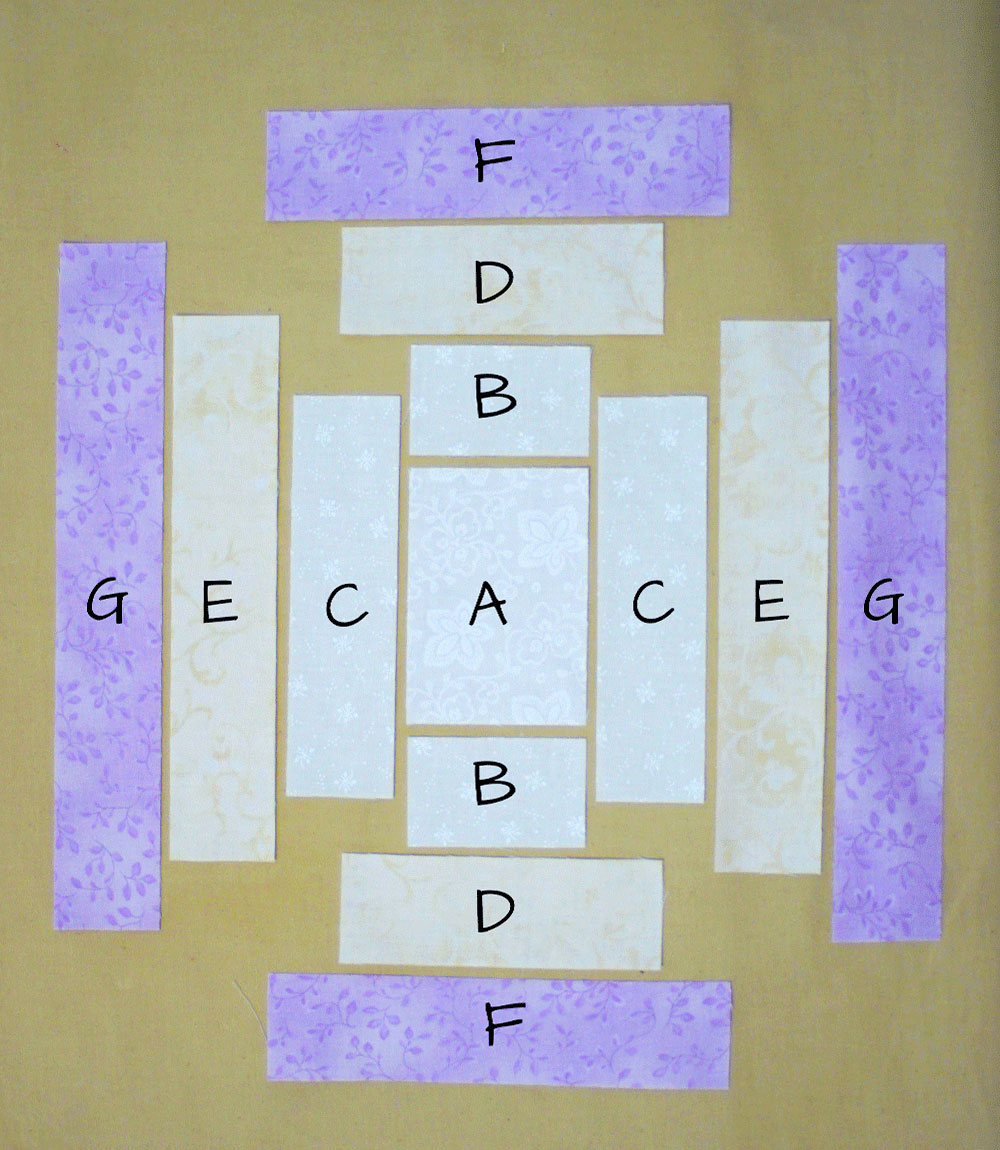
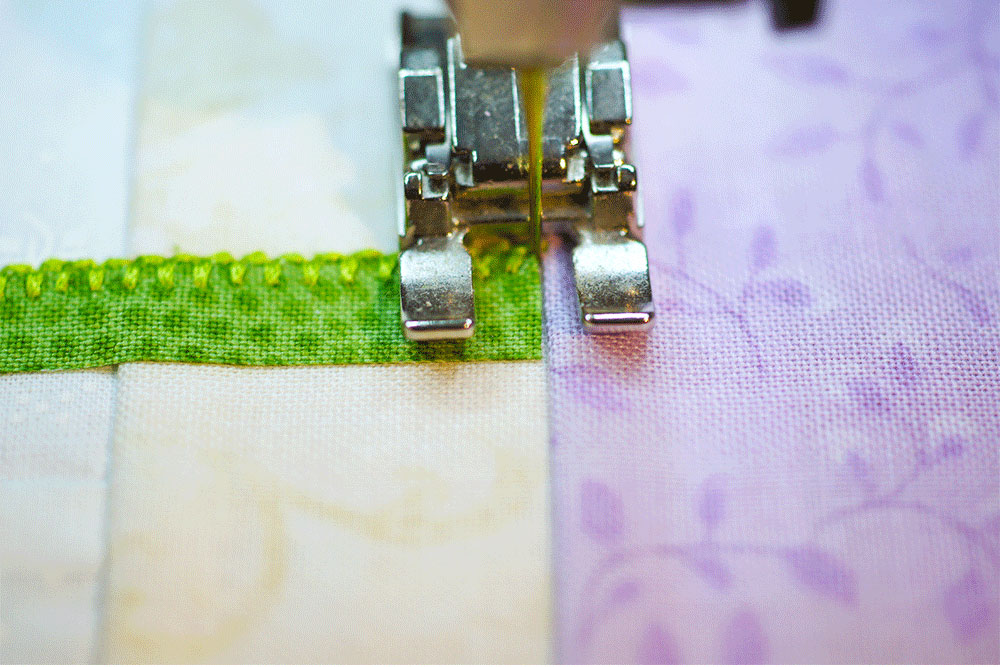
To make this block we will start from the center and work our way out. First add the B pieces to the A rectangle.
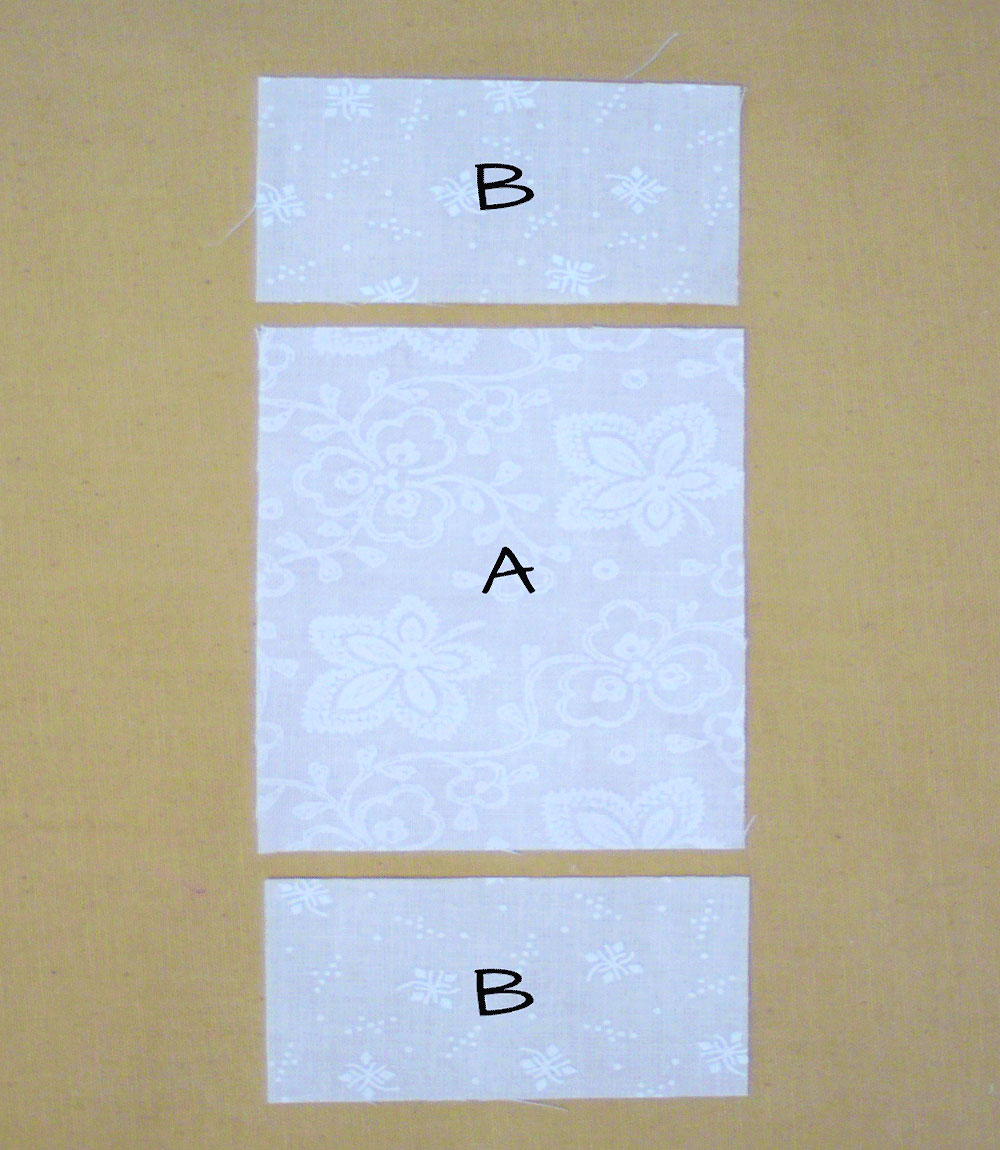
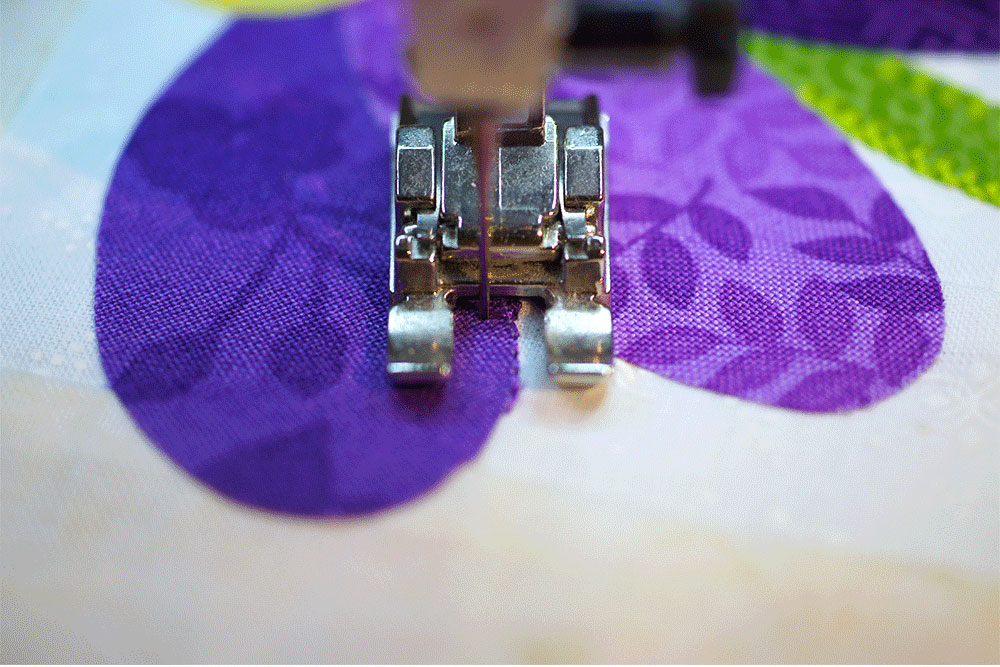
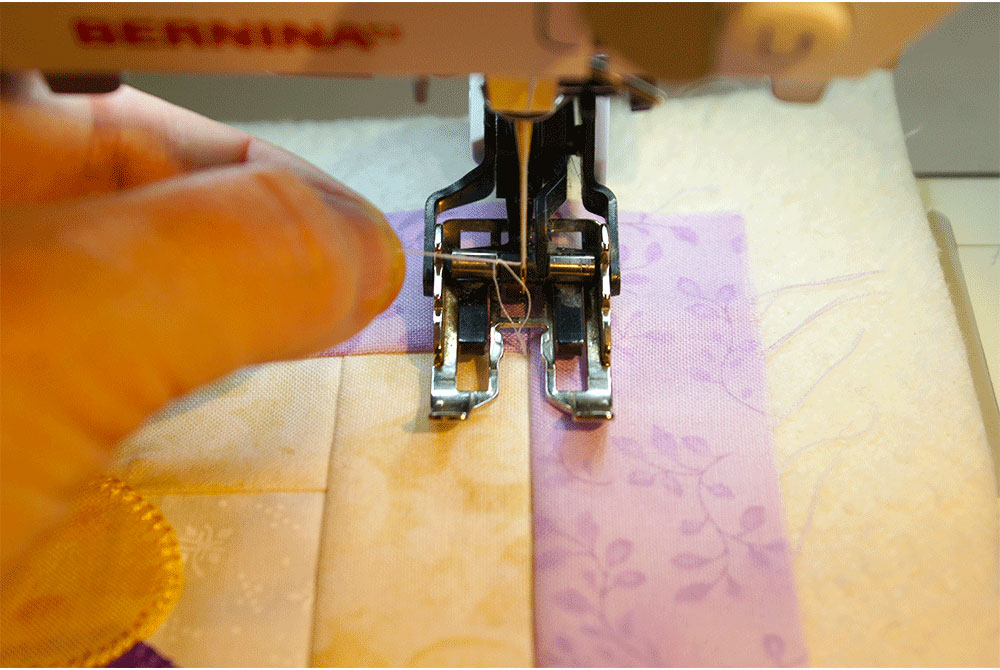
We will be using a 1/4 inch seam for this block and a stitch length set to 2.1 or 12 stitches to the inch. With right sides together, place a B on the short side of the A rectangle.
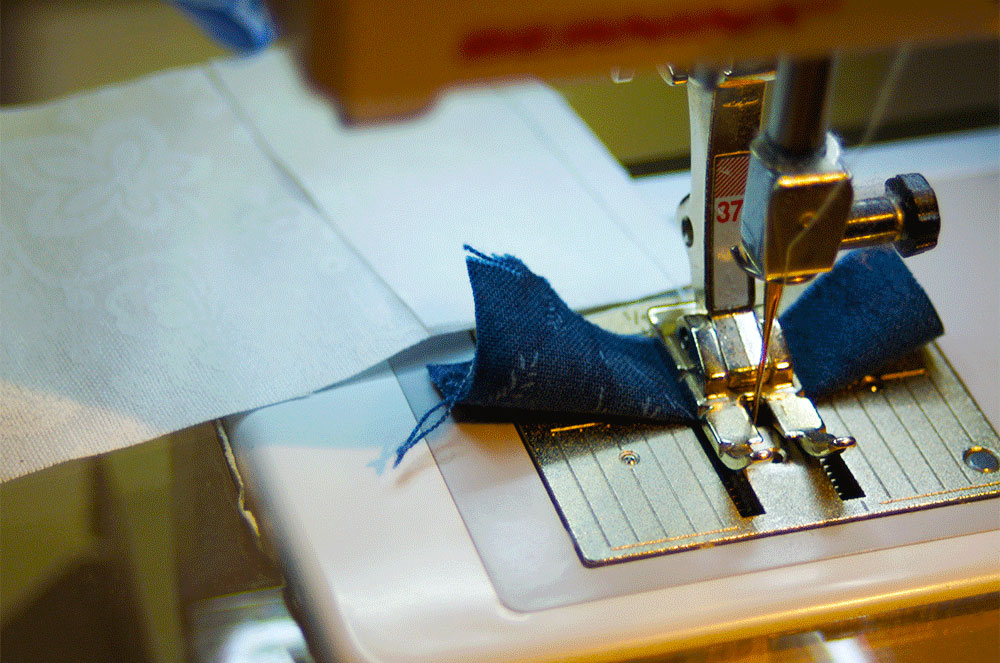
I always start with a scrap piece of fabric (called a leader). With my needle in the down position I place the pieces I want to sew together right up against the needle and then start sewing.
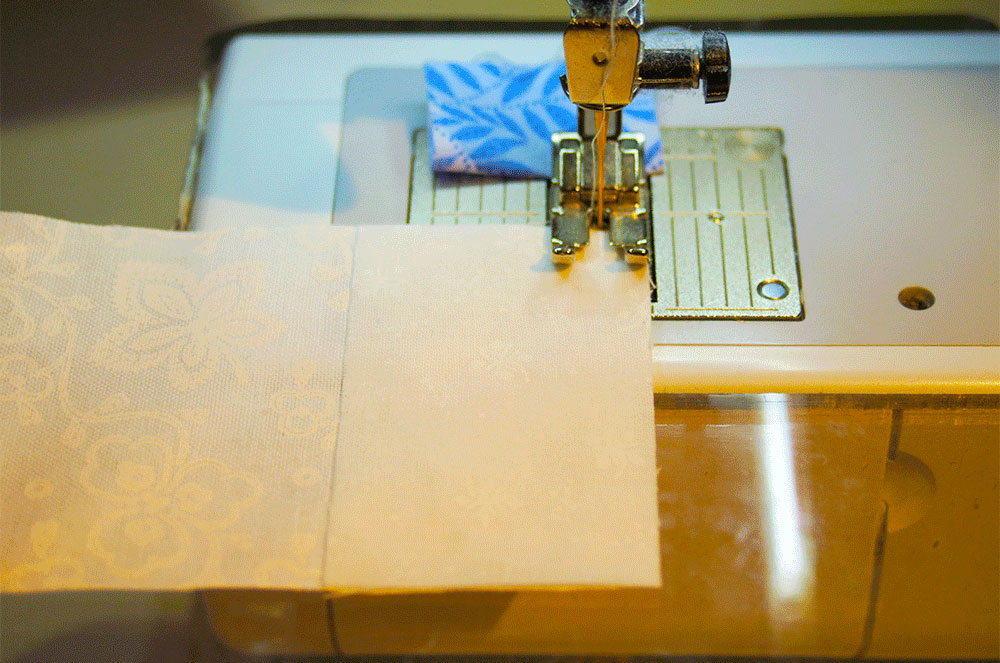
When I come the end of the unit I sew right off of it, take 3 to 4 stitches, and use another scrap of fabric to finish (called the ender). Starting and stopping with these little scraps has solved my problem of having the beginning stitches of my piece coming out messy and does away with the long threads that need clipping too.
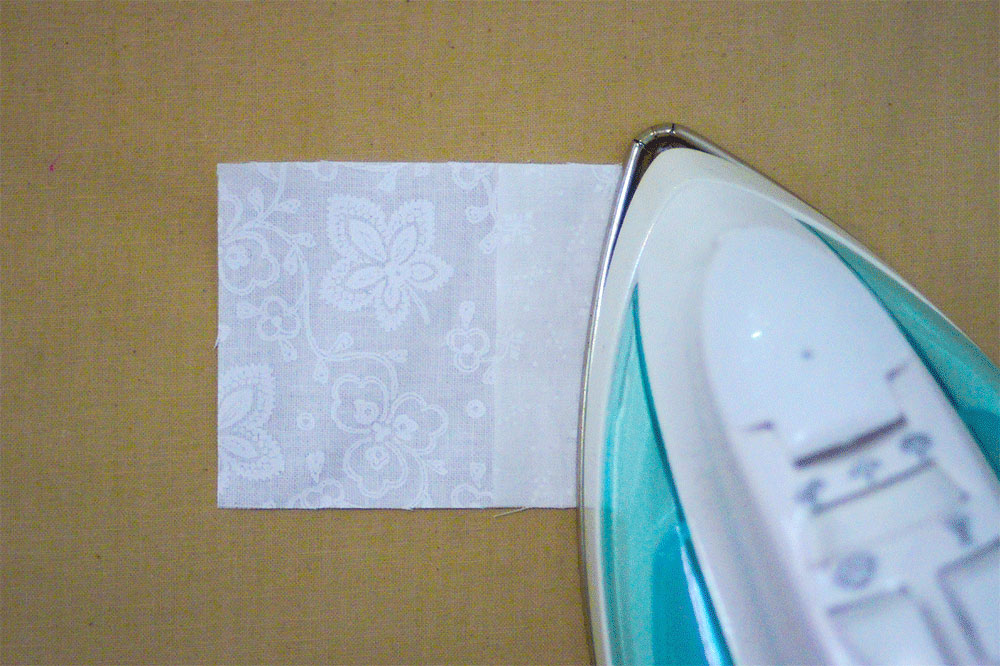
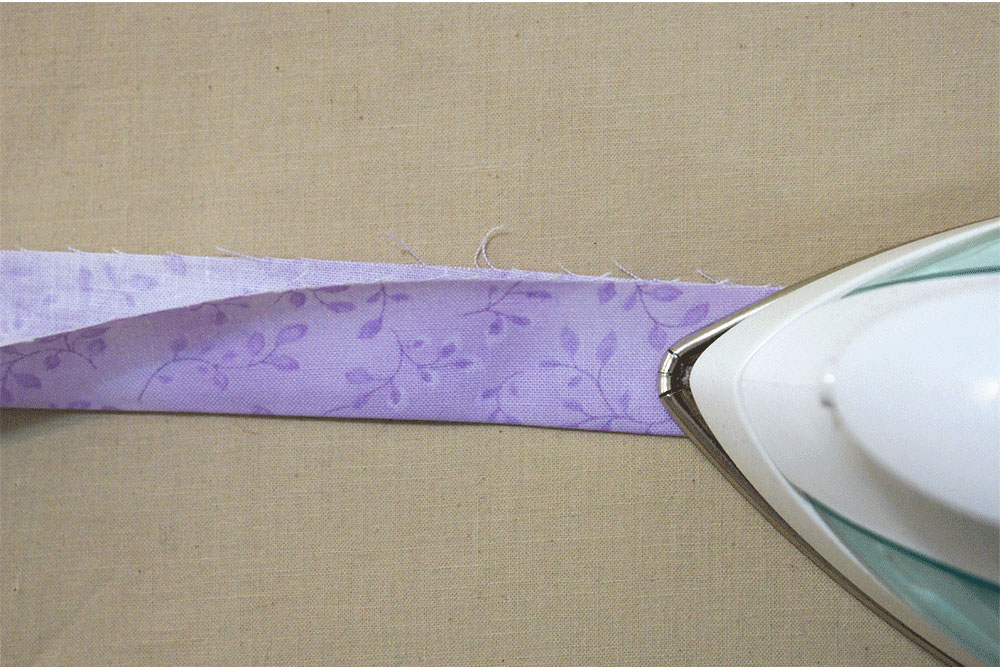
If you are a first time quilter you might not know what we mean when you hear us say “setting your seams” or “press your block.” Ironing is what we do to get wrinkles out of our clothes – at least I hear that is what people do – it is a back and forth motion. Pressing on the other hand is a setting and lifting of the iron to flatten seams. In this photo I am setting the seam the direction I want it to go by setting my hot iron on top of the unit I just sewed.
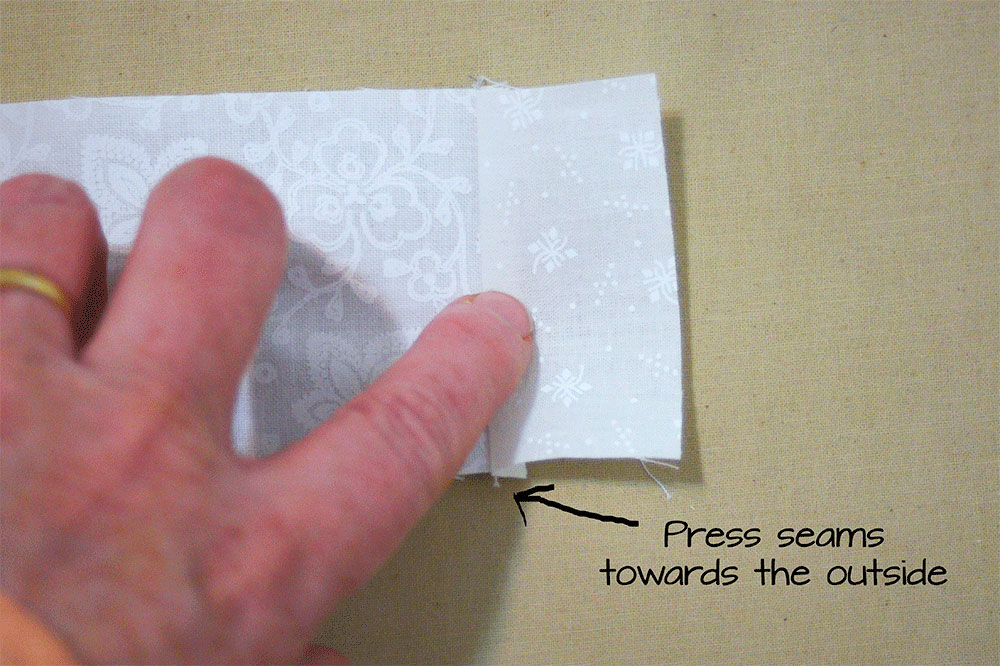
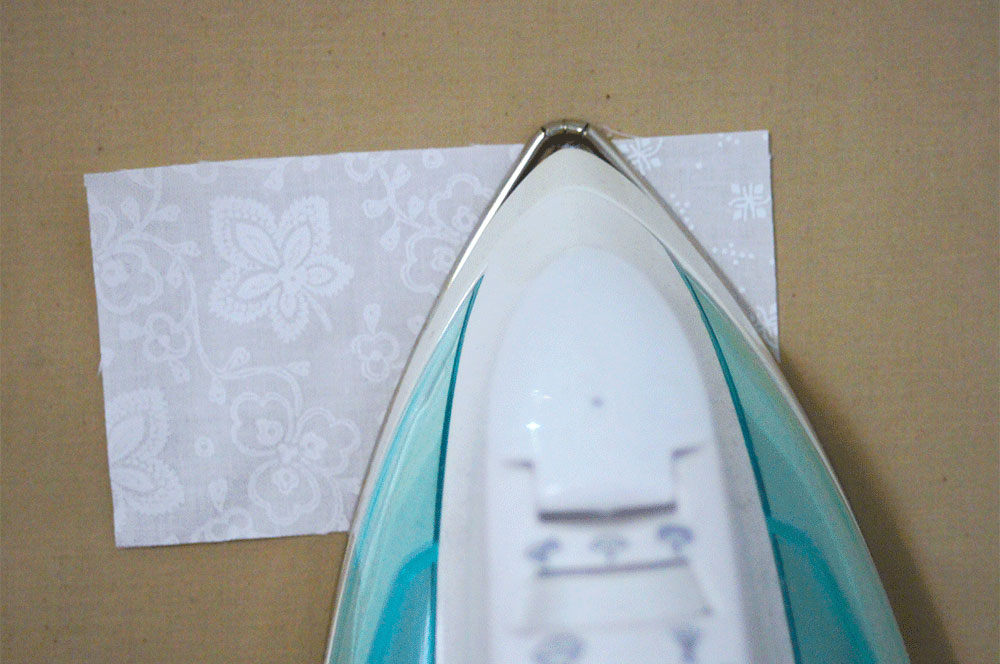
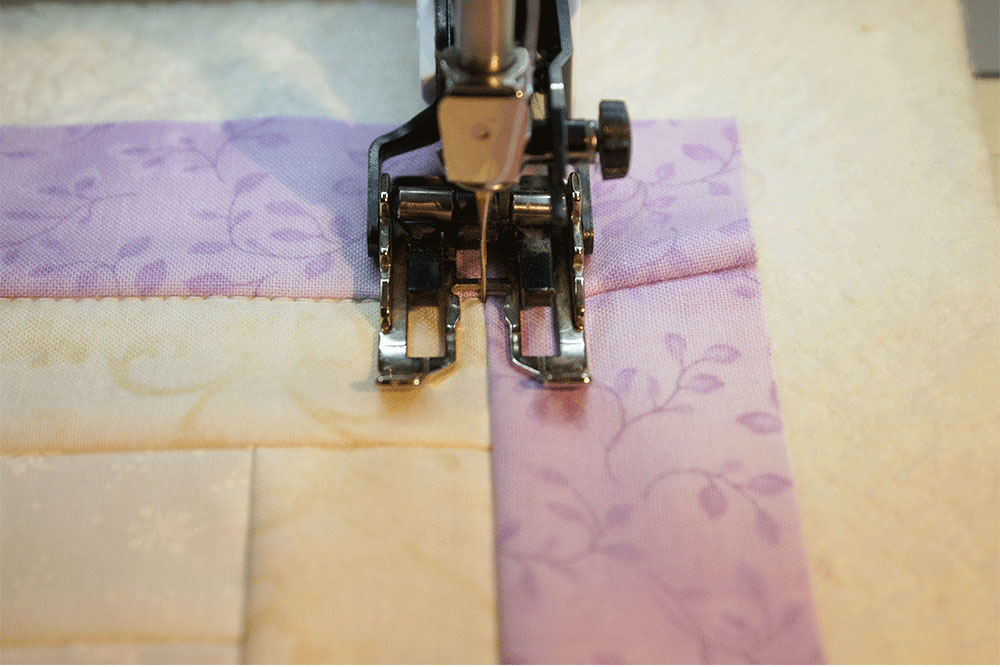
Next I open the piece up and set my iron down over the seam. All of the seams for the background are pressed towards the outside of the block.
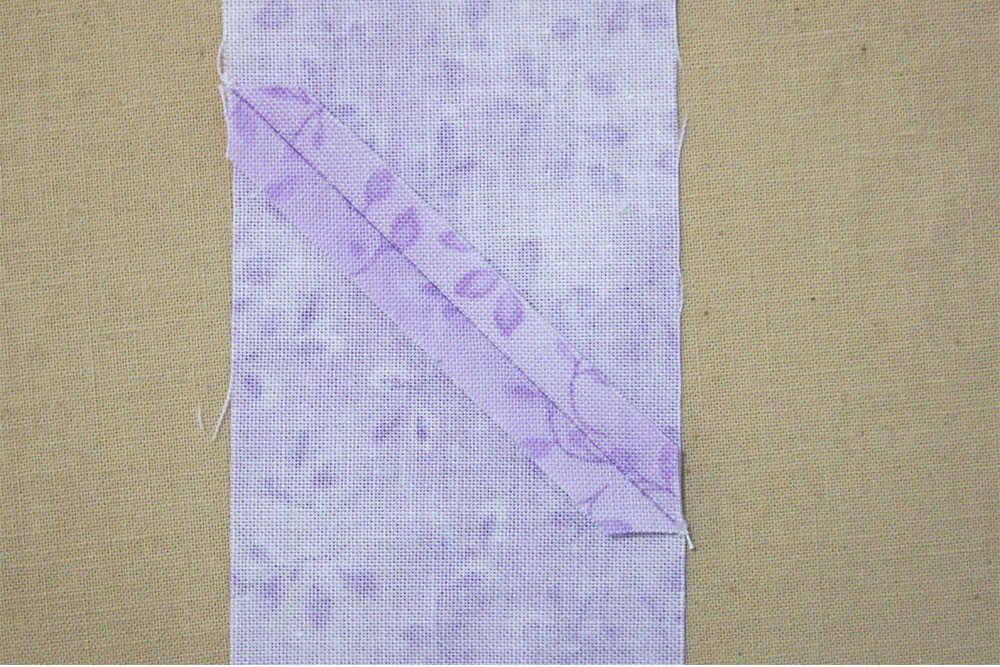
Now it’s time to add the C pieces to our block. This is done in the same way that we added the B pieces. As you sew and come to a seam, just slow down a bit until you have gone over it – this will help your stitches to be much straighter.
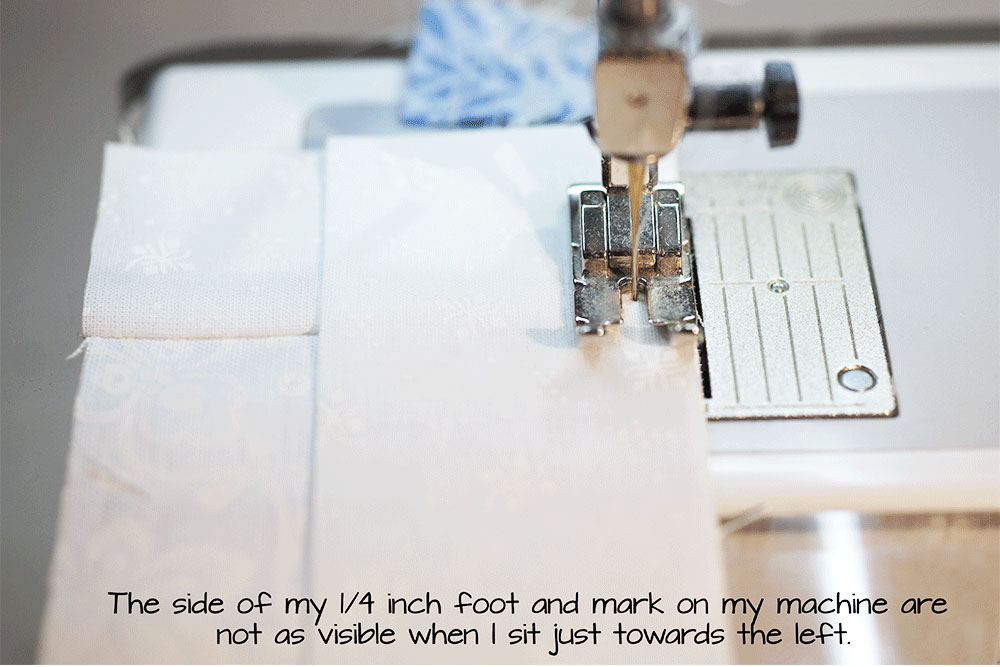
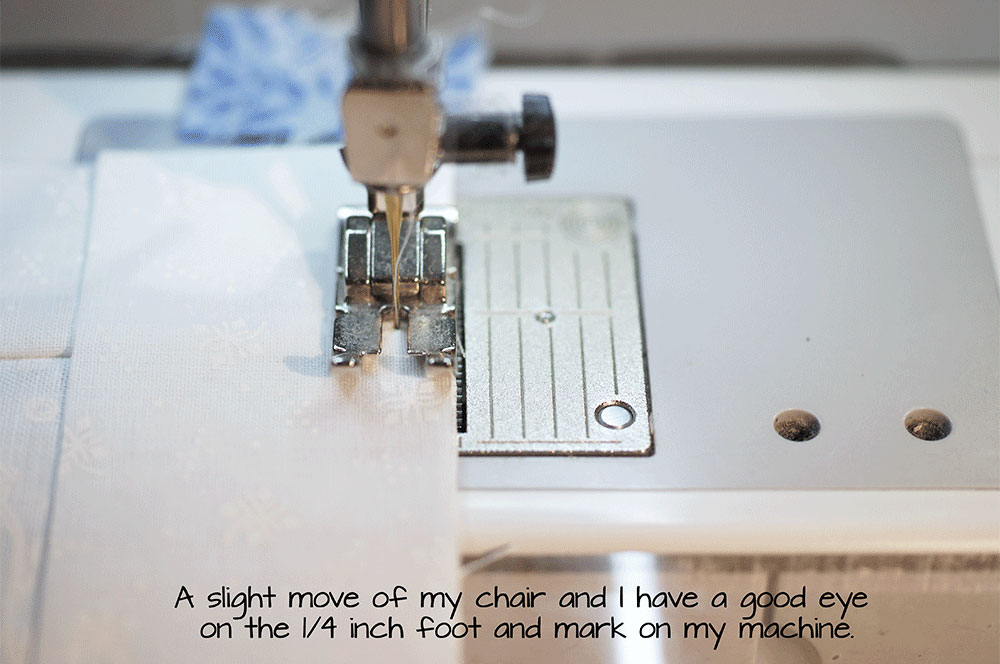
Another tip for piecing accurately is to sit straight on to your machine so you can see your pieces and make sure they are lined up with whatever mark you are using to achieve that 1/4 inch seam. I hope you can see from the photos how just a little move can affect my line of sight. When you realize that just a needle width can throw off your seam allowance, this little move makes a difference.
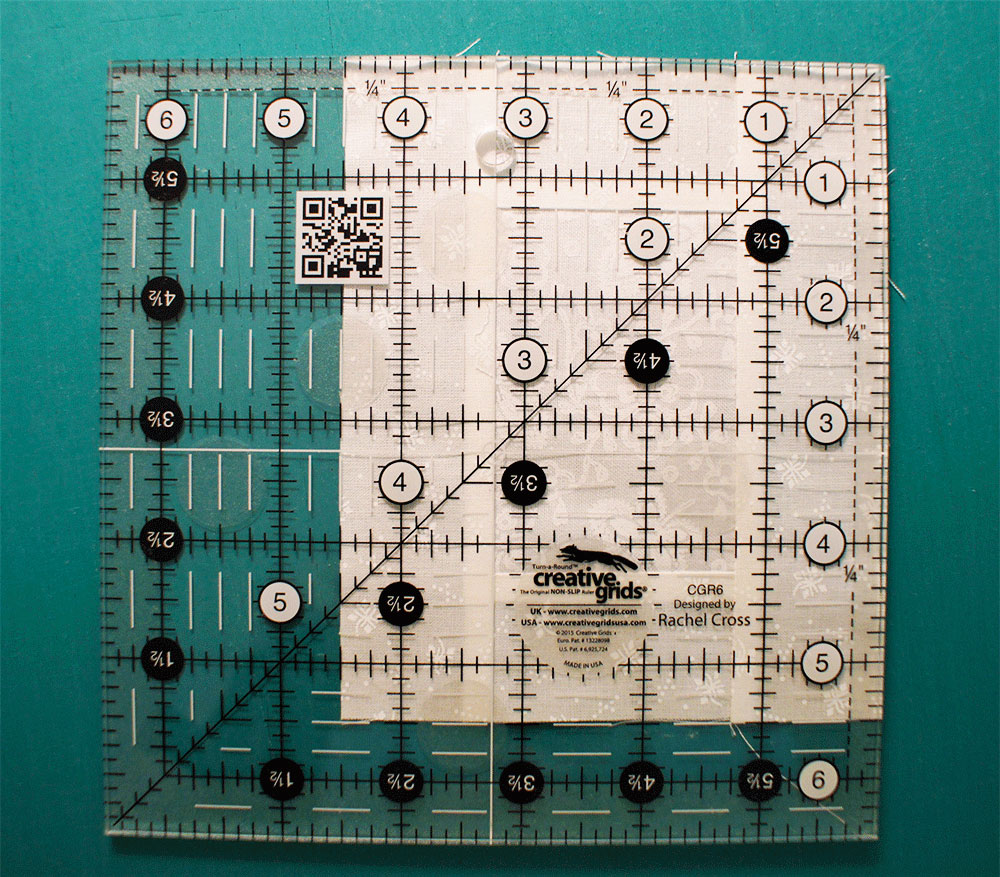
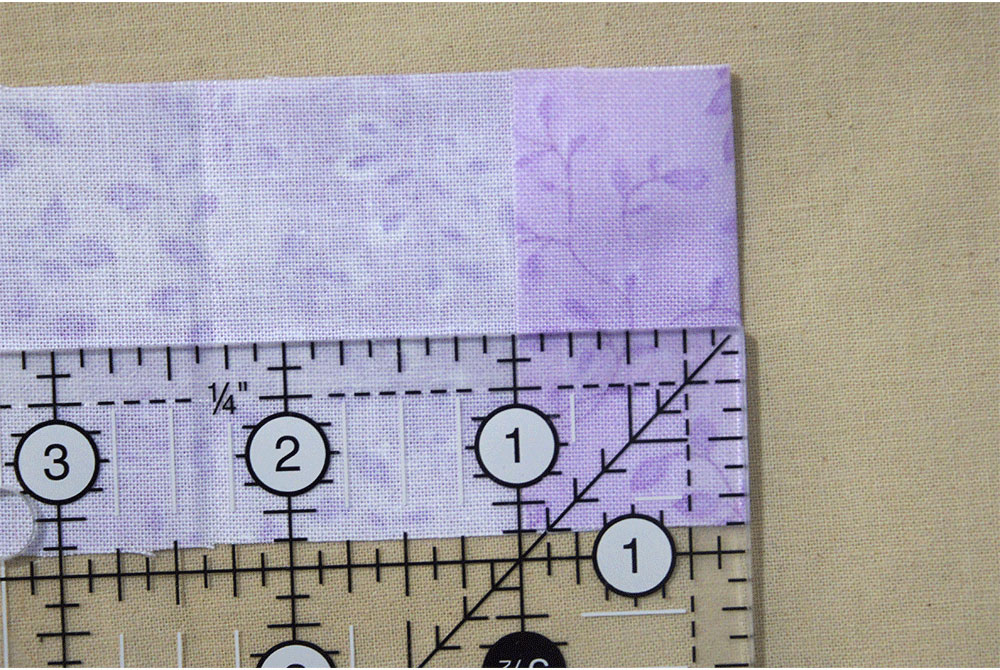
At this point our block should measure 4½ x 5½ inches. Trim away any excess.
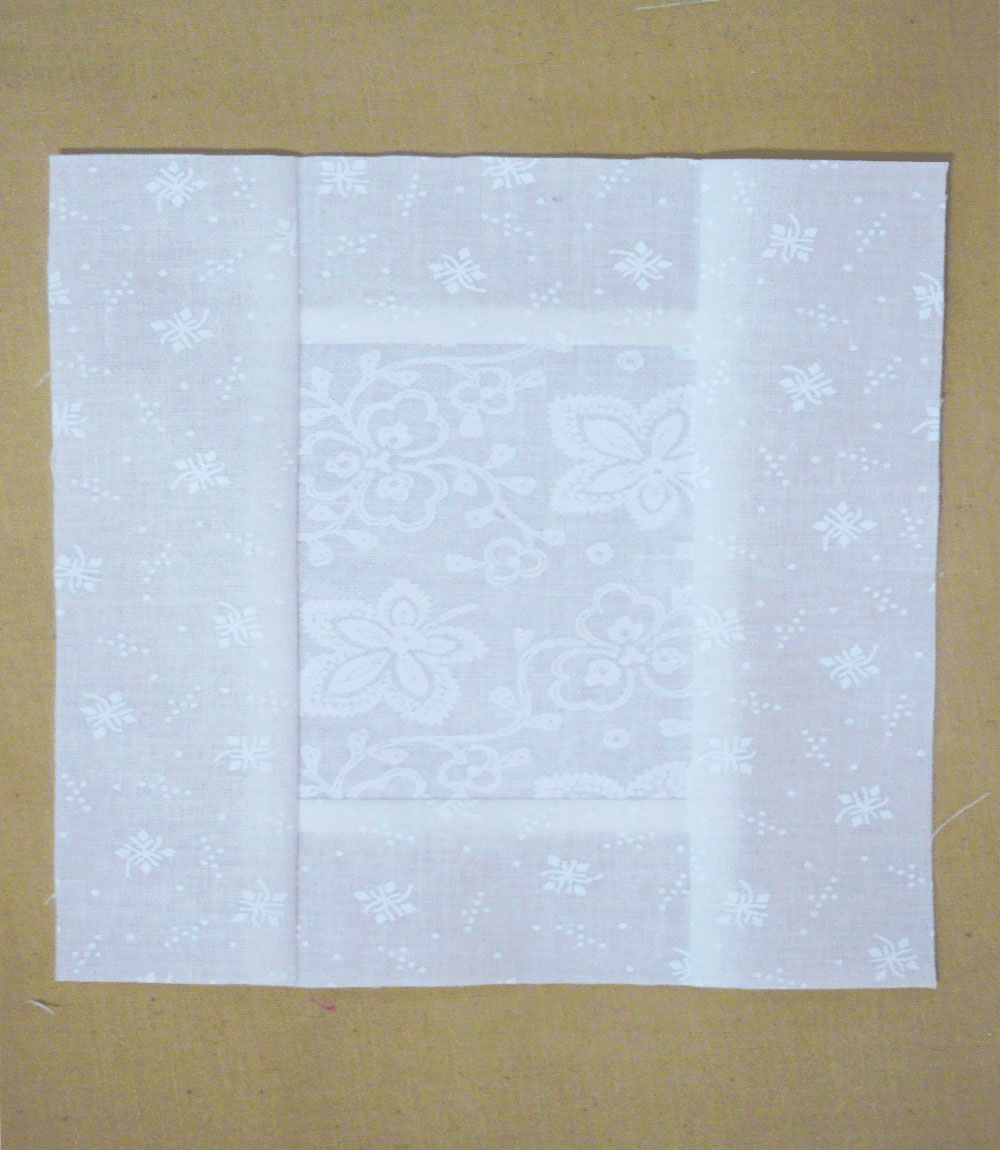
Now we add the D and E pieces to our block starting with the shorter D pieces. The block will measure 6½ x 7½ inches after being pressed.
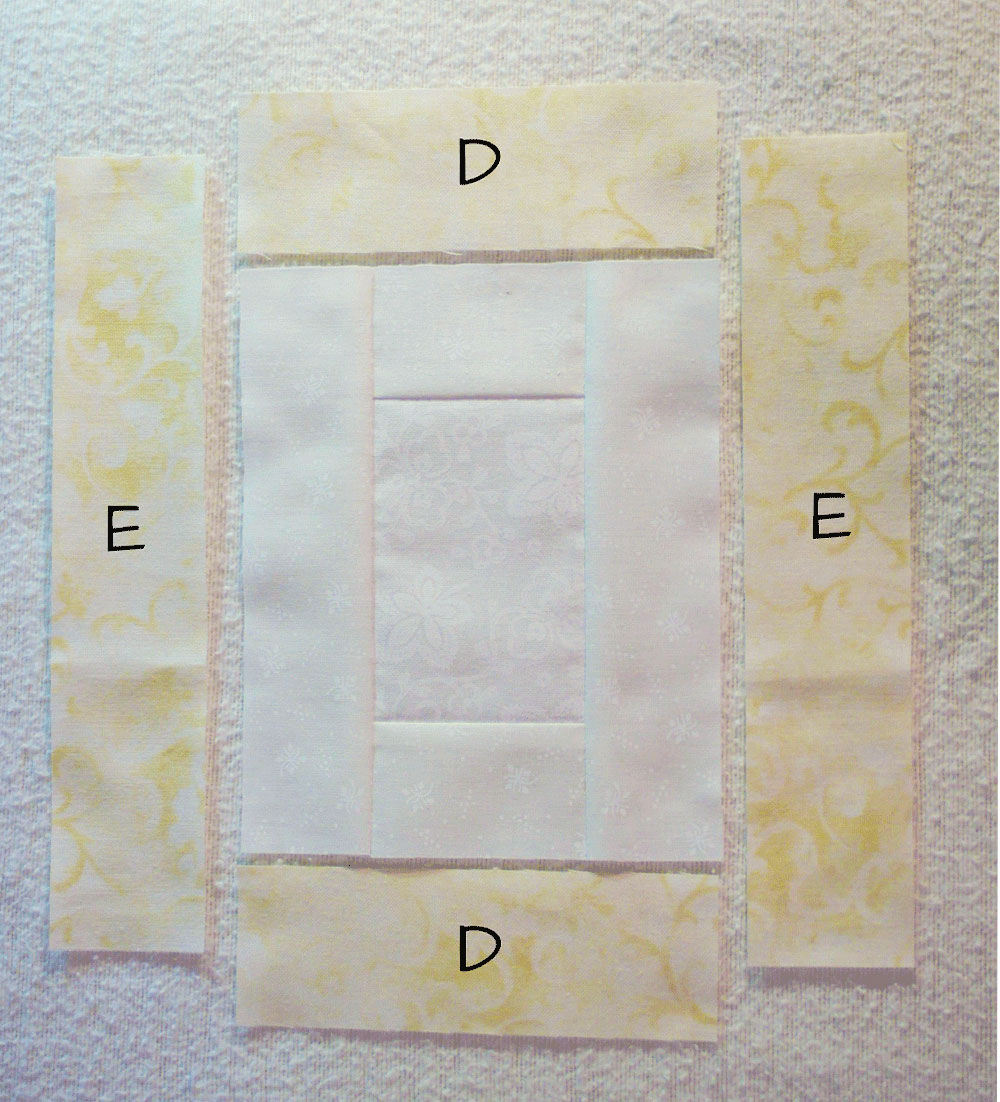
Finally we add the F and G pieces to our block.
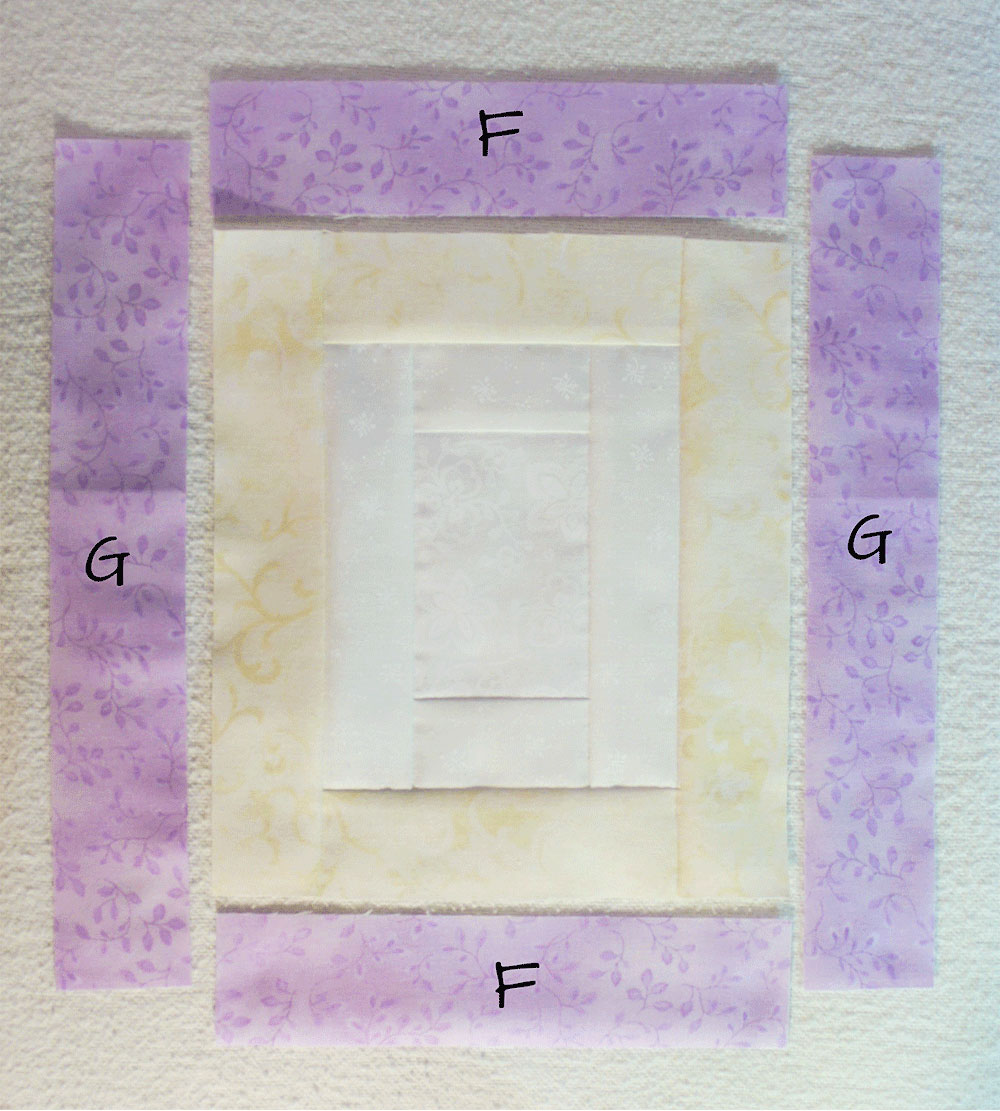
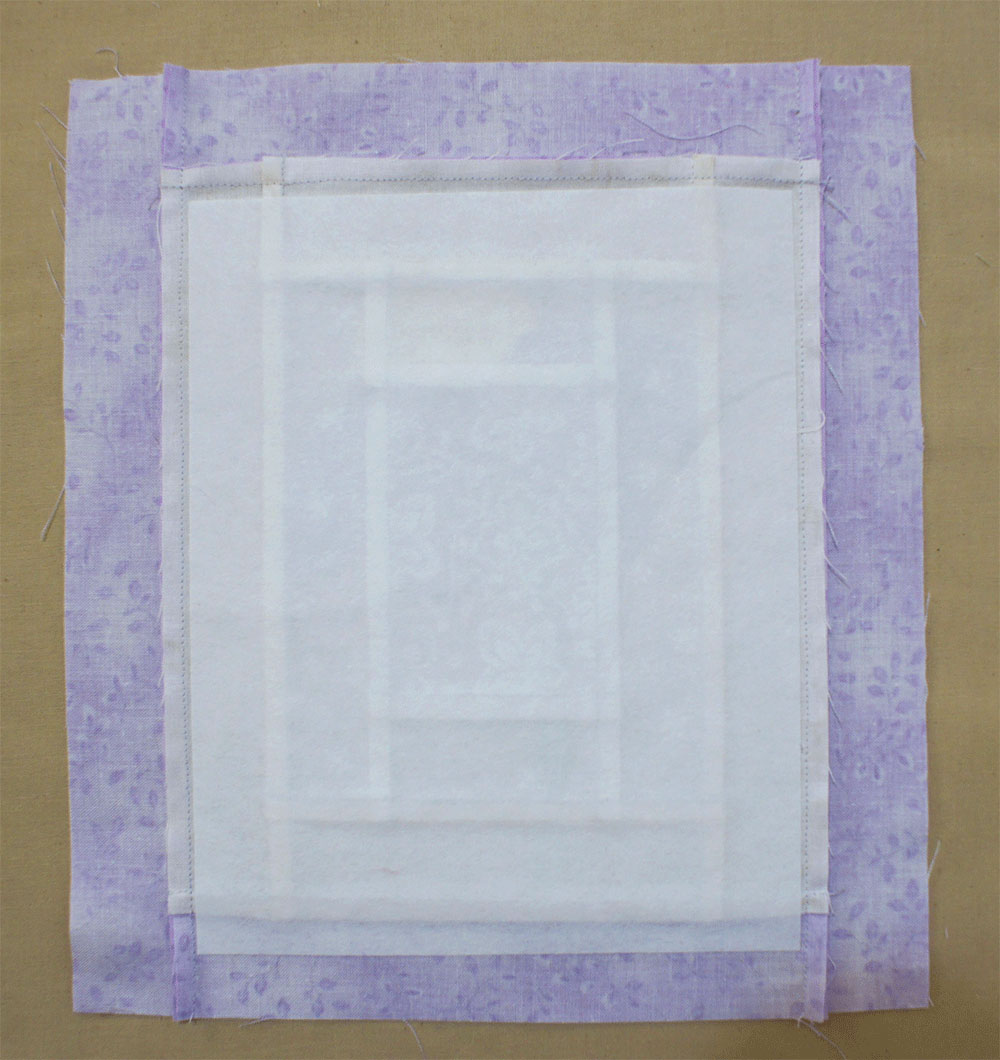
Our background is now ready for the appliqué. We are not worried about our final measurement at this step.
Appliquéing the Flower
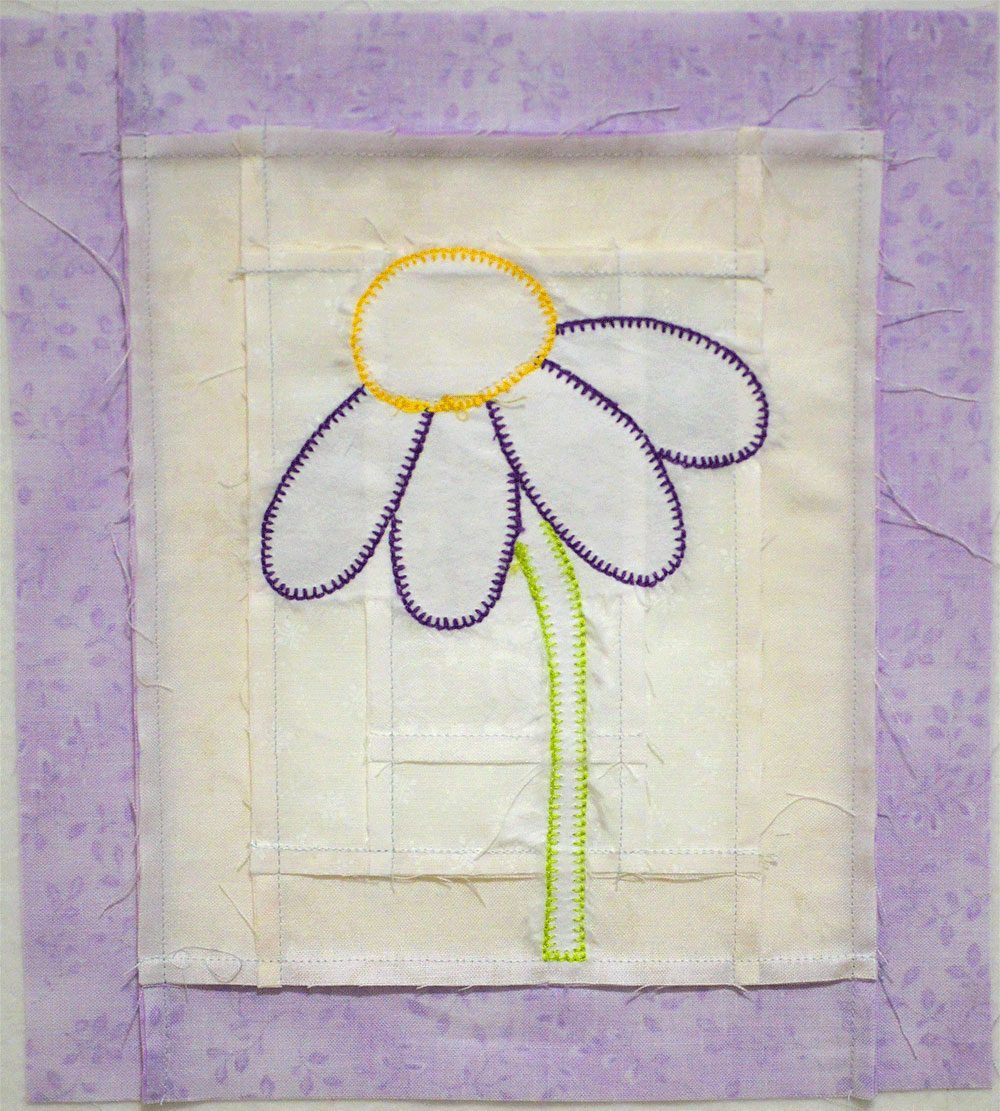
The first thing we need to do for the appliqué is to trace the pieces onto the paper backing of our fusible web. Be sure to include the number of the piece – this will help you know how to place them on the background. One of my favorites is Heat-N-Bond-Lite, but there are many good options out there. Just be sure you follow the directions that come with the one you are using as they vary a good bit.
I love to use the light box my family gave me a couple of years ago for projects like this. Before I had this nifty little helper I taped my pattern to a window for tracing.
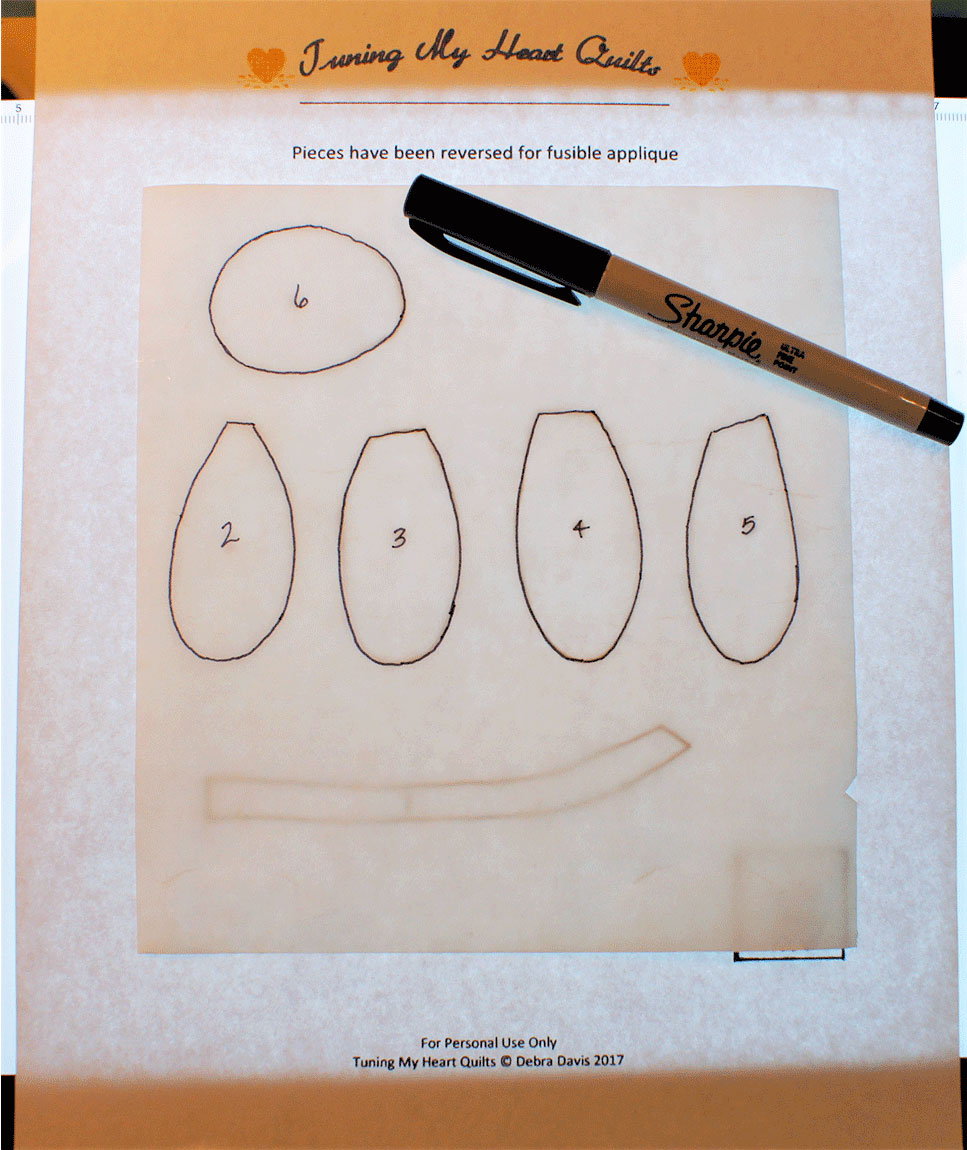
Cut the pattern pieces out about 1/4 inch from the line. Download the pattern pieces here.
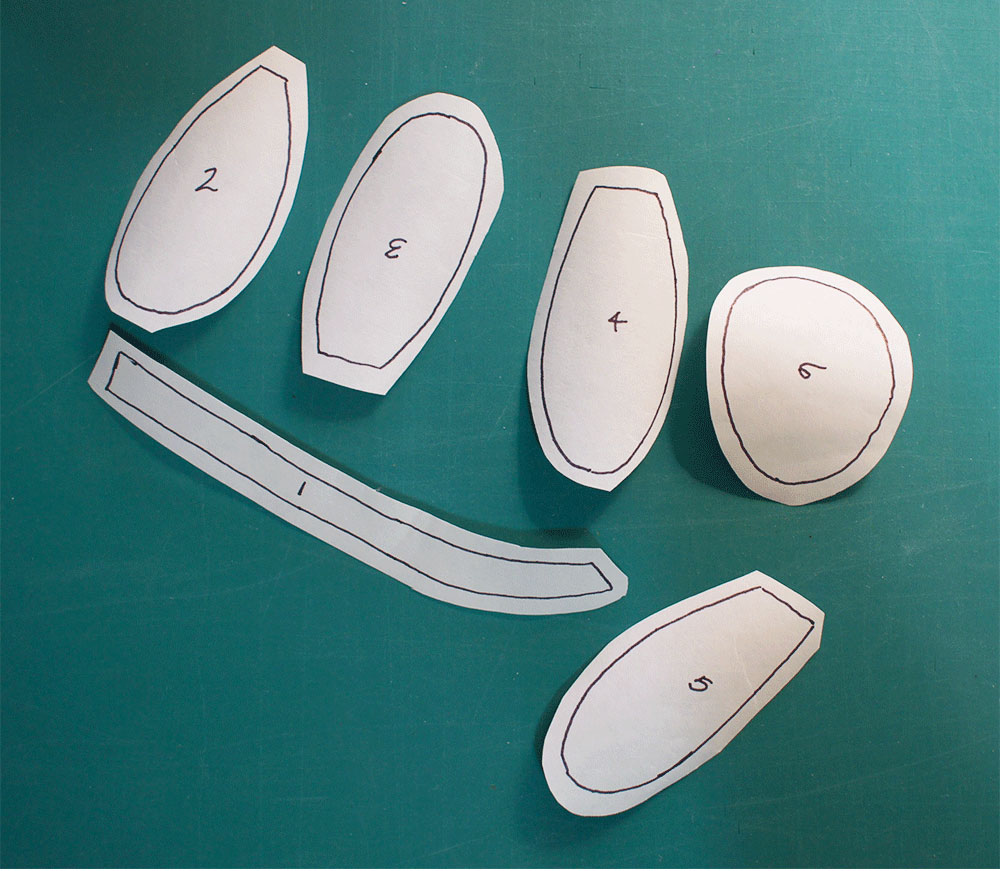
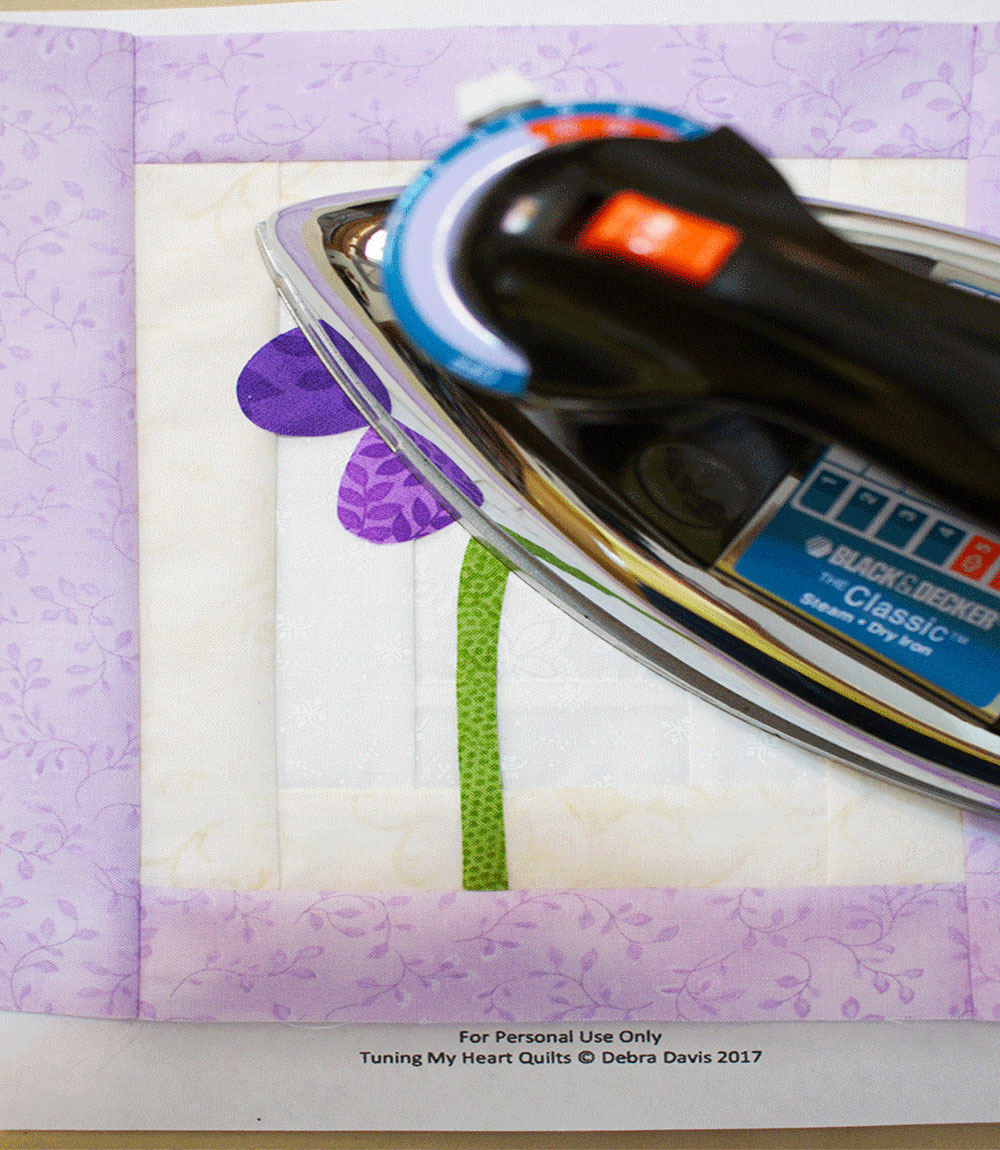
Following the manufacturer’s directions for the fusible you are using, iron the pattern pieces onto the wrong side of your fabric, let them cool, and then cut out on the lines.
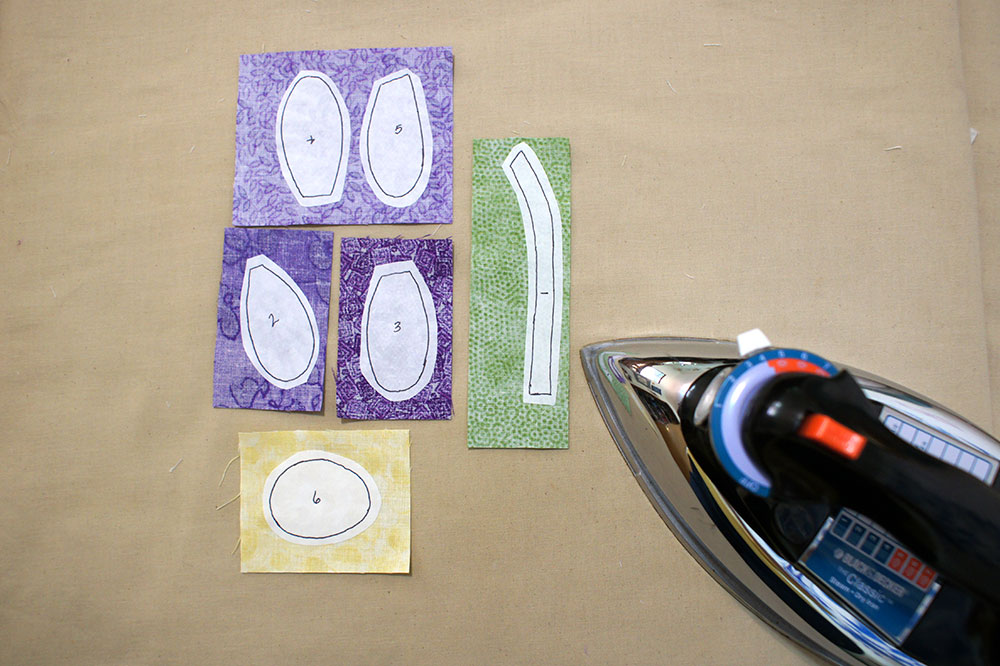

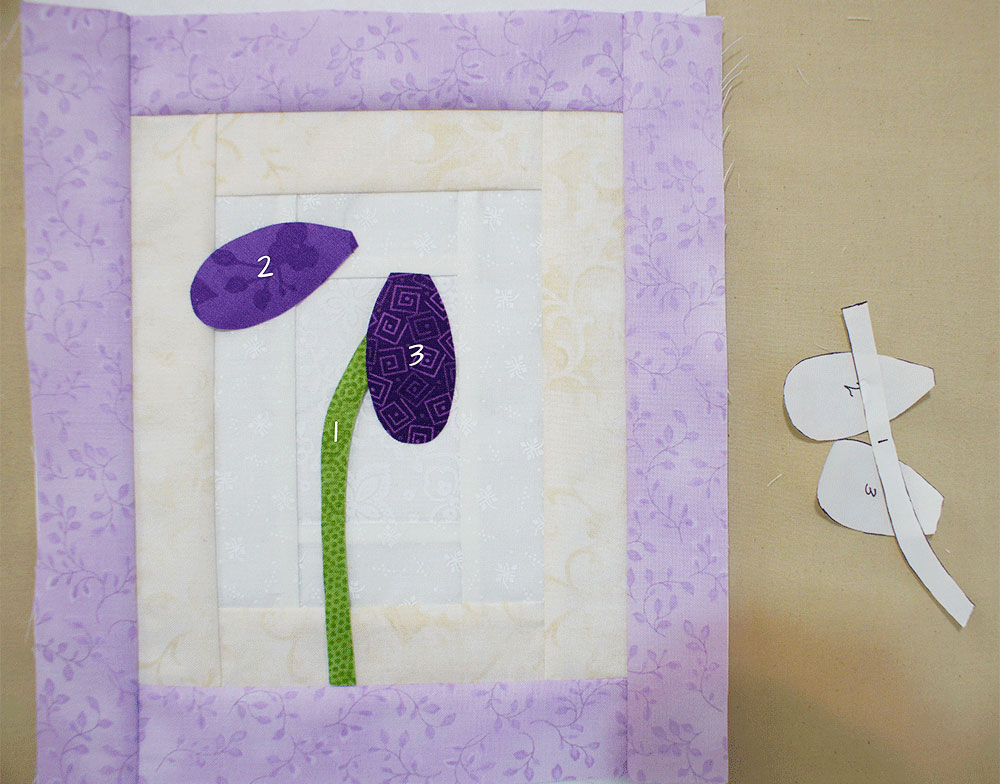
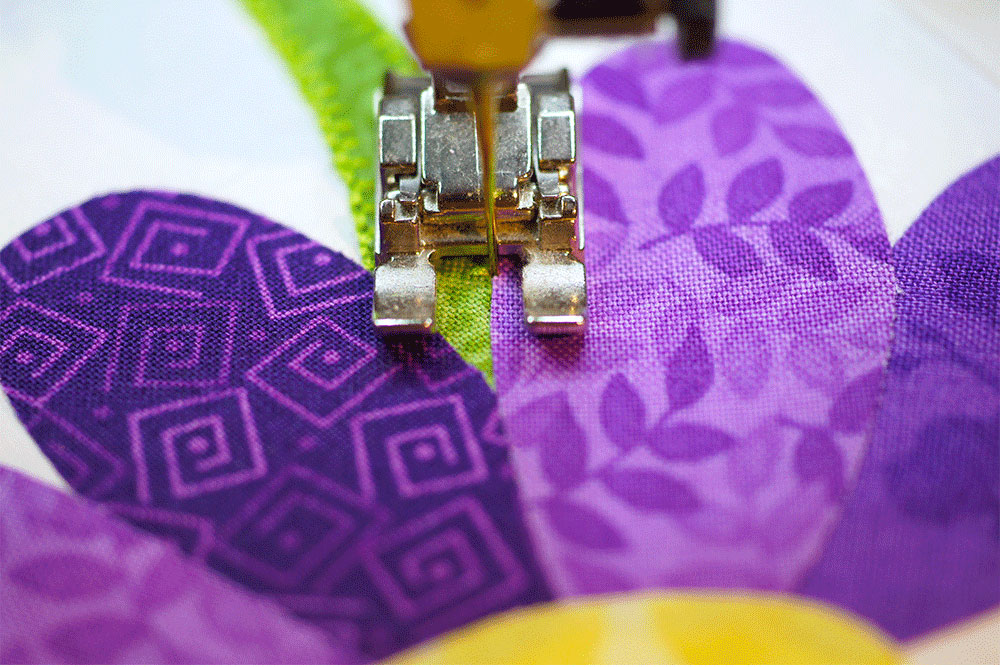
Carefully peel the paper off of the pattern pieces and place them on the background fabric starting with the piece marked number 1. Often you can slip the pattern under your fabric and see where the pieces go, or just put them in place wherever you like – this is your quilt after all.

Add pieces 2 and 3.
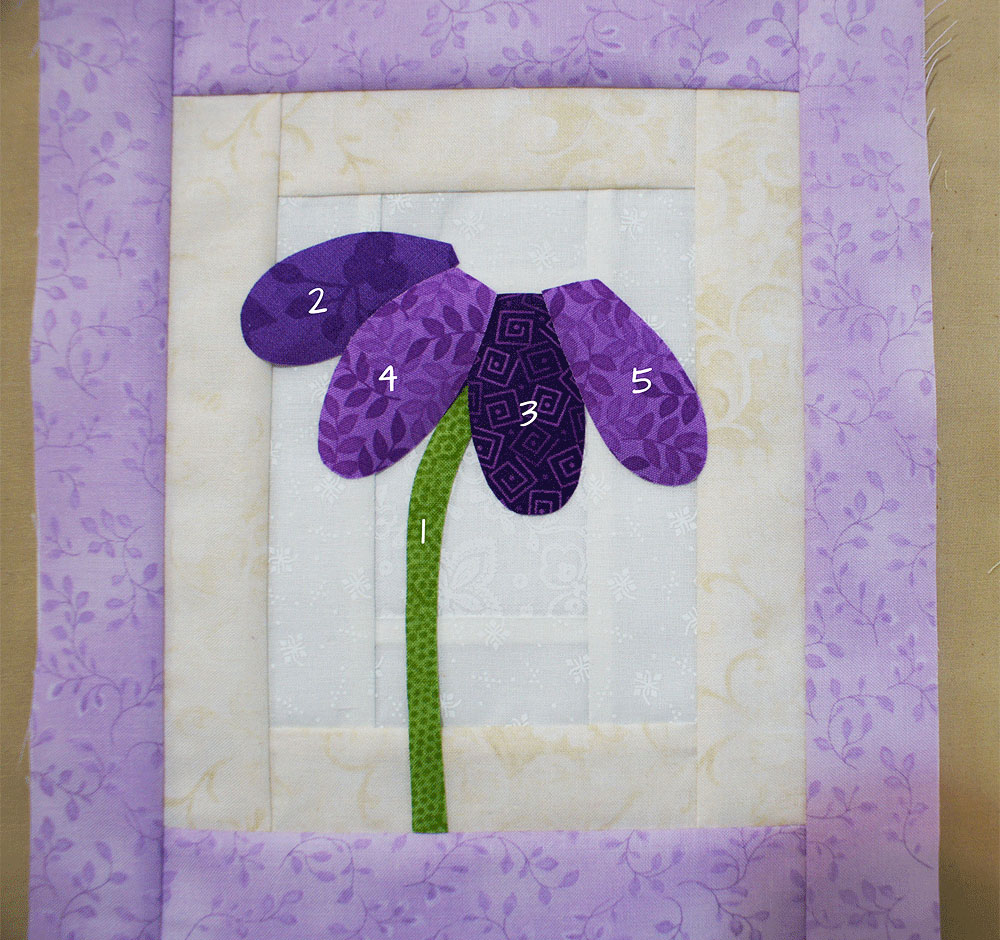
Add pieces 4 and 5.
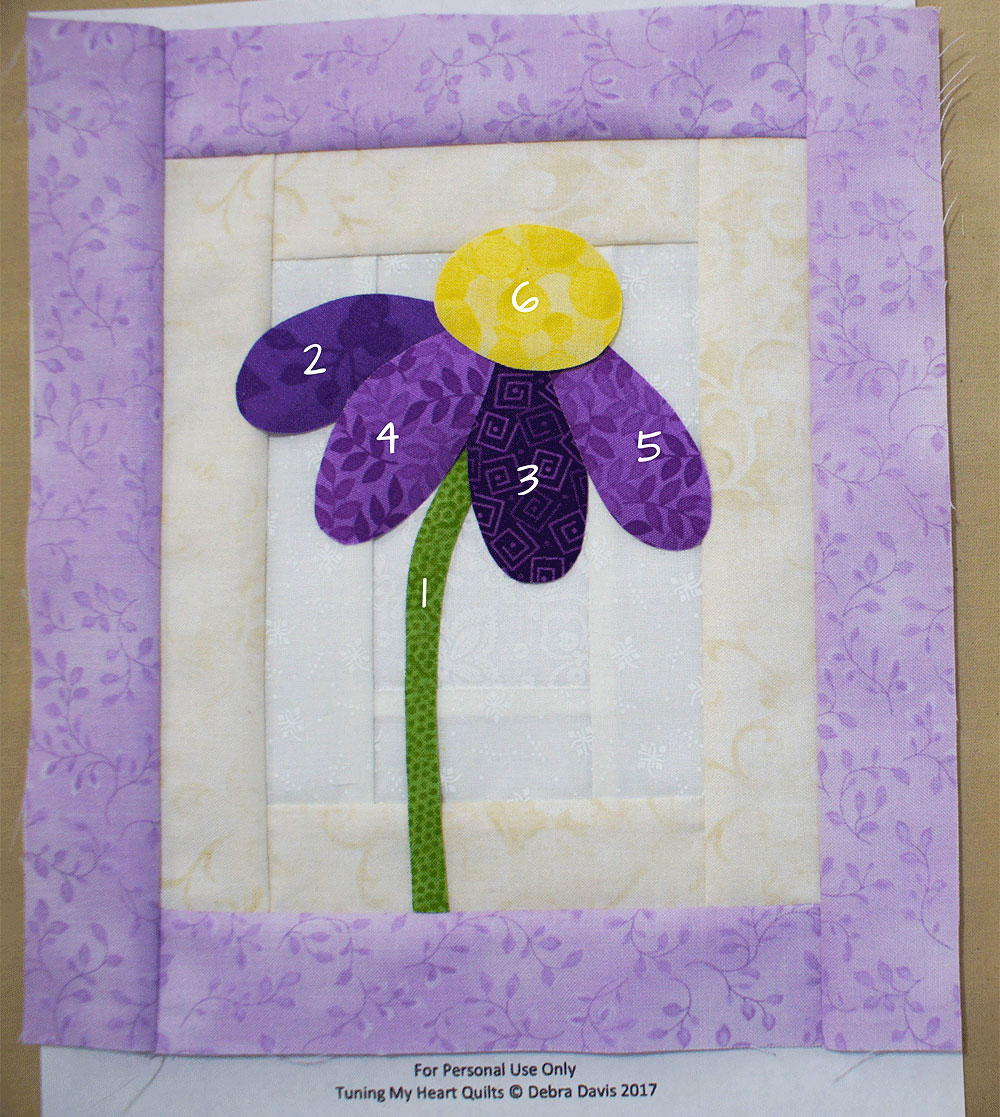
Add piece 6. Once all the pieces have been added, make sure you like the placement and fuse to the background block according to the directions on your fusible.
With the purple coneflower fused in place, add a piece of stabilizer to the back of the block.
Any lightweight tear-away or water soluble one for machine embroidery works well.
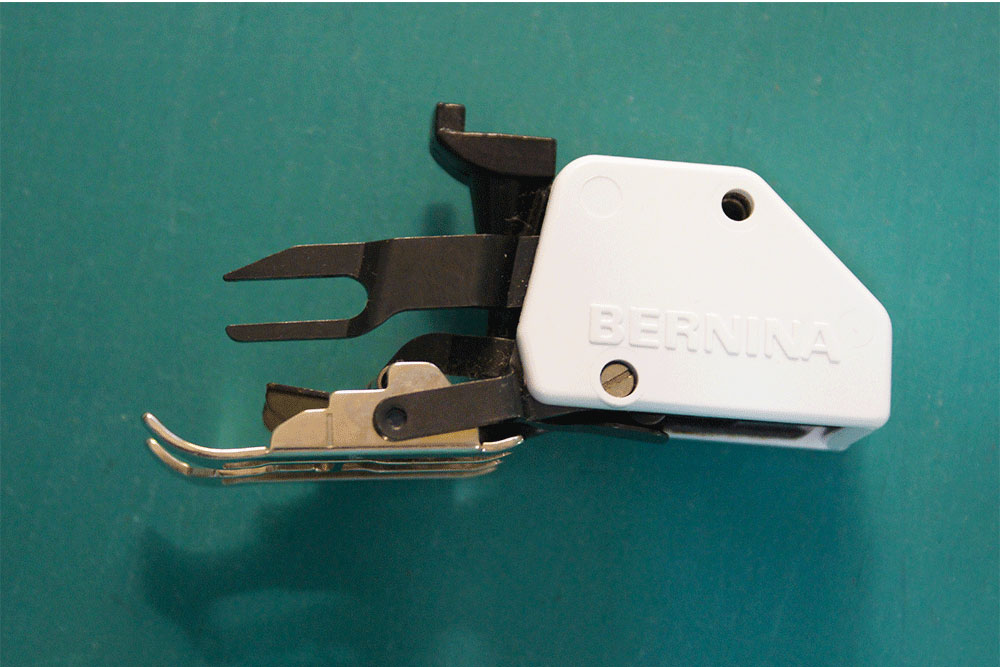
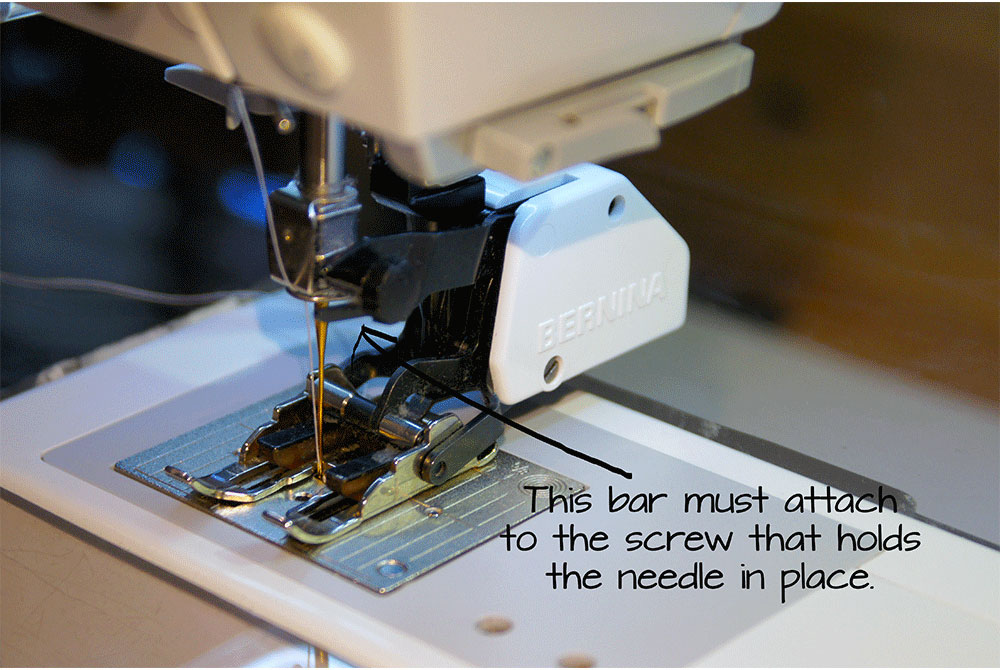
I have now gathered some thread that matches my appliqué pieces and an open toe presser foot for my sewing machine.

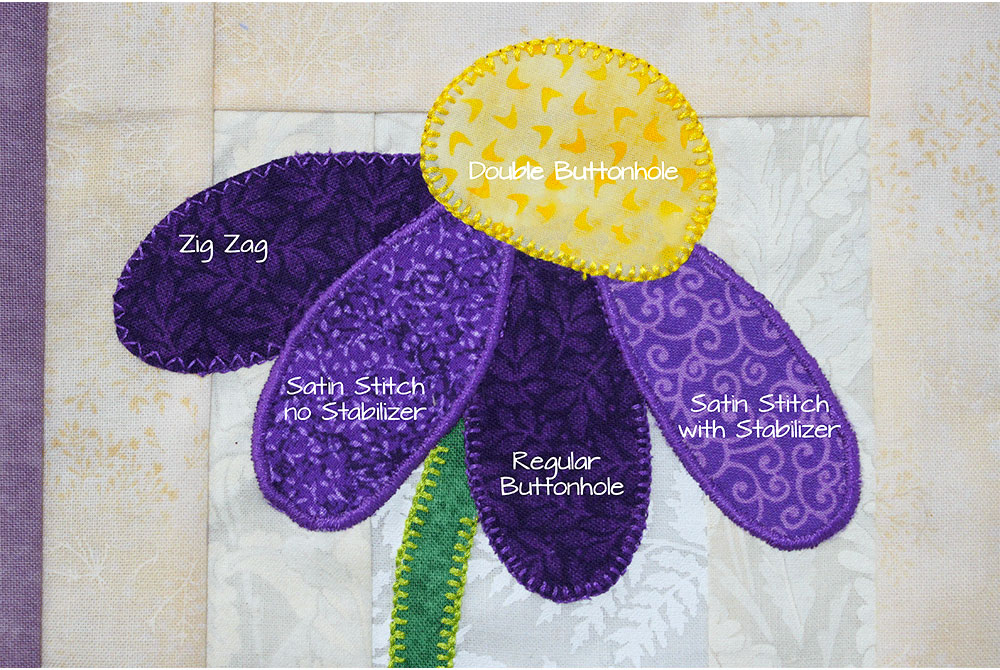
Before we begin I wanted to show you a sample I made using various stitches, pictured below. Depending on your machine you have all kinds of options; these are just the most frequently used.
I would also like to point out the difference you will see if you place a stabilizer on the back of the area to be appliquéd. It is most noticeable with the satin stitch. The one without stabilizer is not smooth, but bumpy. The stitches on the regular buttonhole are also not as even as they should be.
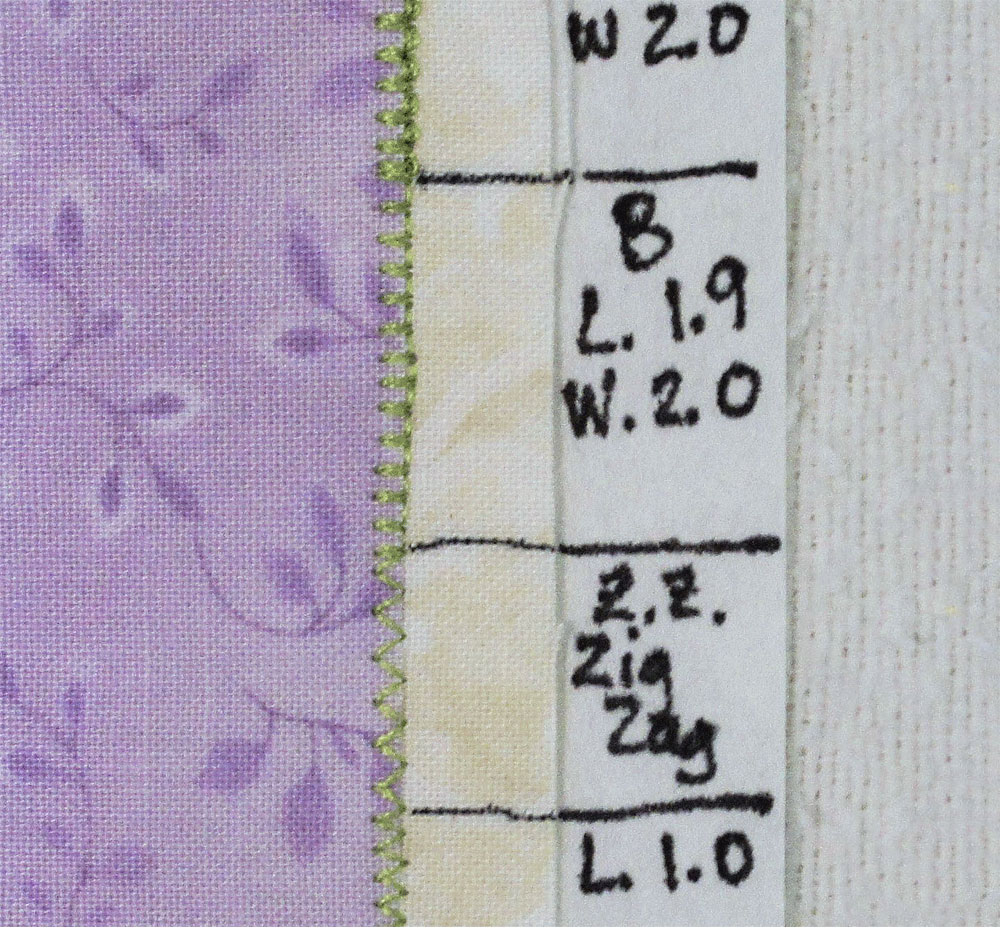
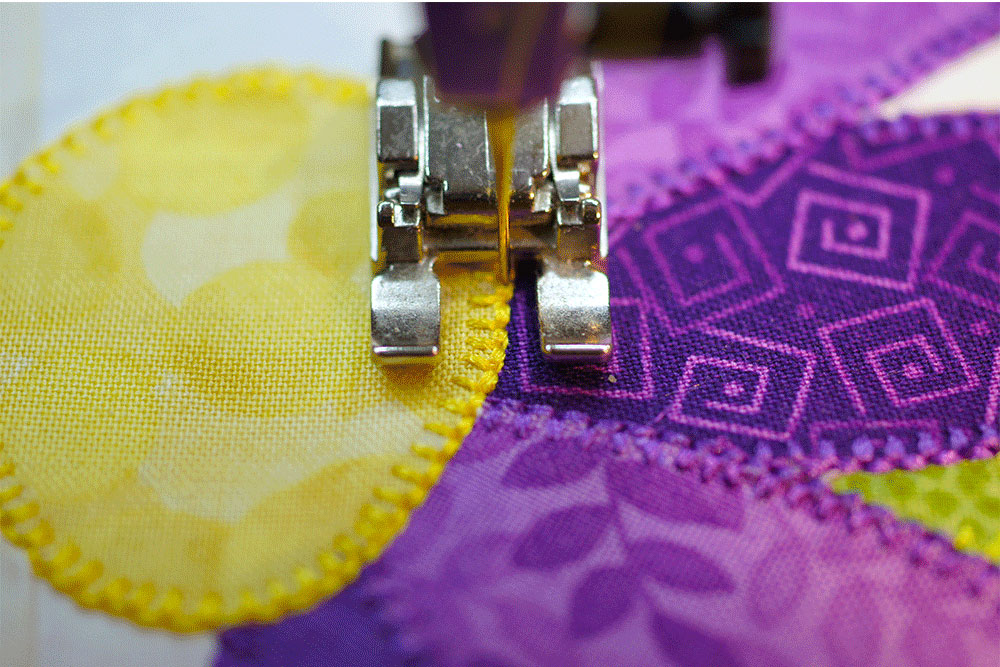
It is a good idea to do a test piece. I have layered a piece of stabilizer and two pieces of fabric scraps to make a sample of stitches. This also gives me a chance to make sure I have everything threaded correctly before beginning on my appliqué. I want my stitches to go right along the edge of my appliqué with the needle landing just on the outside edge of the piece I am appliquéing. How much of a “bite” you take into the appliqué is a matter of preference. I like to make note of the stitch settings on the side of my sample.

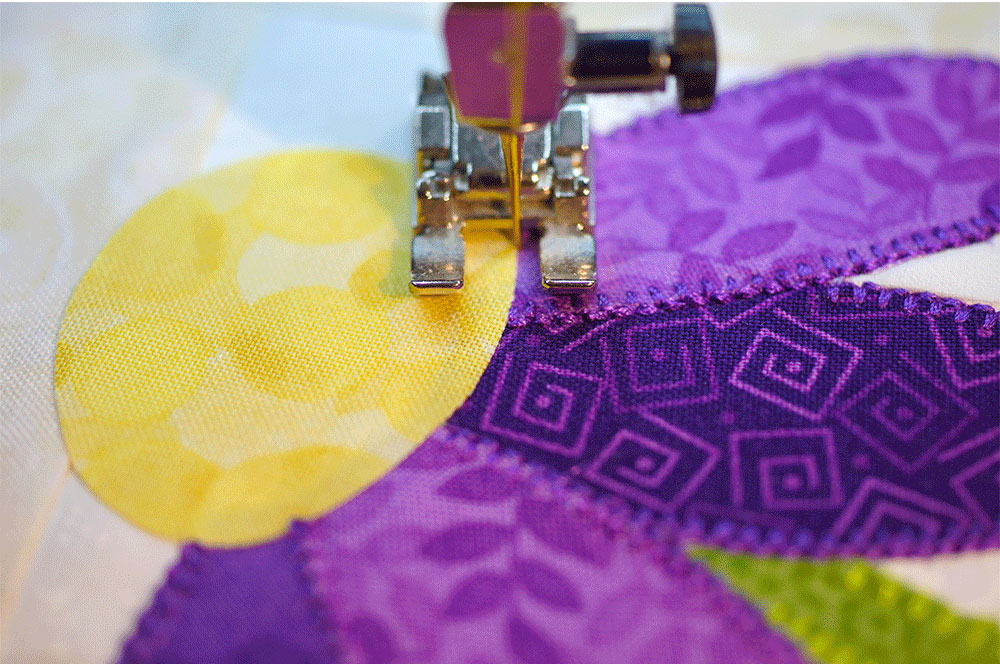
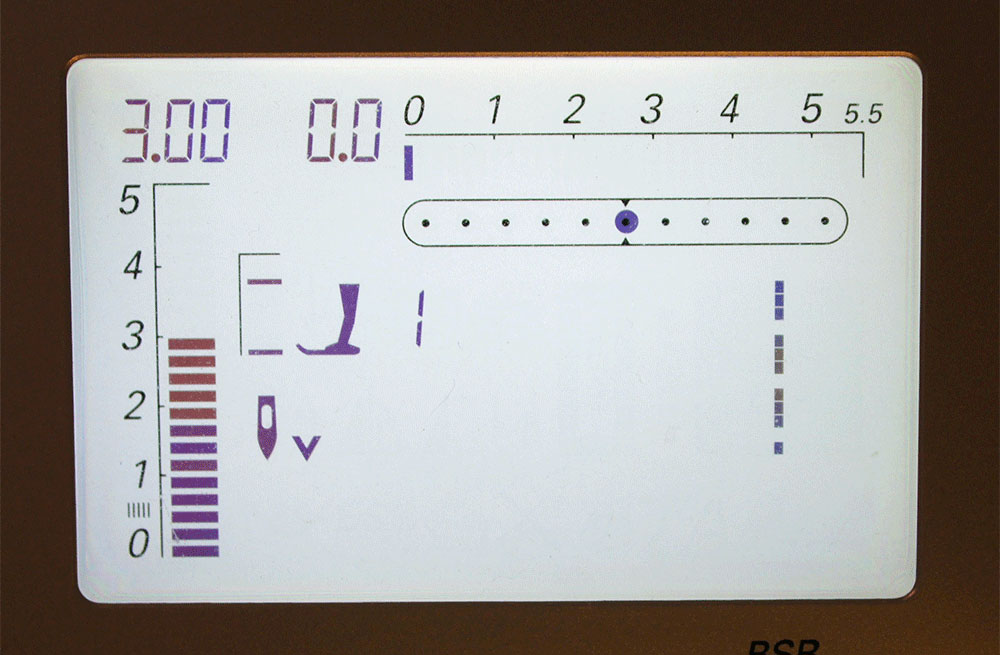
I really like the way a buttonhole stitch looks so that is what I will be using. I have the benefit of a machine with memory so I can easily switch back and forth between the two stitches I am going to use in my appliqué.
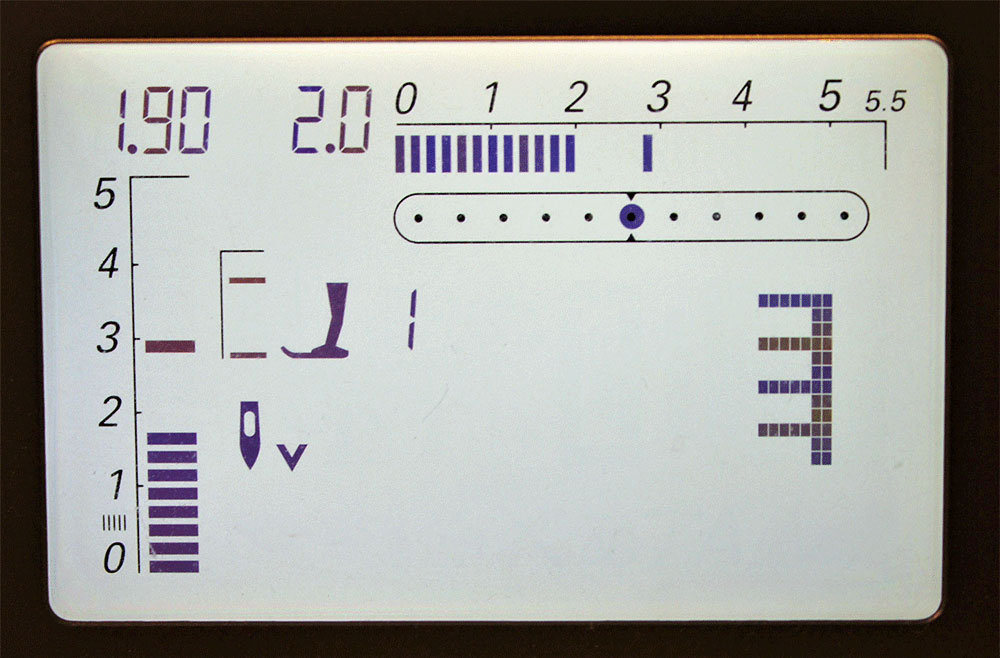
I like to start and end with a straight stitch. My length is 1.9 or 13 stitches per inch. I have moved the needle to the right two positions and am using the needle down position which means when I stop the needle will not lift up out of the fabric. I am using the double buttonhole stitch and keeping my stitch length the same 1.9. I set my width to 2.0 and my needle stays in the center position this time.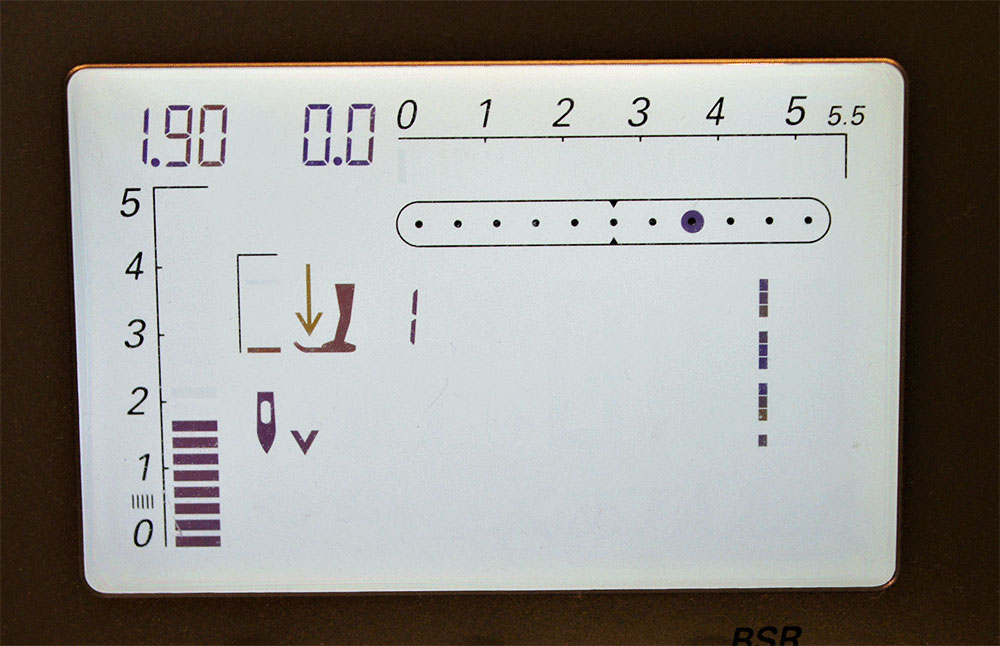
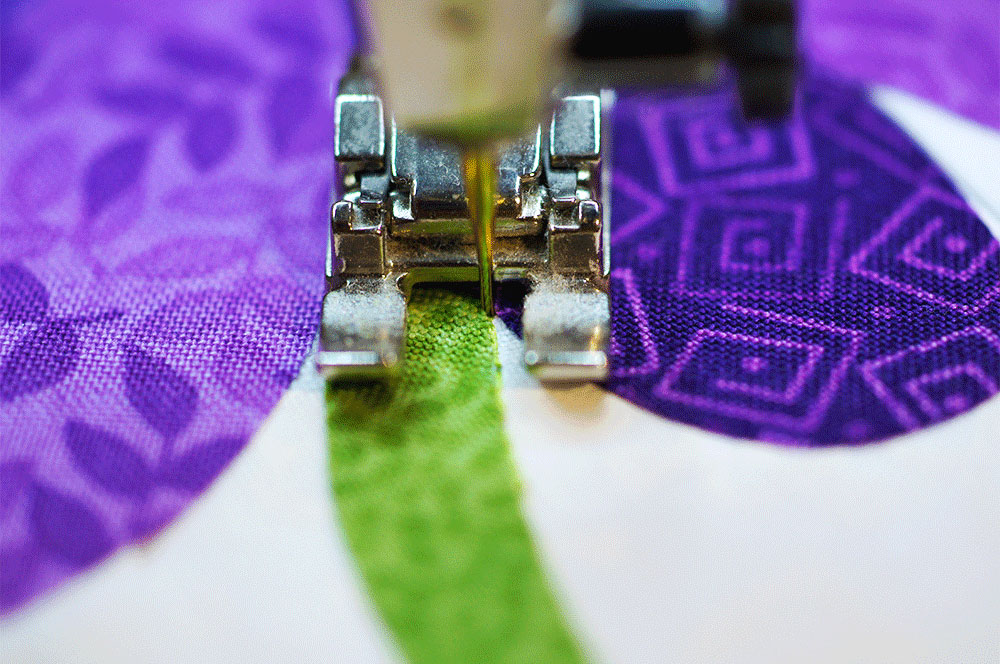
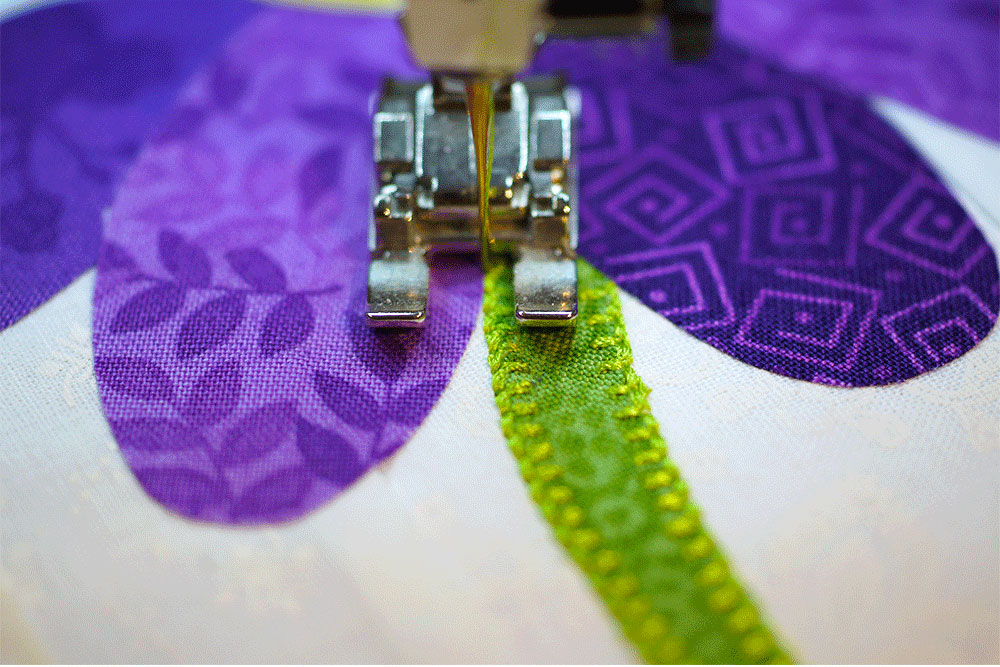
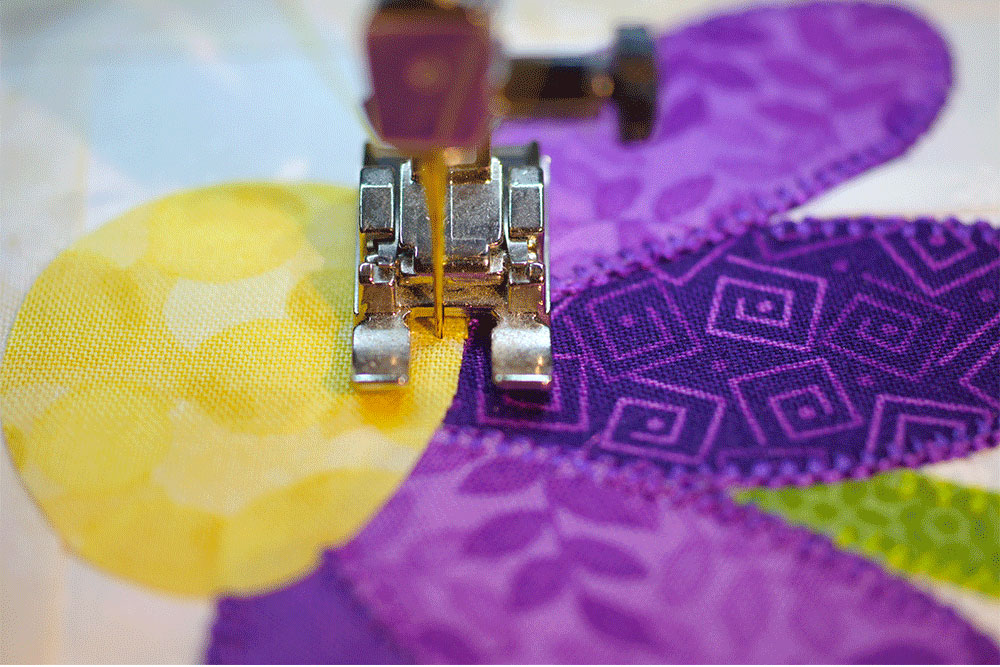
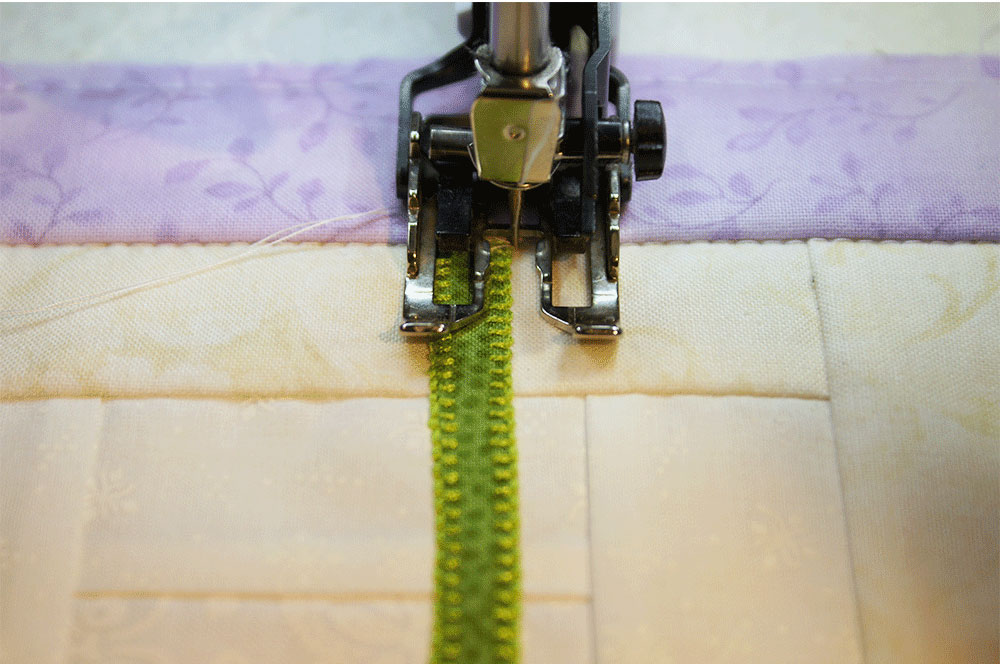
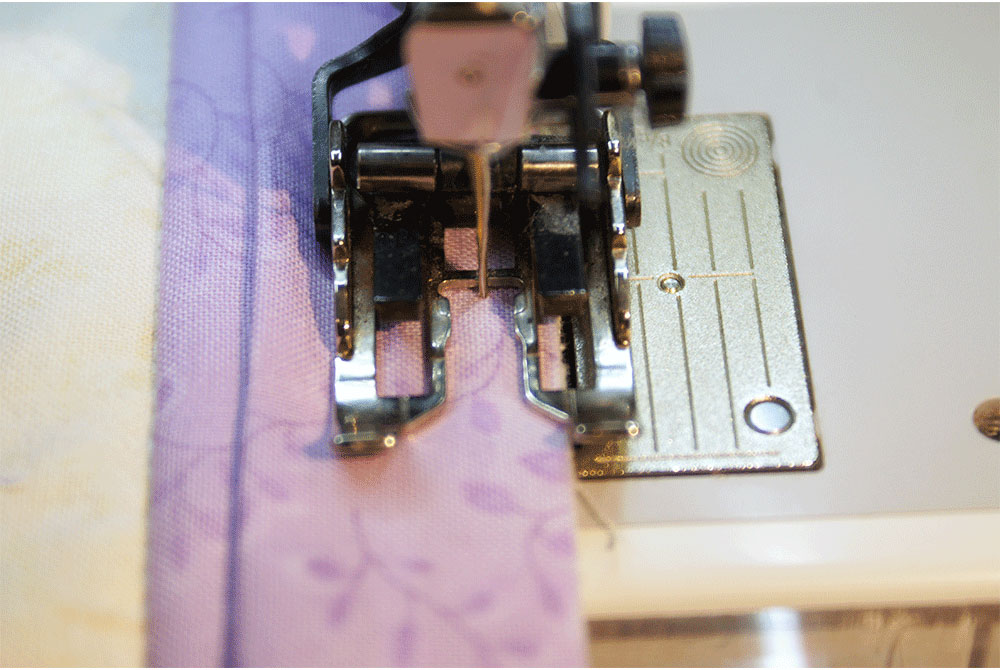
Now we are ready to begin! We stitch the appliqué pieces in the same order that we placed them on our background block, starting with the stem. In the photo you can see where I start with my straight stitch. I will stitch right up to where the stem meets the flower petal and stop.

Lifting my presser foot, but keeping the needle down in the fabric, I pivot my piece around. Now I switch to the buttonhole stitch and stitch around the stem, going right back over those straight stitches I started with. No worries about my stitches coming out now.
When I come to the end of the stem I will stop with my needle down right in that corner – before the stitch bites into the fabric. (I stopped one stitch length from it here so you could see what I was doing and where I want my needle for the pivot.)
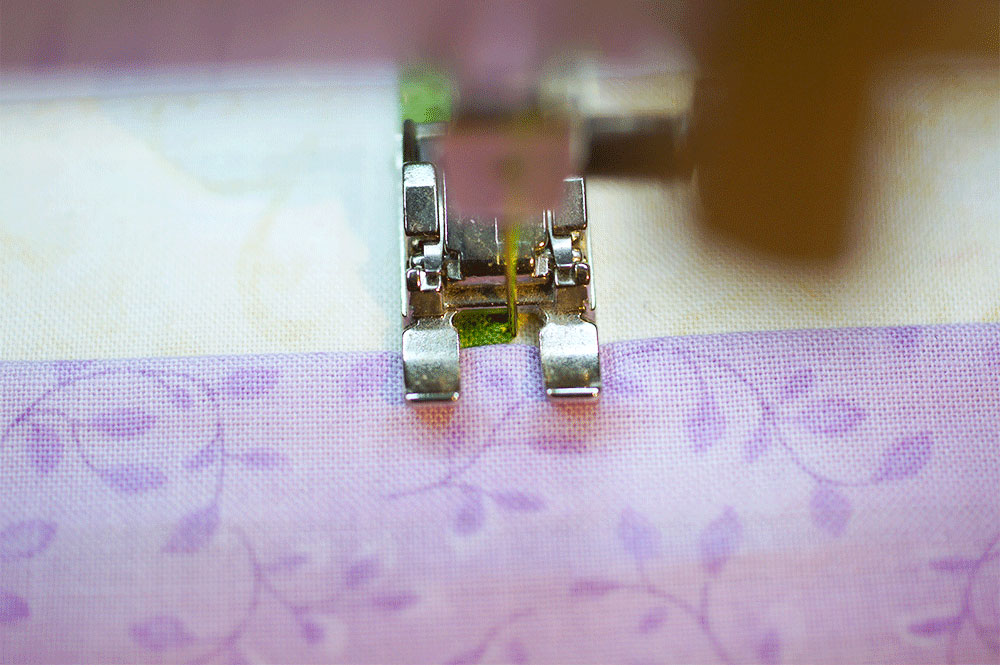
When you make the pivot, the “bite” of the stitch will land on the straight part of the stitch you just made. Then proceed across the stem, pivot at the corner in the same way, and continue sewing the stem.
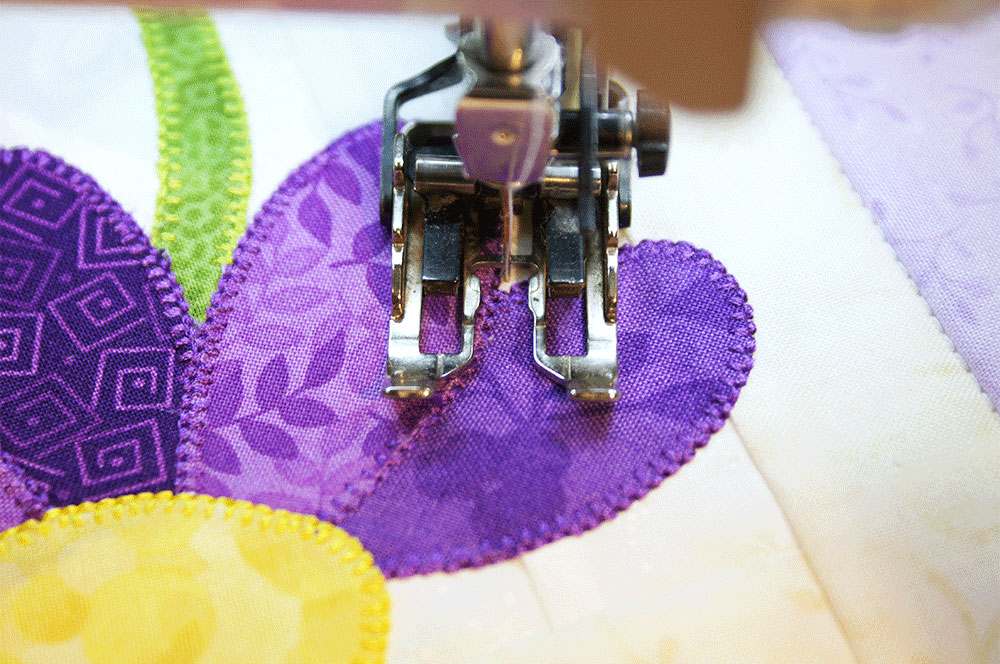
When you meet the purple flower petal, stop with the needle down. Pivot, and go back over with 5 to 6 straight stitches, ending with a locking stitch.
The flower petals are done in the same order that they were placed on the background – those in the back first. Just like with the stem, start with a straight stitch up to the beginning point of the petal. Pivot, and do the buttonhole stitch around the petal.
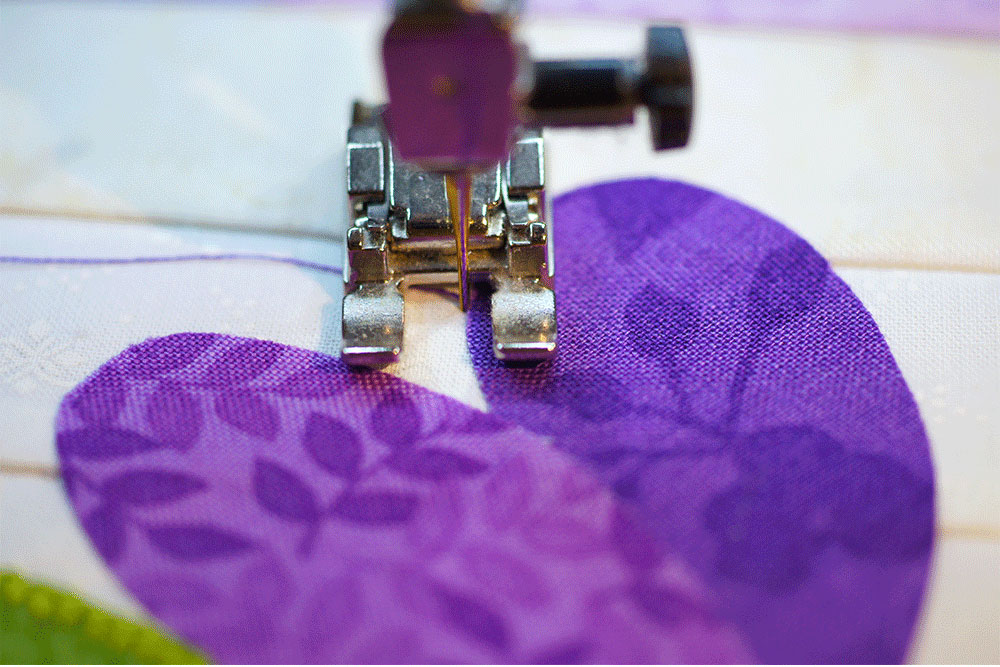
End each petal with a few straight stitches going back over the buttonhole stitches.

After the petals are finished it’s time to do the center of the flower. Once again I start with a straight stitch.
After 5 to 6 straight stitches, switch to the buttonhole stitch and continue sewing around the appliqué piece.
When you get back to the beginning straight stitches, continue with the buttonhole stitch right over the top of them.
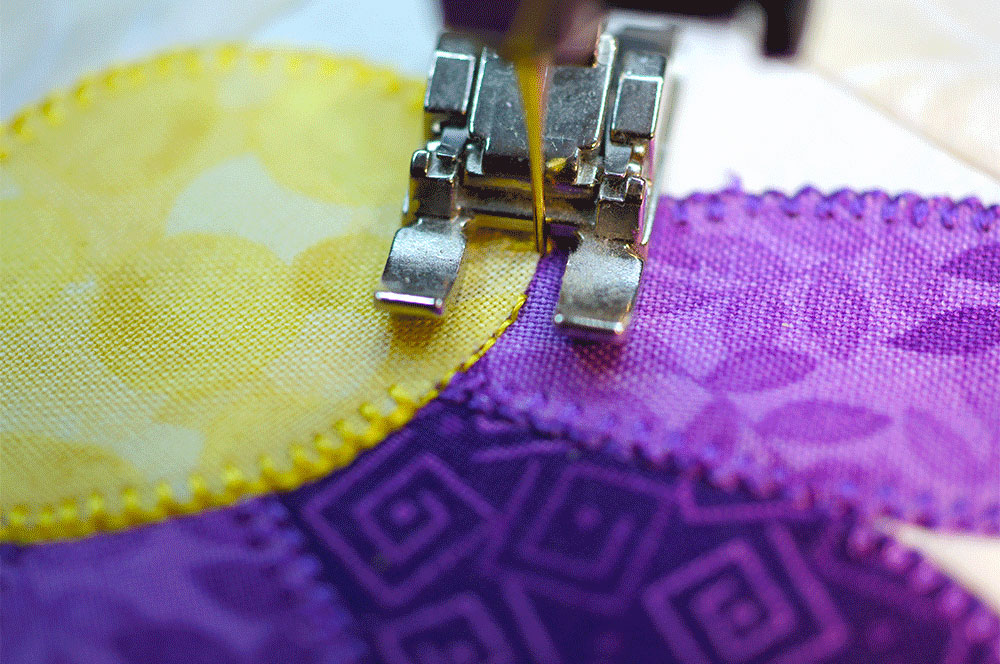
When you come to the start of the buttonhole stitches, switch back to the straight stitch, finishing off with 5 to 6 stitches and a locking stitch.
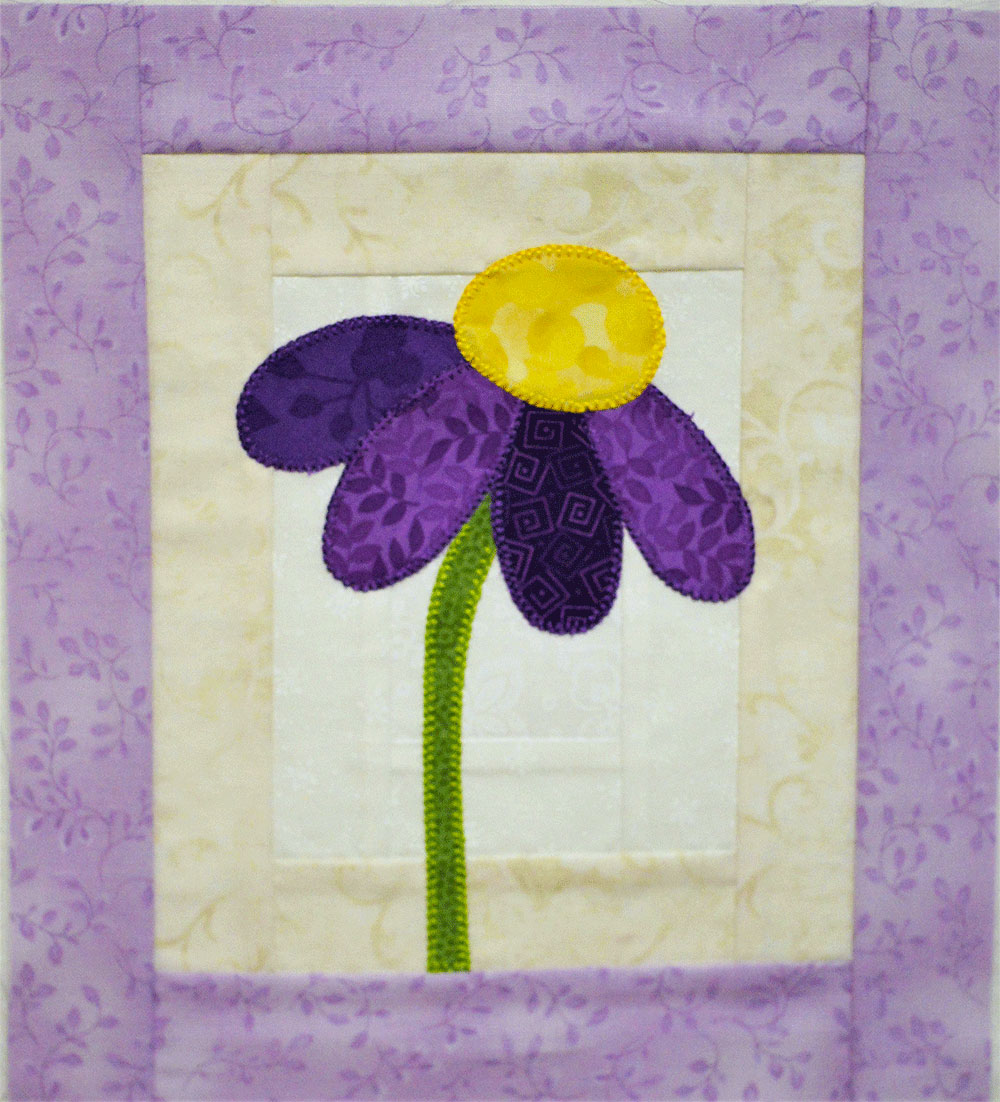
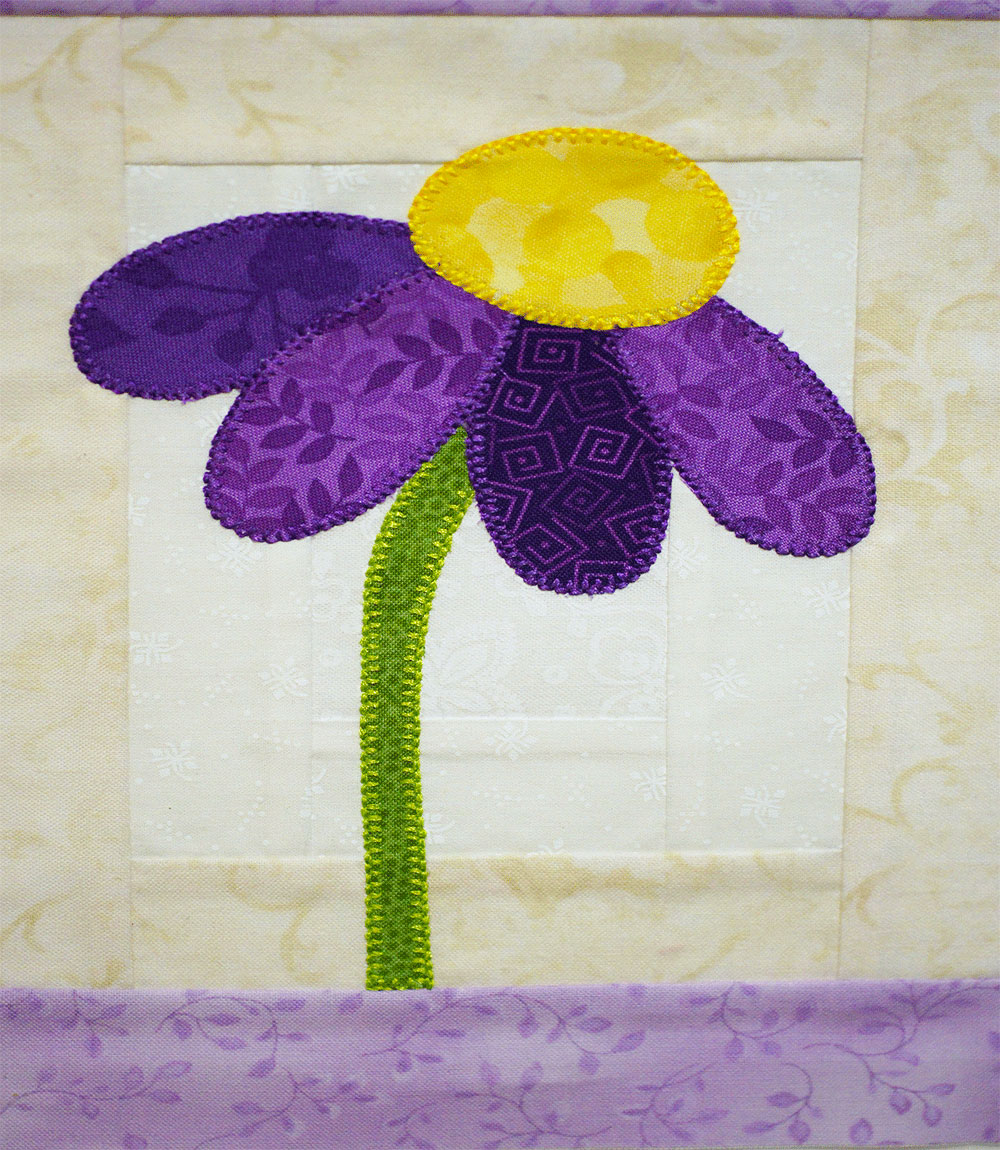
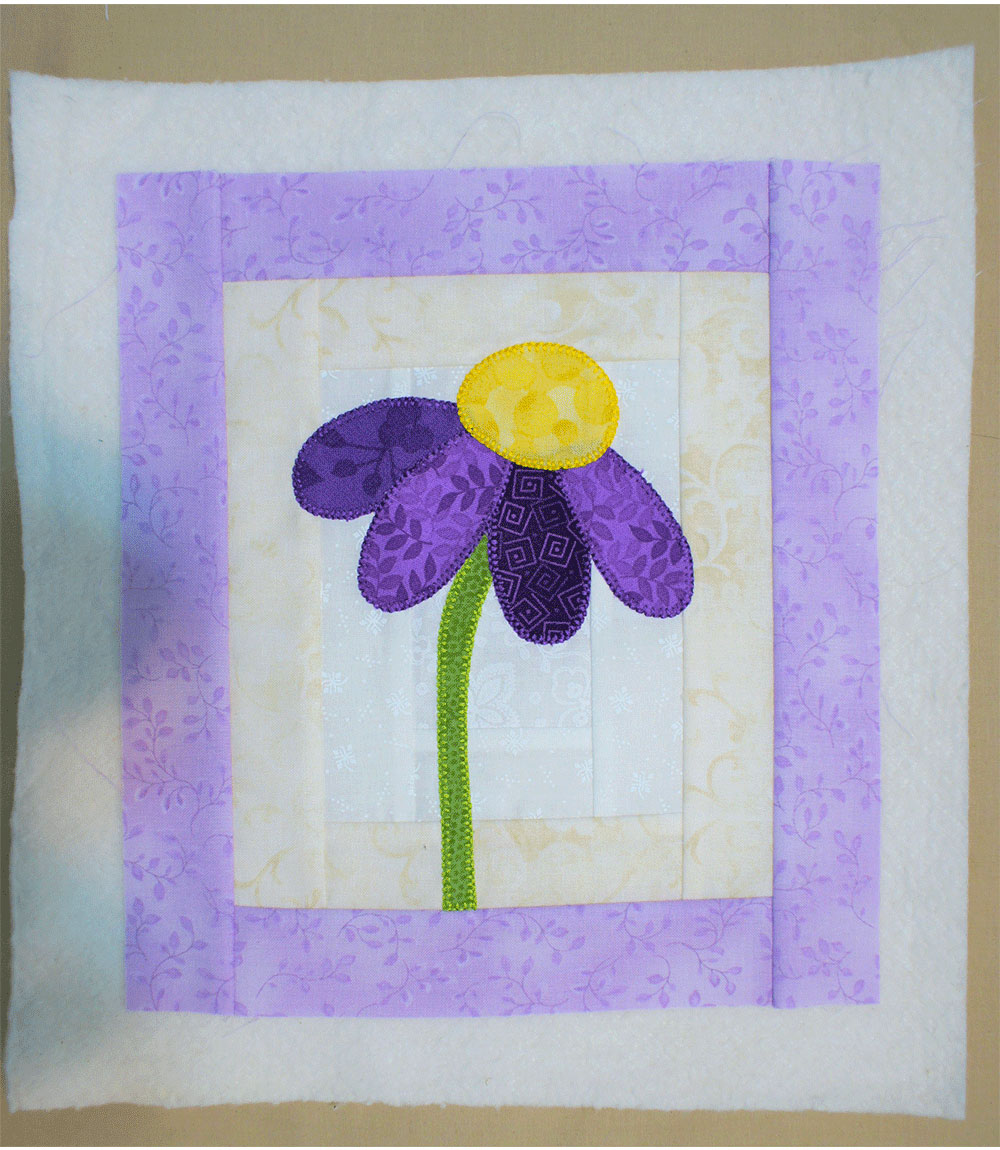
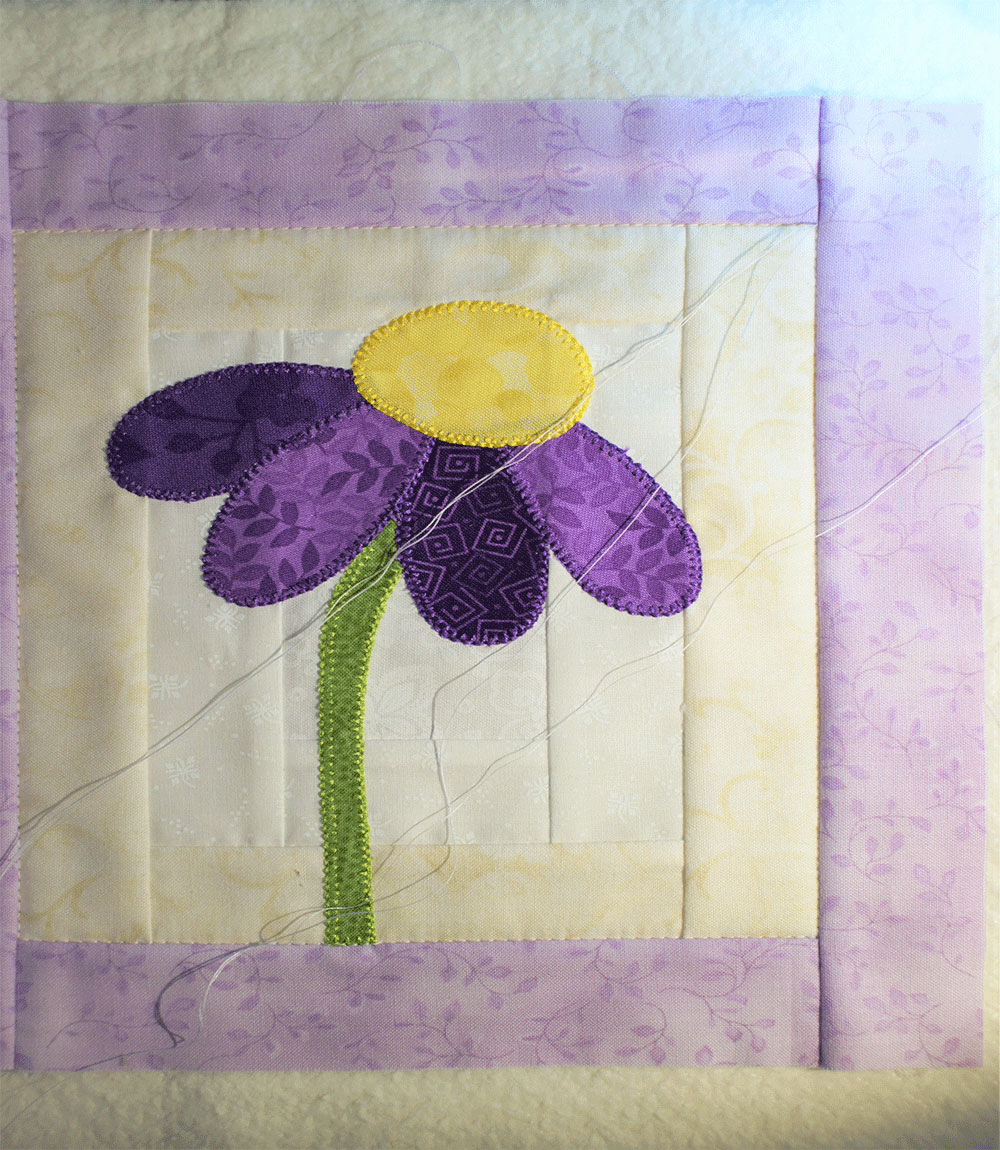
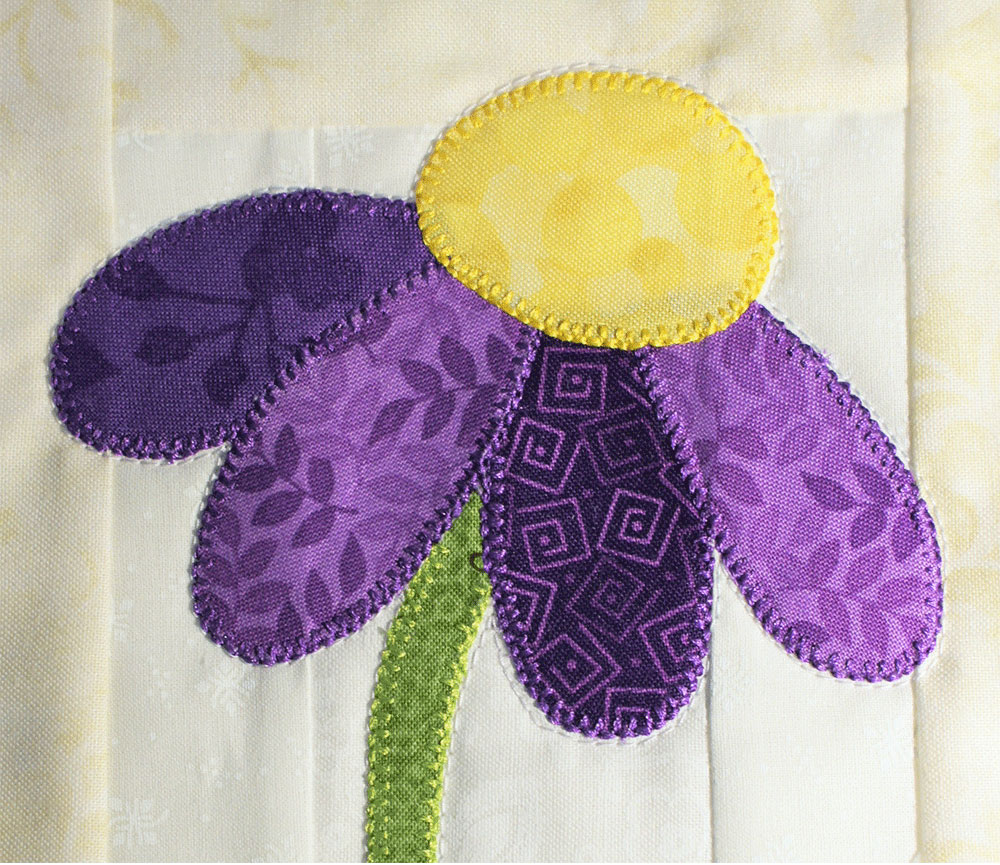
Now stand back and admire your beautiful purple coneflower!
All that remains is to remove the stabilizer from the back, which just tears away easily. A benefit of using a water soluble stabilizer is that I do not have to try to remove what is inside the appliqué pieces as it will wash out. Since I feel a mug rug needs to be washable this will be no problem.
Quilting the Mug Rug
Most patterns will tell you to quilt as desired. For those that would like a little more direction I am including how I approached quilting my purple coneflower mug rug.
For small projects that will be machine quilted I like to use basting spray to make my quilt sandwich. I have cut my backing and batting larger than the size of my block. Starting with the backing I spray the wrong side with the basting spray and let it dry for a few minutes before smoothing the batting over the top of it.
Next I lightly spray the batting, let it dry for a few minutes and place my block on top, smoothing out any wrinkles on the front and back.
For quilting on my machine I really like to use a walking foot. When sewing several layers of fabric it feeds the top layer at the same rate as the feed dogs do the lower layer.
In general I like to use a stitch length that gives me 8 to 10 stitches per inch. I have set my machine to a stitch length of 3 and use the needle down position (or, whenever I stop the needle is in the fabric).
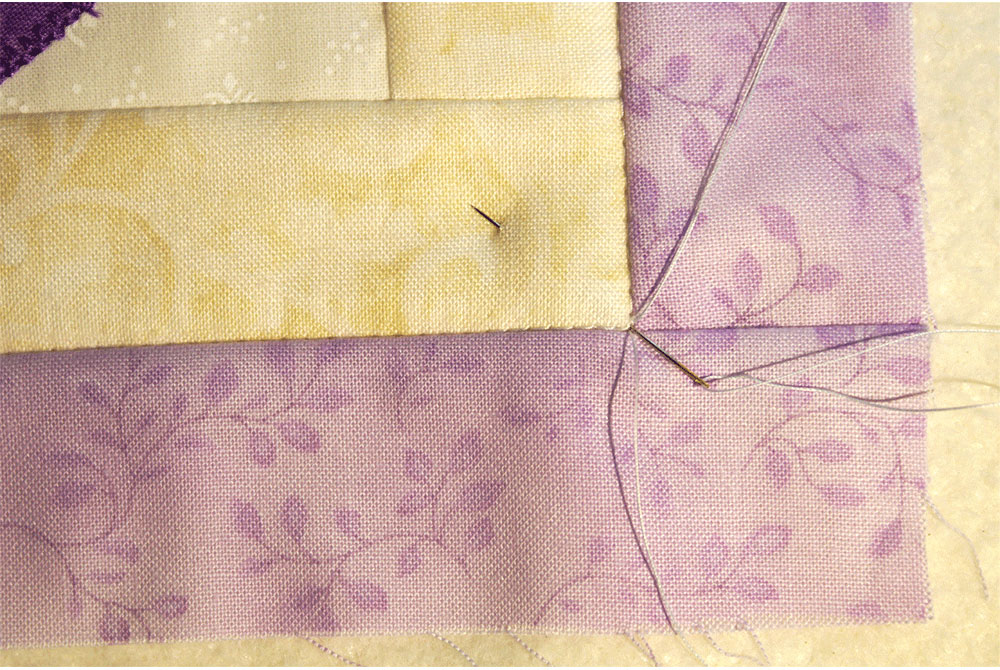
I am going to do a very simple quilt-in-the-ditch around the last border. To begin, pull the bobbin thread up to the top. We want the back to look as neat as the front and this will keep the bobbin thread from getting bunched up on the back. Do not clip these threads, but leave several inches available for finishing.
Then just stitch along the seam. When you come to a corner, leave the needle in the fabric, pivot, and continue.
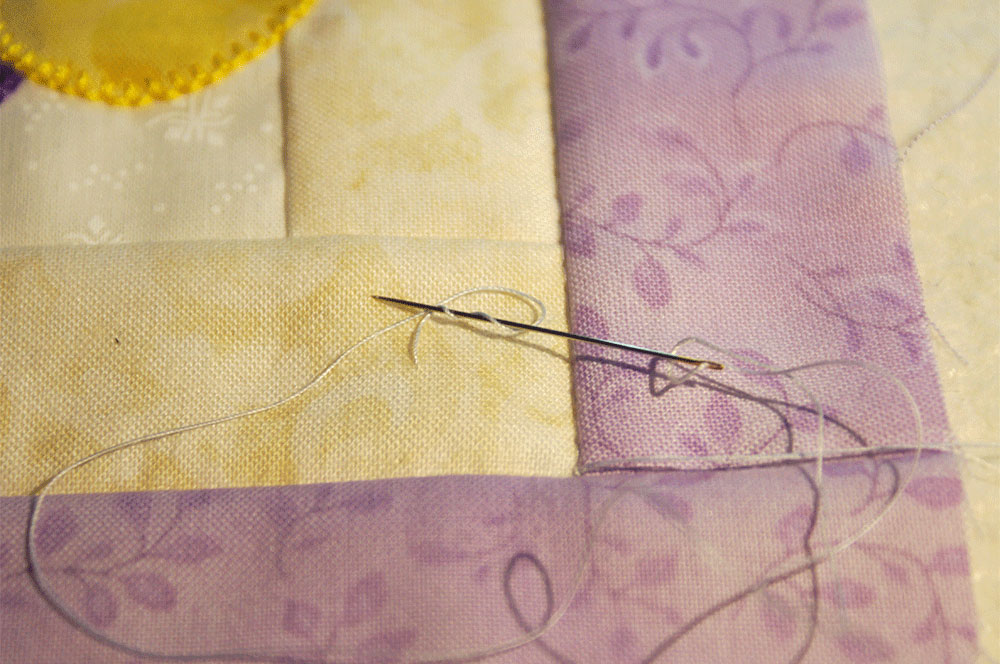
When you make it back to where you began the quilting, leave yourself several inches of the top and bobbin thread and clip.
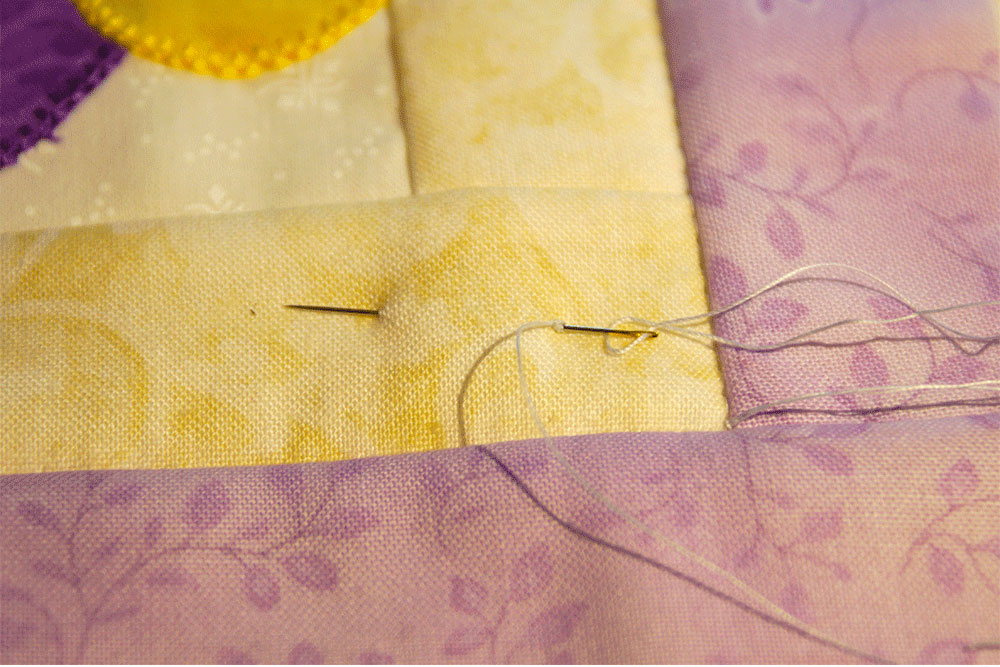
I use a quilter’s knot from my days of hand quilting to tie off the ends and hide the knots in the quilt sandwich. One at a time, with a thin hand sewing needle – I use a quilting between – pull the thread ends into the fabric, working it into the batting layers, but being careful not to go through to the backing, and then bring it back up through the top. I wrap the thread around my needle two to three times to form my knot.
When you make it back to where you began the quilting, leave yourself several inches of the top and bobbin thread and clip.
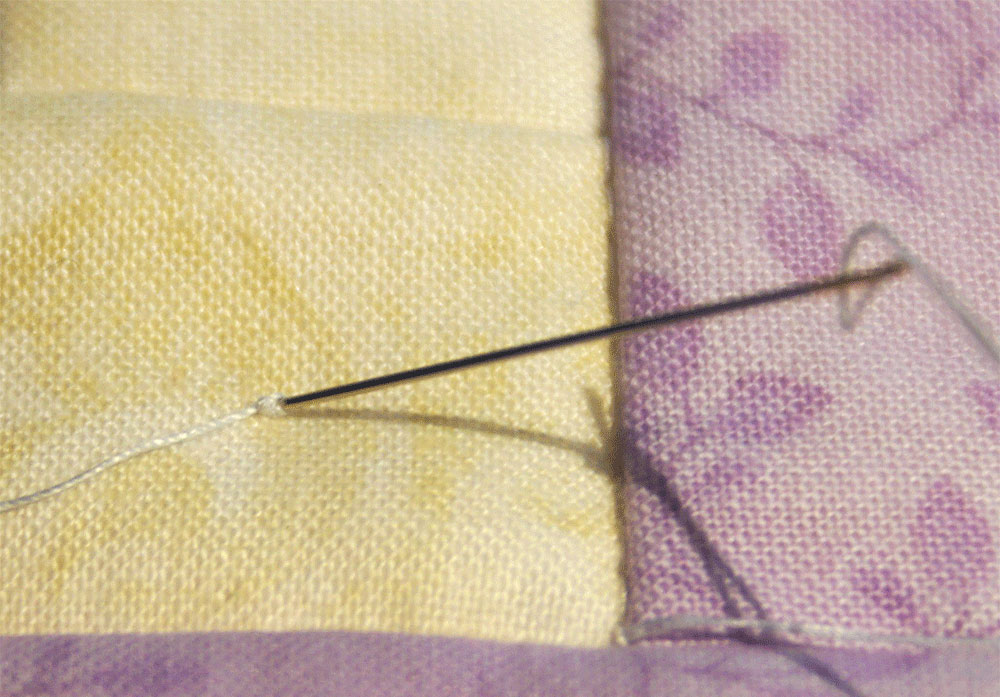
Once again I work my needle through the batting layer and come up to the top. Pull the thread through until the knot pops into the fabric out of sight. You have to give a gentle tug on the thread as you do this so that the knot pops through the needle hole. I sometimes will repeat this process a second time before clipping my thread ends.
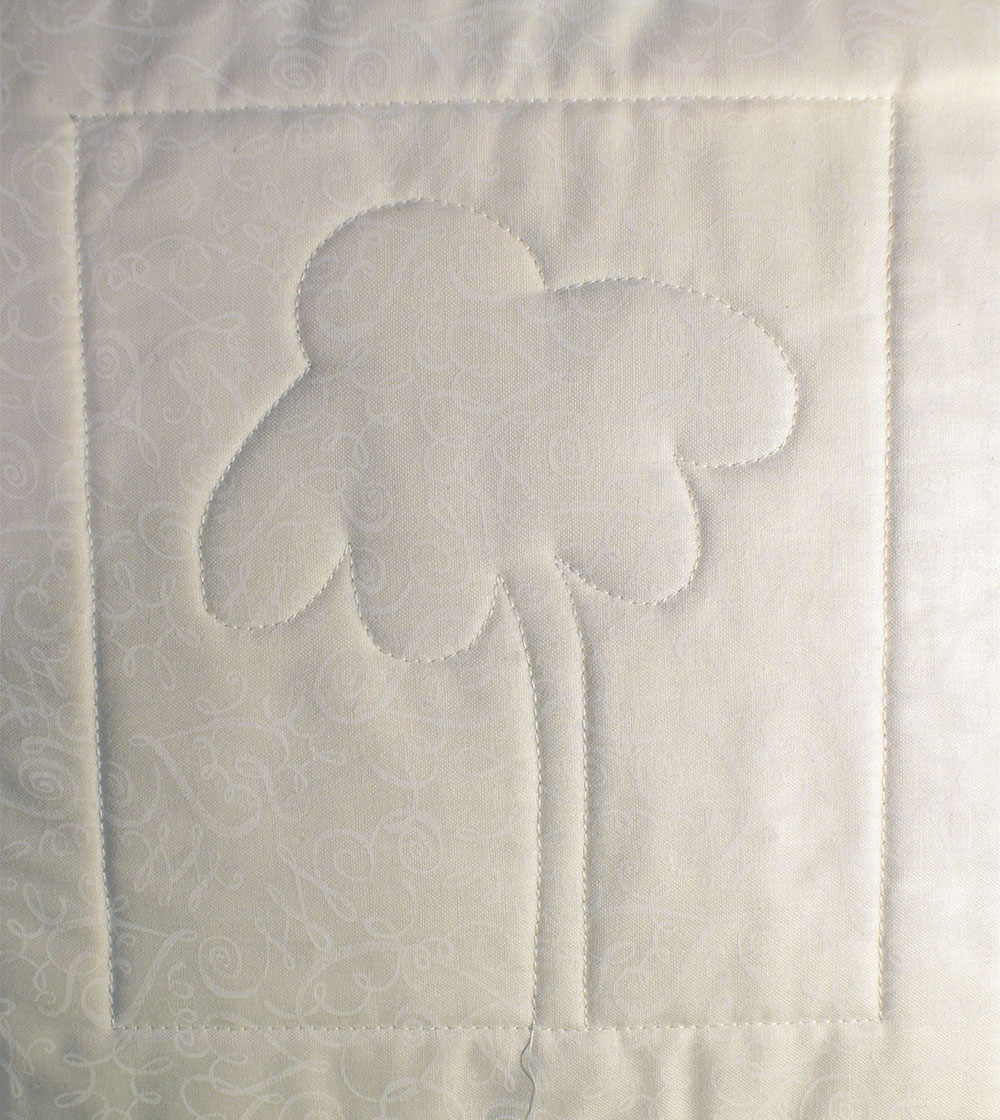
Dense quilting will tend to make your quilt stiff, while quilting that is not close together will lend itself to a softer feel which I like. So for this mug rug I am going to outline the purple coneflower and call it good. I will still use my walking foot and just slowly go around the flower in the same way I did the previous quilting. I am not going to worry about staying exactly along the outline, just close to it.
You of course can do more or less depending on your own likes for this little quilt. The only thing I have to be aware of is how far apart my batting needs to be quilted. I am using a cotton batting that states the quilting lines can be up to 10″ apart so no worries with this one.
Here is my purple coneflower with outline quilting from the front and back.
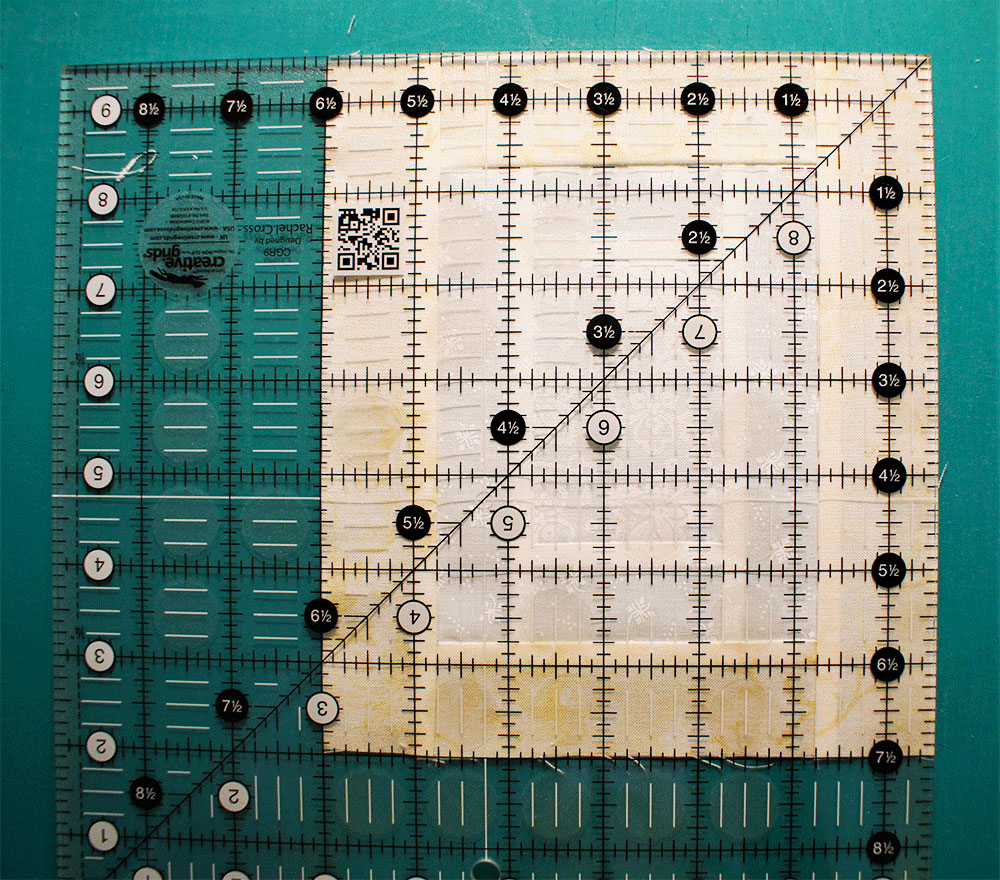
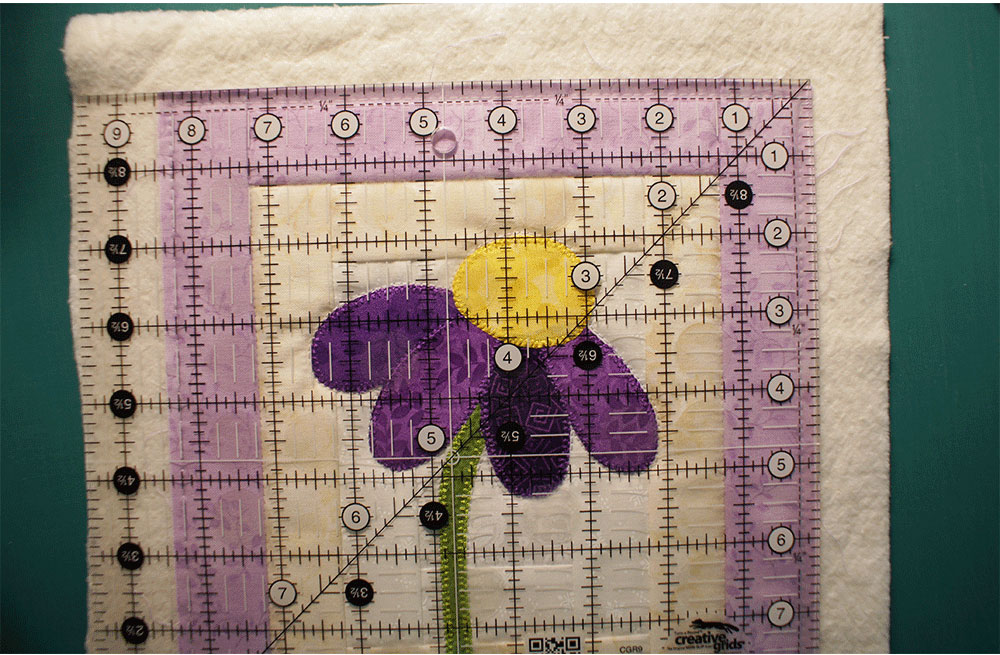
With the quilting complete it is time to square up the quilt. Using a square ruler, trim away the extra batting and backing. No need to worry if your finished size is a little off, it is more important that your quilt is square.
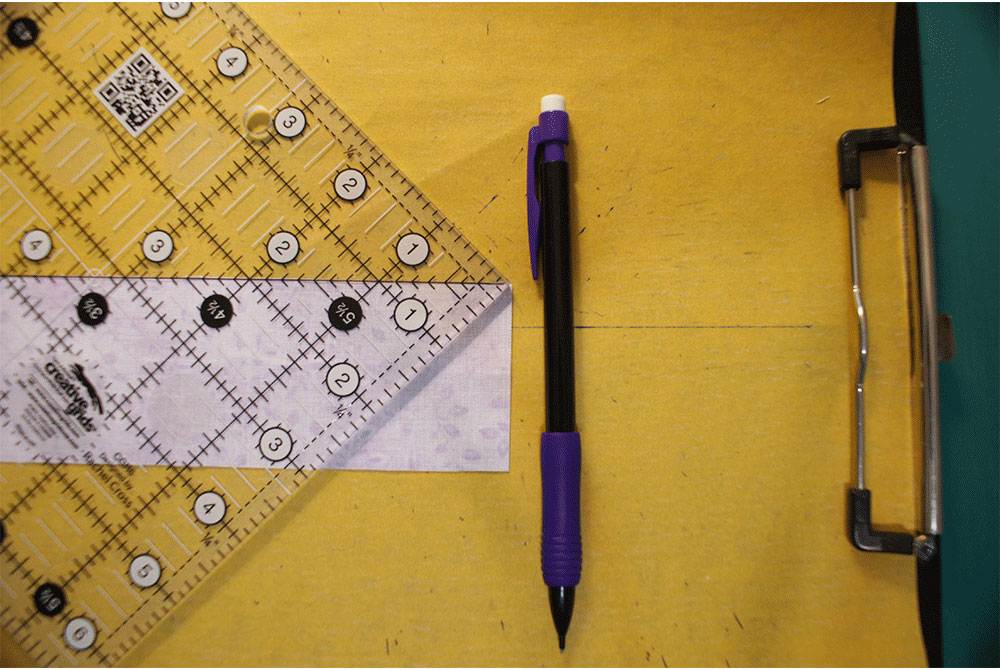
The final step in the quiltmaking process is the binding. You need strips that are 2″ wide and enough to go around your quilt with 10 inches or so left over. I am using 18″ strips cut from my fat quarter so I need to join them together. I start by drawing a diagonal line on one end of the strips, lining up the diagonal line on my ruler with the edge of the strip.
With the quilting complete it is time to square up the quilt. Using a square ruler, trim away the extra batting and backing. No need to worry if your finished size is a little off, it is more important that your quilt is square.

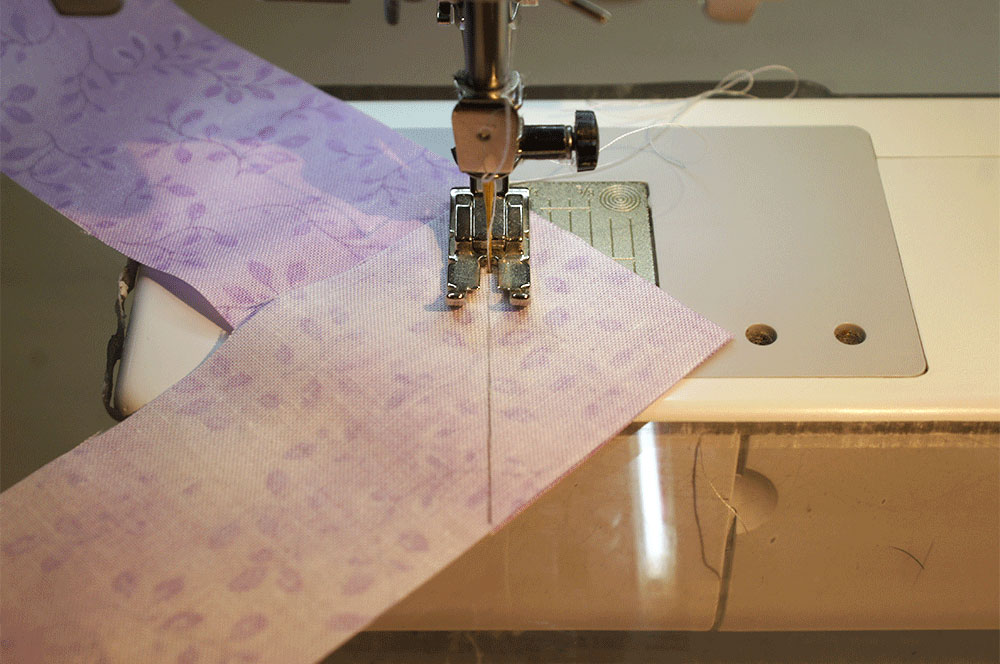
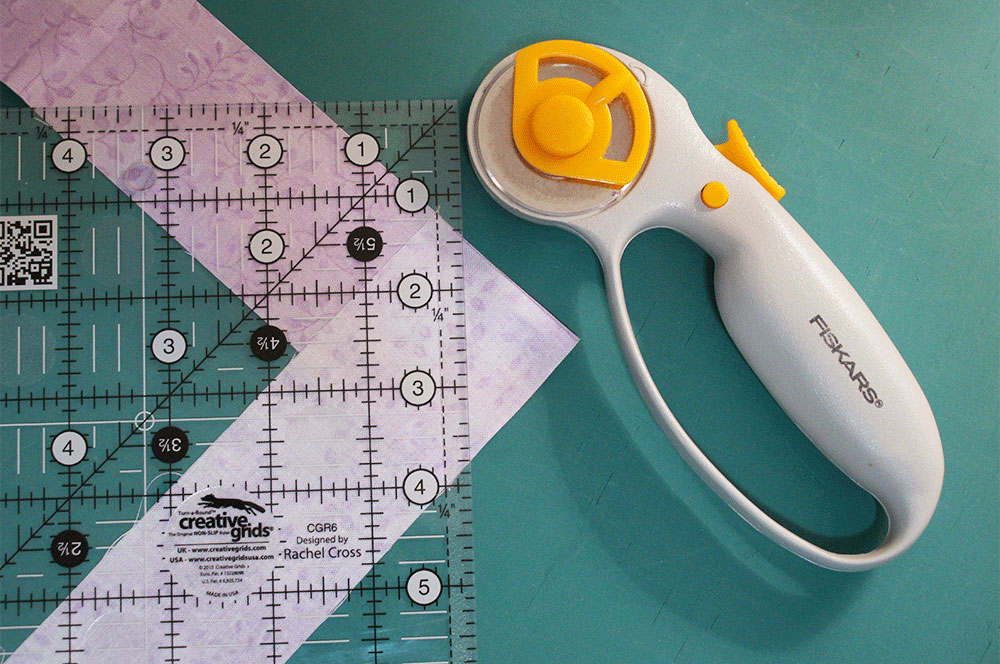
Trim away 1/4 inch from the seam and press the seam open.
Fold over about 1 inch of fabric on one end of the binding strip and press. Then press the entire strip in half lengthwise.
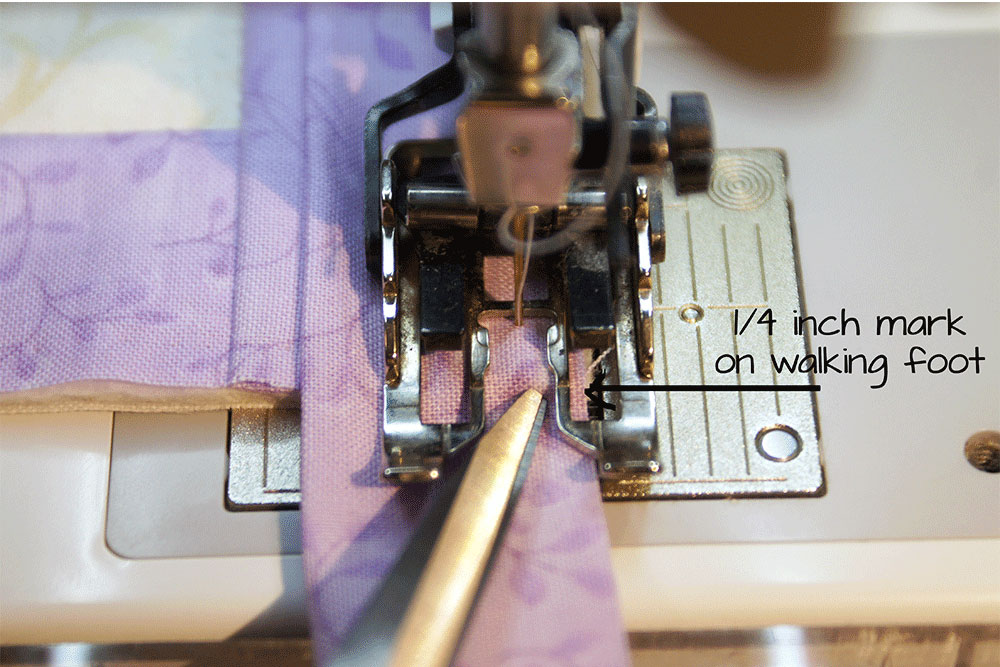
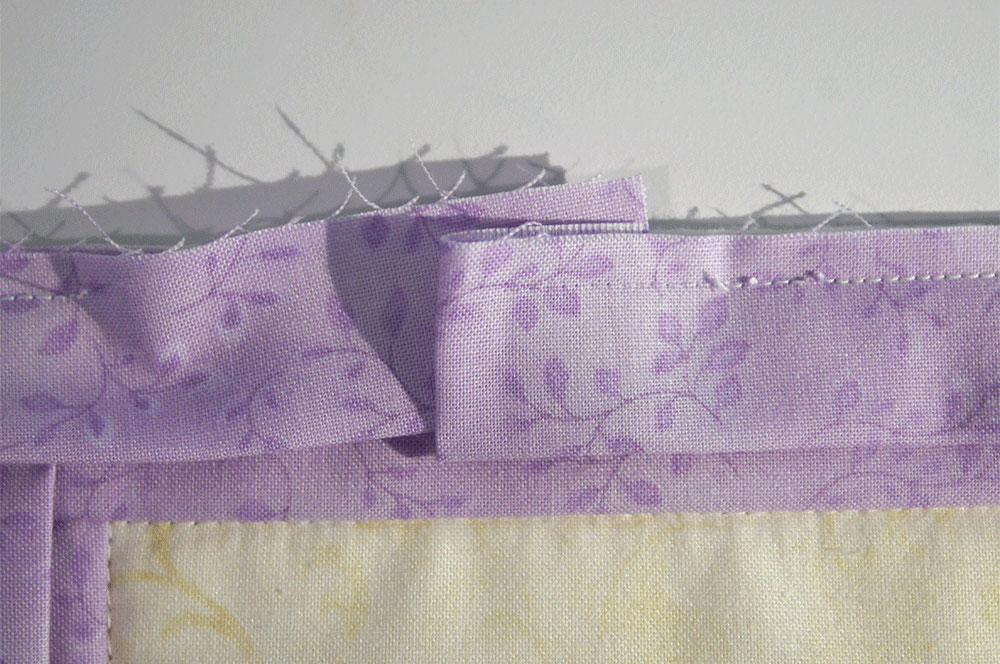
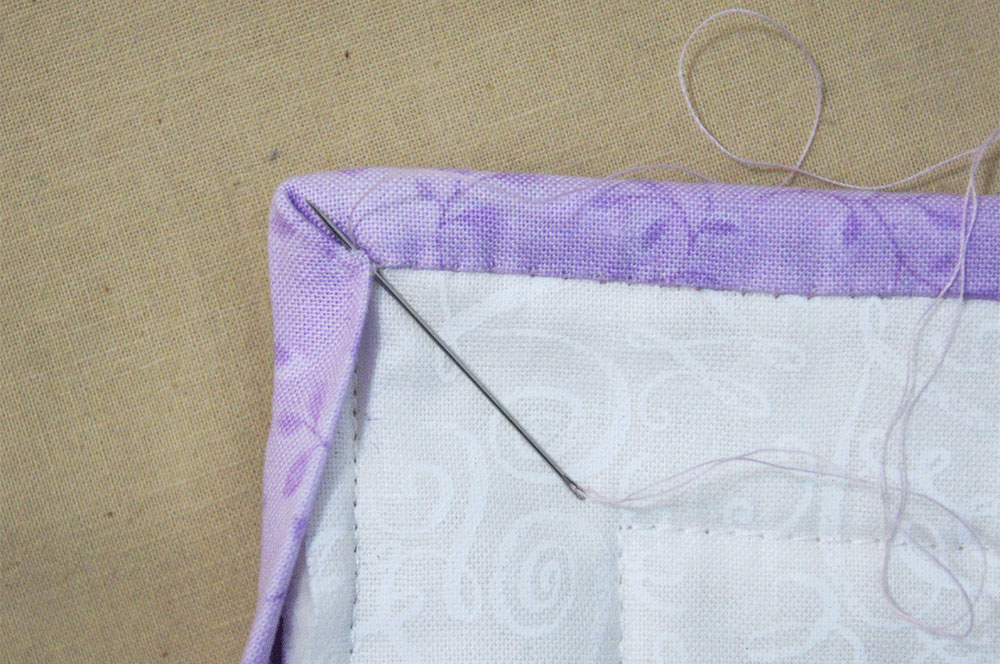
Starting about 3 inches from the folded end of the binding strip begin sewing the binding to the quilt front. I prefer using my walking foot to attach the binding. Use a 1/4 inch seam allowance and match the raw edge of the quilt with the raw edges of the binding.
When you come to a corner, stop 1/4 inch from the edge and backstitch.
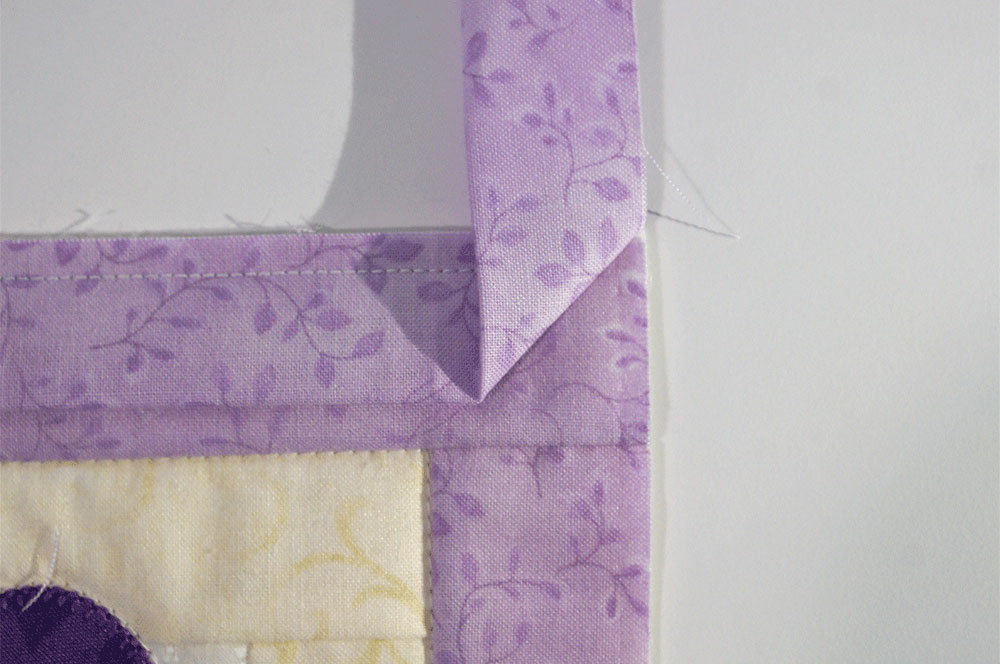

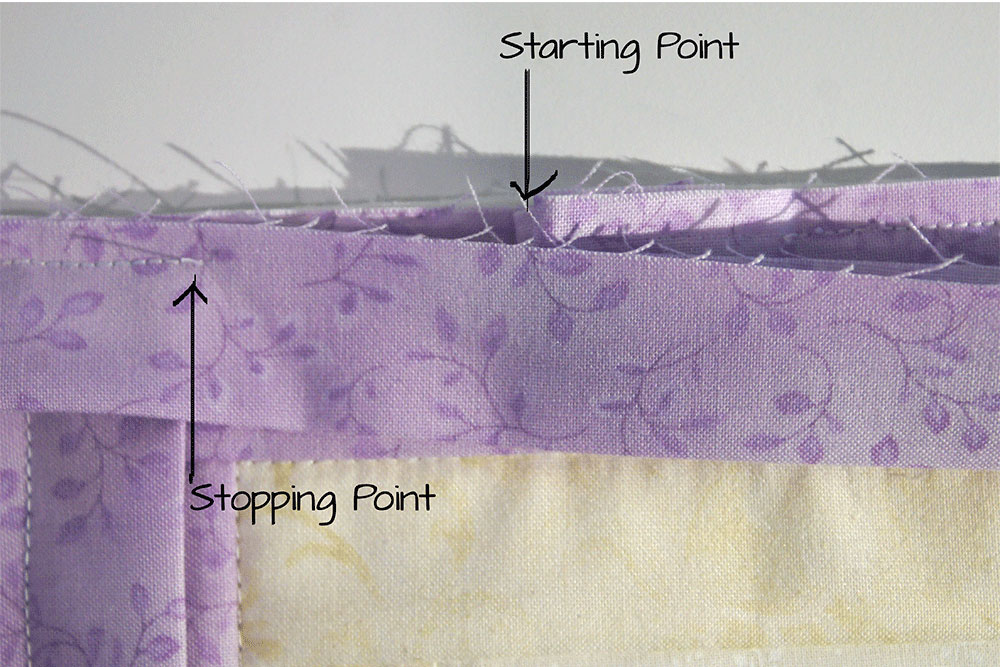
Resume stitching from the corner edge just as before, mitering each corner along the way. Stop stitching 3 inches before your starting point.
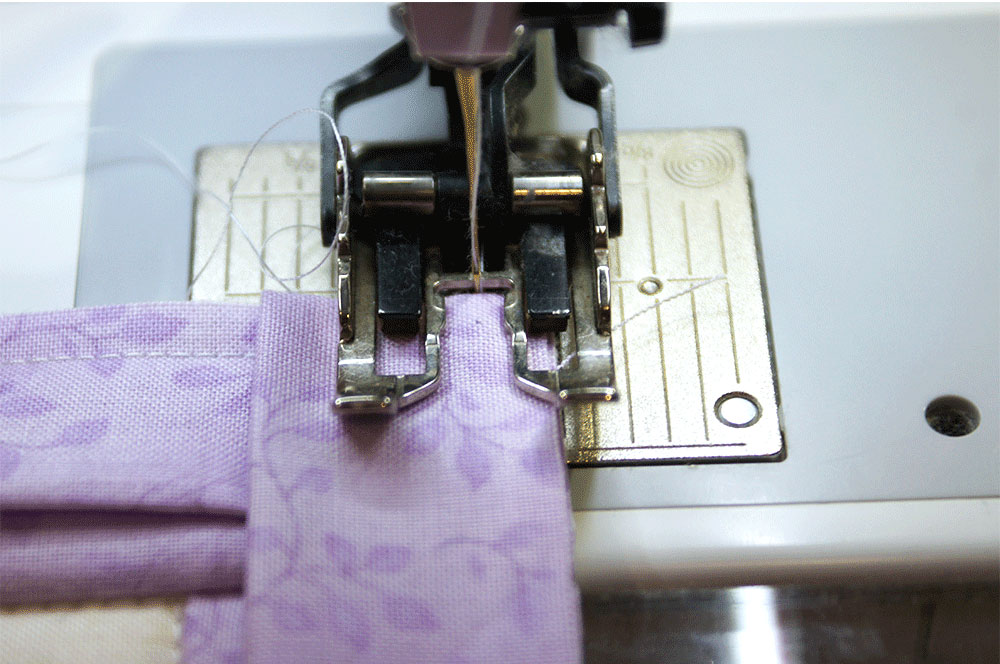
Trim the binding end long enough to tuck inside the folded edge we started with and finish sewing.
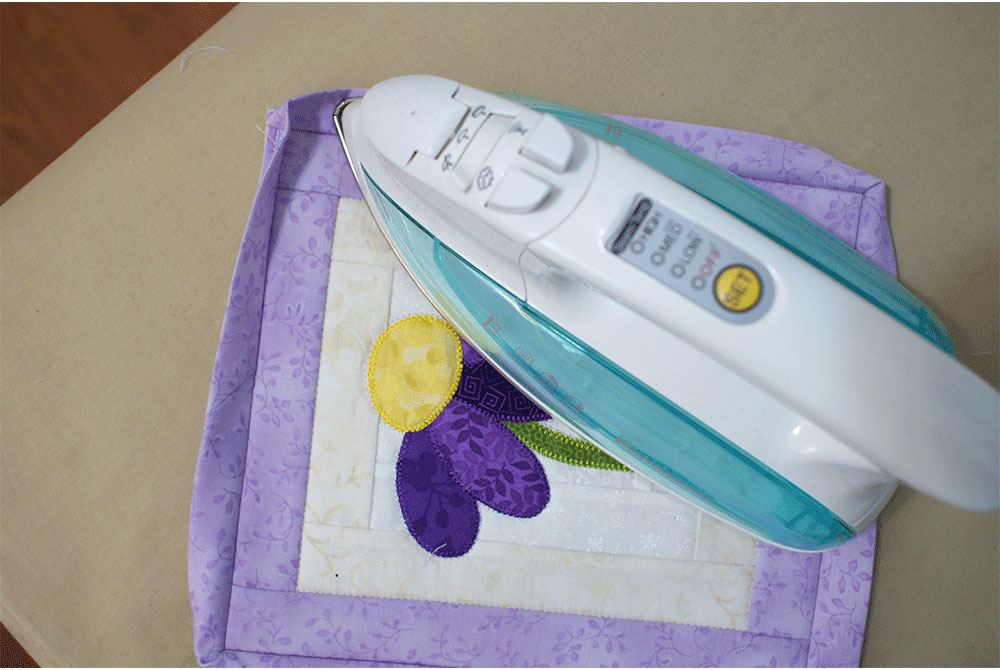
I like to press my binding open at this point.
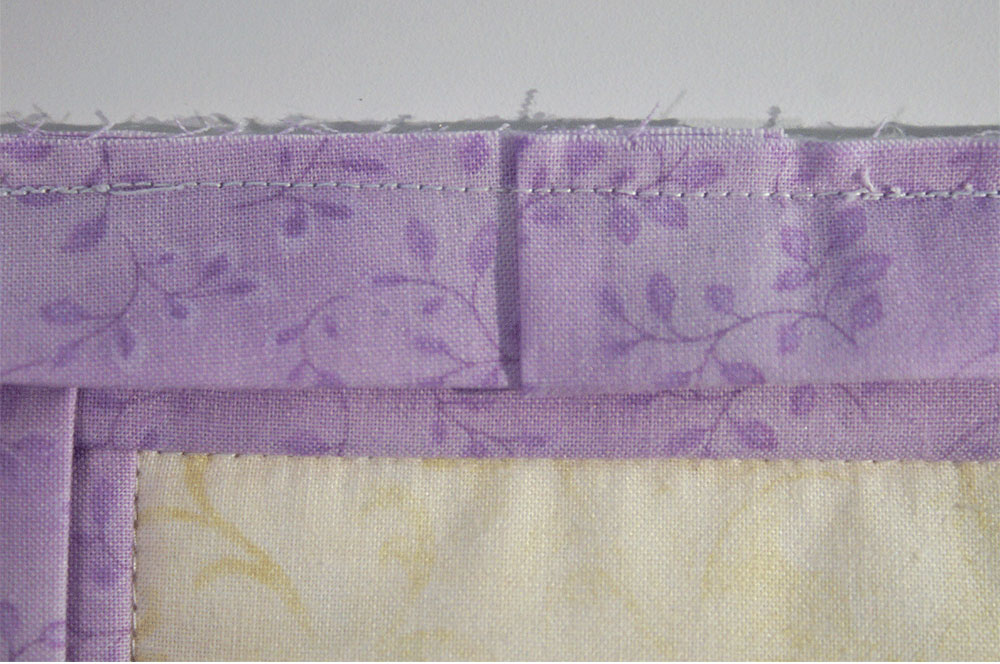
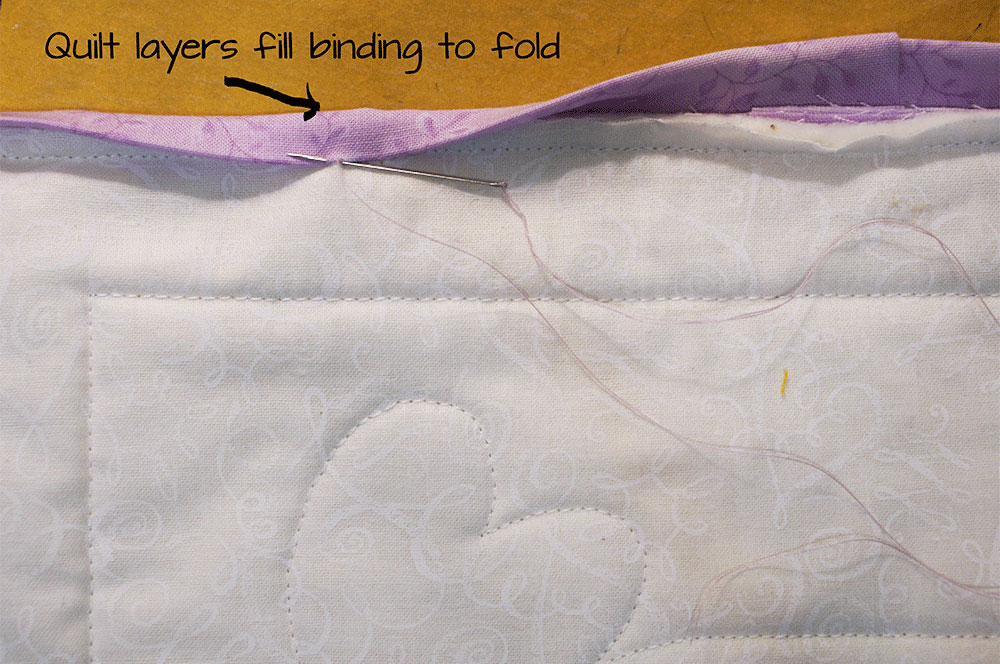
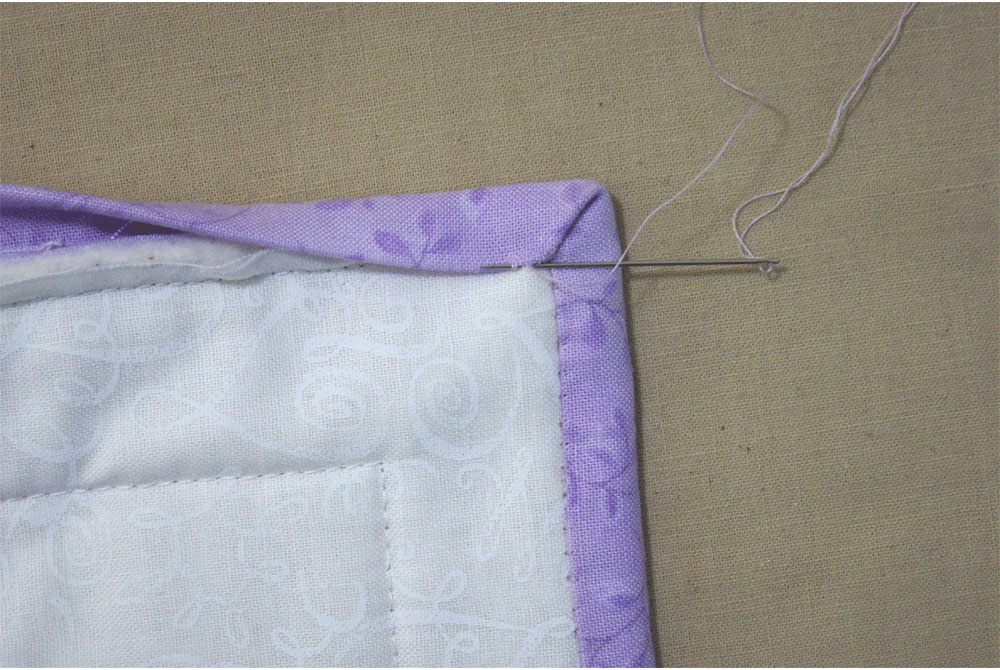
Fold the binding to the quilt back and stitch in place being sure to cover the stitches from where the binding was attached to the front. You want the layers of the quilt to fill your binding.
When you come to a corner take a couple of stitches where the miter comes together before continuing along the next edge.
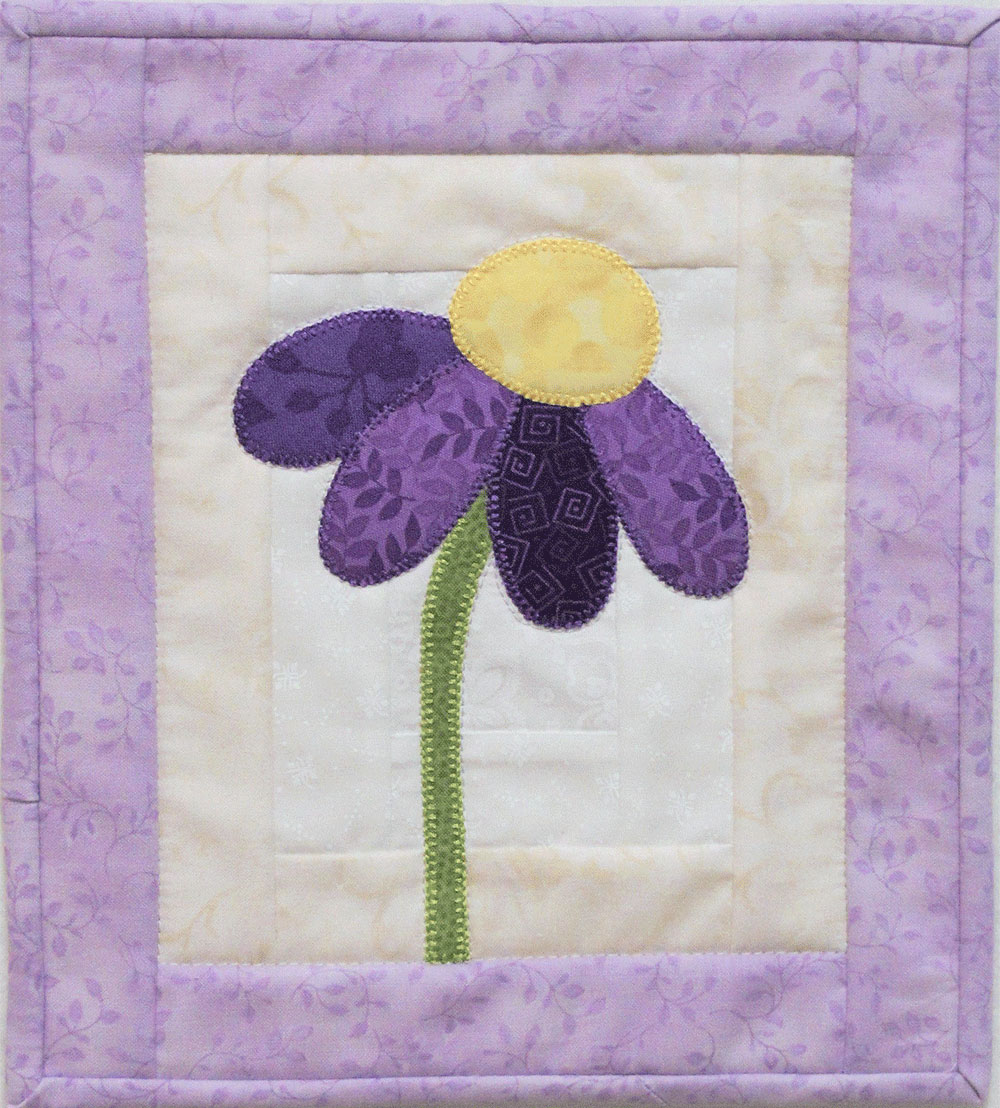
Your Purple Coneflower Mug Rug is now complete!
Meet Debra Davis:
My life with quilts began at a very young age as I was tucked in each night under one of my grandmother’s quilts. I still have her precious works of art. Growing up my own interests led me to drawing and painting, crochet and cross-stitch. I took many art classes throughout high school and college and so exposed myself to all sorts of arts and crafts. My own quilting adventures started while we were awaiting the arrival of our firstborn when I combined some cross-stitch designs with a simple quilt.
We then moved to Michigan where I discovered an Amish quilting community and picked up a book to teach myself how to quilt. There were no rotary cutters in those days and the fabric choices were somewhat limited. But I was soon hooked by the limitless variety quilt making presented to me. The rest as they say is history. I have been quilting now for almost 30 years! My how the time flies. You would think I would have a house full of quilts, but most of my work has been given to others. I do have visions of a home adorned with my quilts someday.
You can find me on my website at www.Tuning-My-Heart.com and also join me on Facebook at Tuning My Heart as well.

Not sure why there are no pictures or access to the pattern ... ???
I can’t get pdf, where is it? I get 404 error.
This is a really nice design and a great pattern, especially for beginners. The instructions are excellent! Thank you for sharing Deb.
Beautiful
This looks great. I want to try it.
I love this Pattern. Would like to make it for my daughter who loves purple.
That is so pretty.
I would like to order th the coneflower kit.
Excellent instructions. As a retired instructional writer, I am often disappointed in the lack of clarity in many of the written tutorials. A good teacher assumes that the student has no prior knowledge of the content. Thanks for a good tutorial.