If you’re anything like me, you’ve had your fair share of frantic, last-minute quilting and crafting around the holiday season. A gift that isn’t done in time, a forgotten someone on your list, or a last-minute party invite that requires a hostess gift. You can’t always plan ahead on these things!
What I’ve been doing lately is keeping an arsenal of quick and easy projects on hand, especially around the holiday season. They don’t require a lot of time or supplies to complete, but still give a big impact when gifted. Besides, who doesn’t love to receive something handmade with love at the holidays?
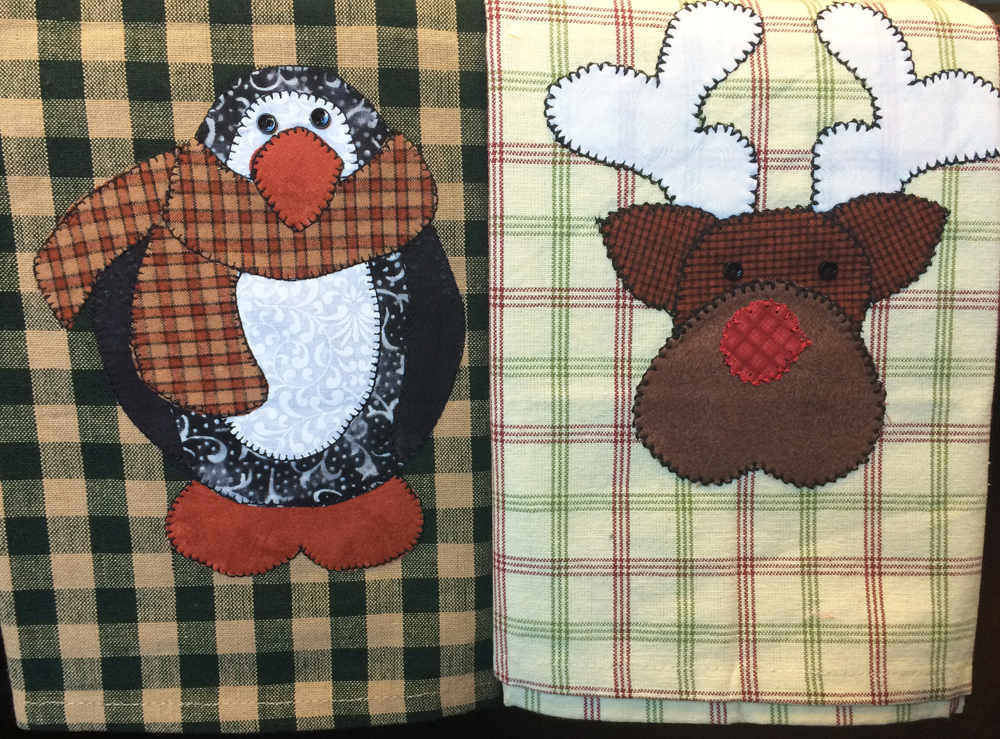 One of my favorite last-minute ideas is hand-appliqued tea towels. These are always a big hit, especially if paired with a tray of homemade Christmas cookies! I’ve been using applique patterns from a pattern design called The Wooden Bear, and I’ve fallen in love. In this article, I’m going to walk you through a few quick tips and techniques to make your own appliqued tea towel using their Reindeer Patternlet for the demonstration, but hopefully these tips will be helpful for any applique project you try.
If you’d like to follow along with me in a video of this project, click here to watch!
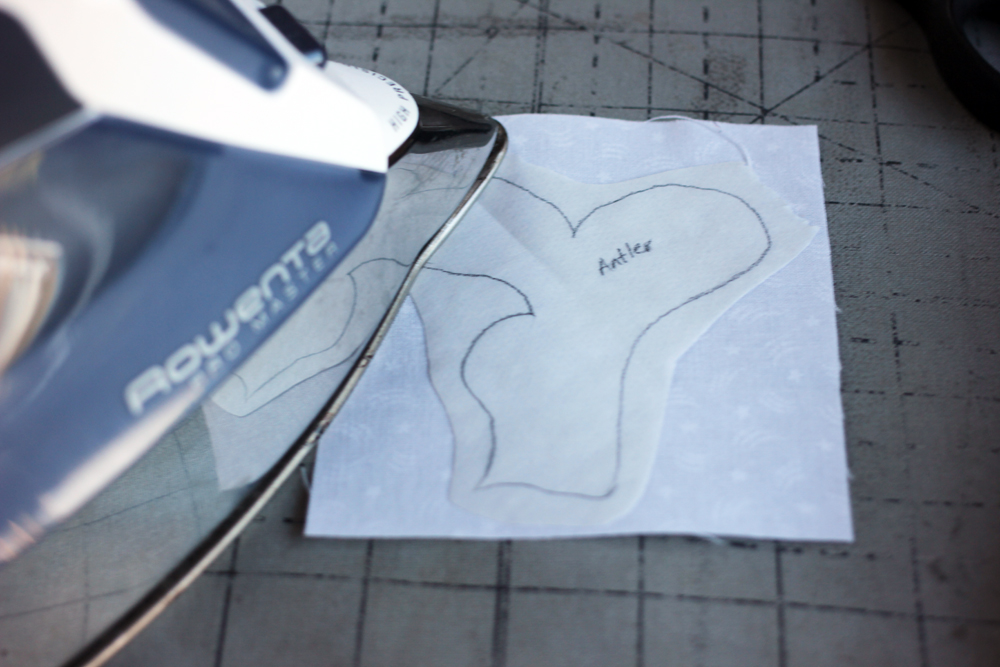
When I start my projects, I like to make sure I have plenty of fusible web on hand (I like to use Steam-A-Seam 2). This is a double-sided adhesive that you can trace your pattern onto. It is important to trace the pattern onto the paper side that is not easily removed from the fusible web. (There is paper on both sides.) You will notice that one side is removable – you do not want to remove either side until the project is traced.
Also, it is a great idea to have a light box on hand so you can see your pattern through the fusible web as you trace. A light box is exactly that: a clear box with a light in it that you can use to draw/trace on. If you don’t have a light box, you can tape your project to a window and tape your fusible web over that, utilizing the natural light to illuminate the pattern.
Once you have traced your pattern onto the fusible web, you will be ready to cut the sections apart. We do this because each pattern piece will adhere to a color choice that will complement the pattern. (Do not cut the removable paper on the fusible web; keep it in one piece so you can use it for applique construction if you do not own an applique sheet.)
 Then you’ll press your individual pieces onto your selected fabrics. I like to keep scraps and use them for this purpose. It will give a homey and festive look to your project (plus it will cut down on the cost of your gift!).
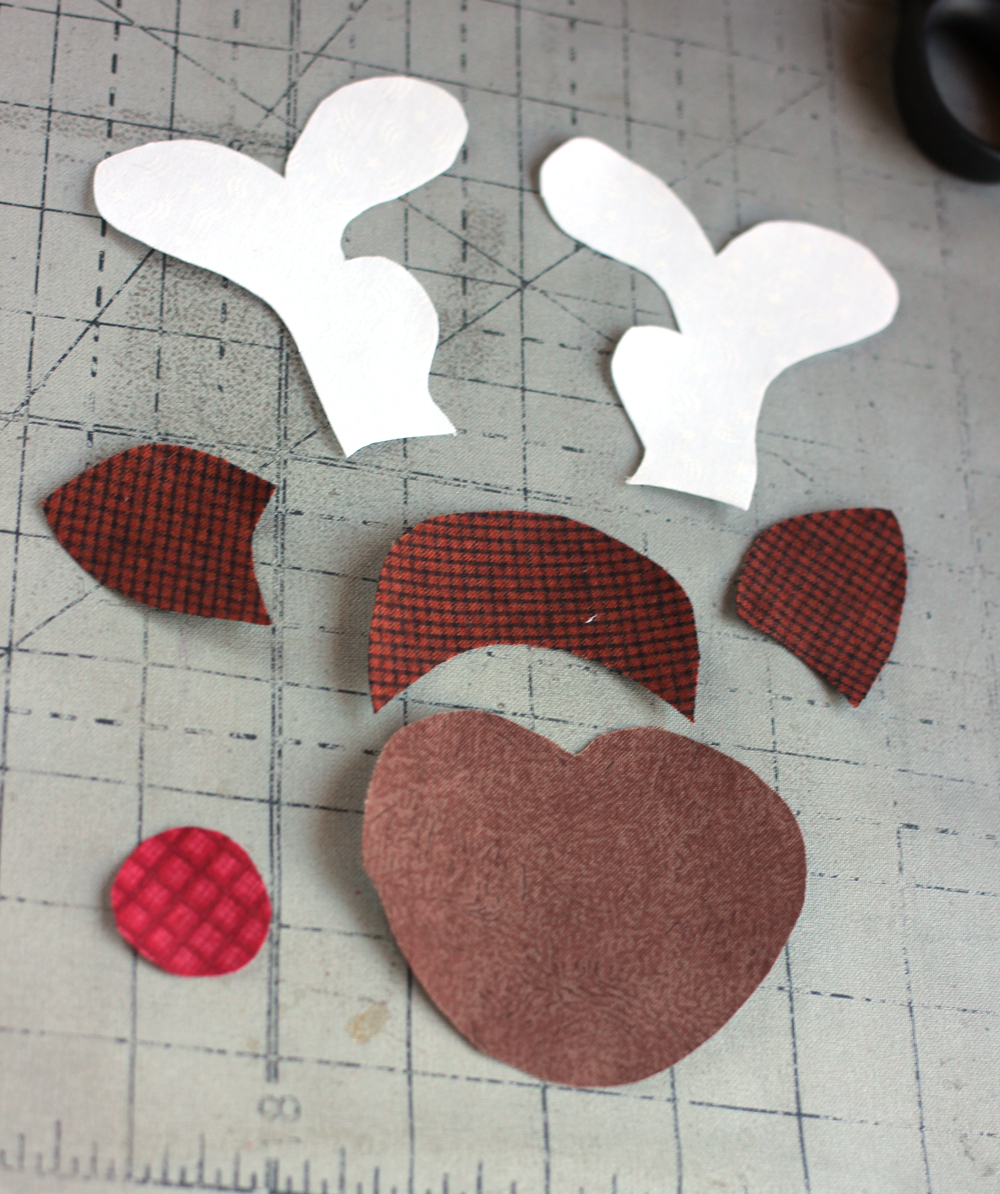 After all my pattern pieces are pressed onto my chosen fabric scraps, I cut them apart and set them on my applique sheet (you can purchase an applique sheet or use any excess fusible web backing paper that are still in a full sheet.)
I begin to put my project together at this point. You will notice that once the paper is removed from your individual pieces that have been pressed onto the fabric, you will have a sticky side. This is why I like Steam-A-Seam 2. You can readjust your pieces without being stuck permanently. Once ironed it’s a done deal, but until them you can readjust. I love this quality about this product.
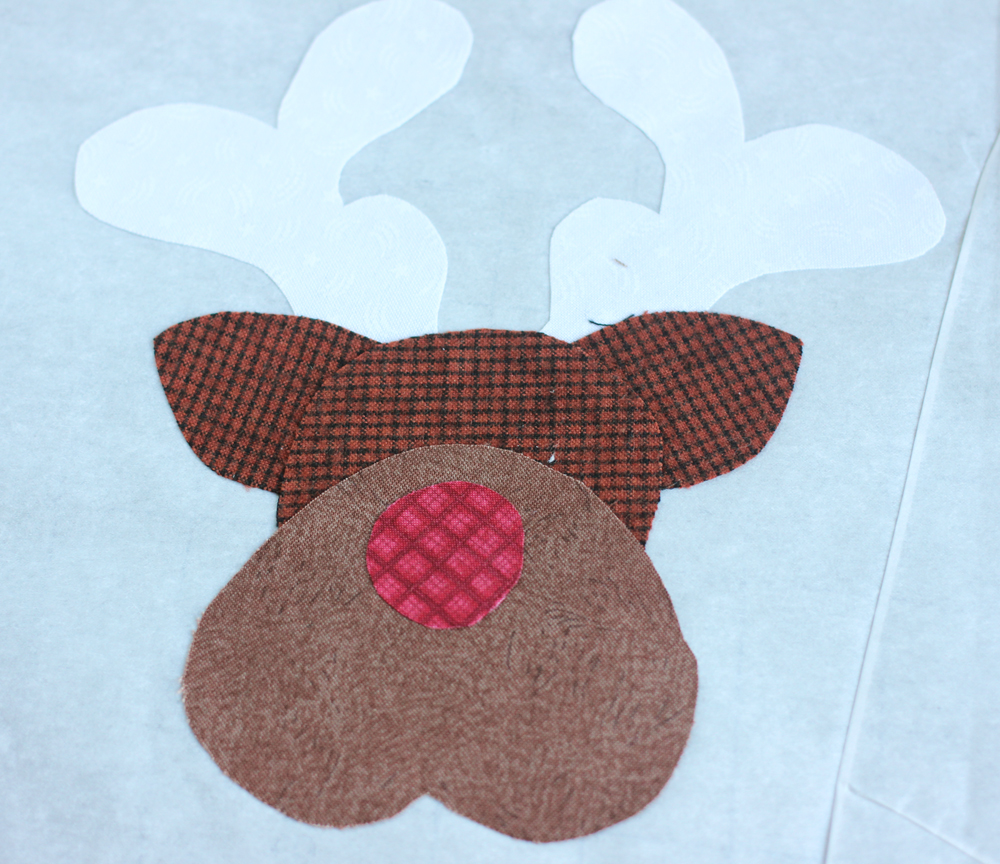 Once you have it as you like it, it’s time to press. (Don’t forget to use a pressing sheet of some kind!) If you forget, you will have a lovely applique on your pressing surface. Something to remember: just because you have a pattern doesn’t mean you can’t cock the antlers a bit, put the nose a little higher, set the ears at crazy angles. This is your creation so don’t be afraid to make it your own – you want it to touch your loved one.
Once you have that in place, you are ready to apply your applique to a “canvas” of some kind. I really like to use the tea towels that can be purchased at your local quilt shop. They are typically 100% cotton, can take the applique well, and absorb moisture well. They typically sell for $2.99 to $3.99, but if that isn’t an option you can also head over to the dollar store for a great value hand towel or placemat.
Before placing your applique piece on your surface of choice, I suggest doing some test placements. Hang your tea towel on a hook or rod, place it on a table – try to get a feel for how the towel will be displayed to show where the applique is best placed. When it is set just where you prefer it, press it in place.
You’re now ready to stitch the applique in place. You will need a top stitch needle, 12wt cotton thread (I really like Sulky), a bobbin weight thread in the bobbin, a piece of stabilizer, and an open toe applique foot. (A note on the stabilizer: I usually iron a piece of freezer paper onto the back side of the project – wax side to project. It tears away easily and I always have it on hand.) If you do not have the applique foot you can use your basic utility foot that serves all purposes. The advantage of an applique foot is it gives a nice equal pressure on your project while allowing you to see where the decorative stitch is lying on your project.
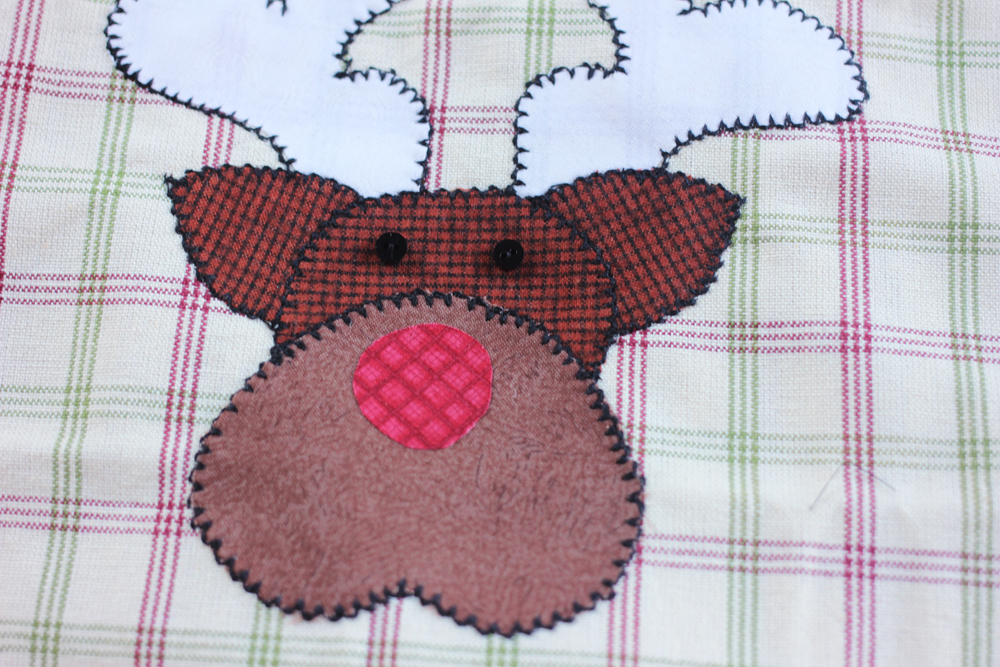 I like to use a variety of decorative stitches. Zig zag, blanket stitch, overcast, satin or buttonhole stitch – it is really your preference. I chose the blanket stitch for my project. Before you begin stitching on your project, you will want to stitch on a sample piece. Because the thread is so thick in the needle you will likely have to adjust your top tension. It is best to do this before you begin sewing your project.
Once your stitching is done, add any other creative touches you like, and you’re done! Your applique tea towel is ready to gift to anyone on your list. Pair this heartfelt gift with a tray of warm homemade cookies, and you’ll have a real winner!
Have you tried this project or something similar? Share a picture with us on Facebook!
Happy quilting!
Related video: Applique Designs for the Holiday Season
Get in touch! Leave a comment or email editor@nationalquilterscircle.com.


Beginner
Great information on freezer paper for appliqué dish towels.using freezer paper on wrong side. Then threads on right side are smoother . I love the idea. Thank you
How/where do I find the pattern for the penguin?? I am new today to this group. THANK you!!
Looks like fun
I’ve done some of these. They are so much fun quick and easy. The scraps of fabric you have stashed away will be use.
Do you need to put anything on the back of a applique tea towel to cover your stitches?? Thank you
These would also be cute on a sweatshirt.
Thank you, good information.
They do make a difference, lovely.
Bought t towels and applique designs here I go. Love T towels