Heads up! This article is part of a series on precision quilt piecing techniques. Make sure to read the previous installment of this series here.
The simplest method for piecing a triangle in a square is to use the Tri-Recs ruler set. The Tri ruler is used for cutting the center piece and the Recs ruler is used for cutting the side pieces. This technique will result in an equilateral triangle. Follow along as I take you through the precision technique basics of piecing a triangle in a square.
Piecing it Together
Step 1: Begin by cutting two contrasting fabrics the width of the unfinished block. For example when making a 4” finished unit, you will need to cut a 4½” strip of fabric.
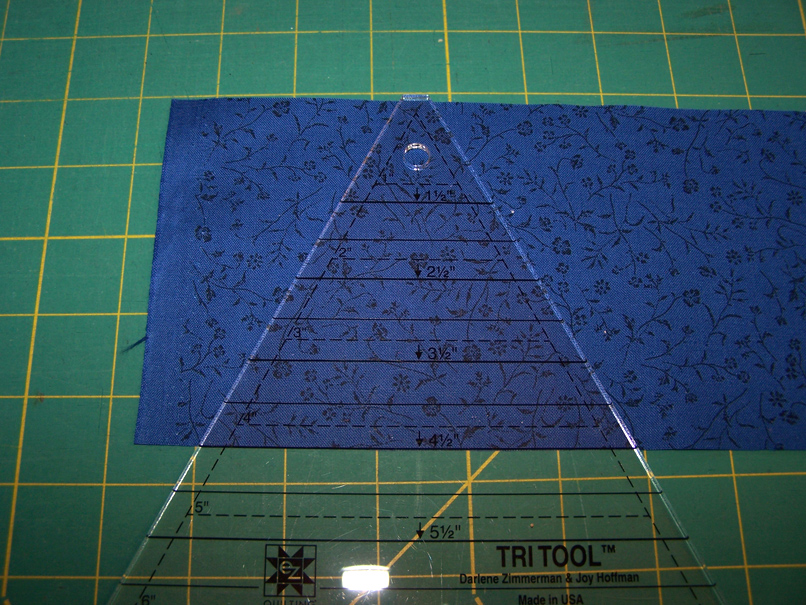 Step 2: To cut the center pieces, place the Tri ruler 4½” line along the bottom of your cut strip aligning the blunt edge at the top of the ruler along the top edge of the strip. Cut along both sides of the ruler.
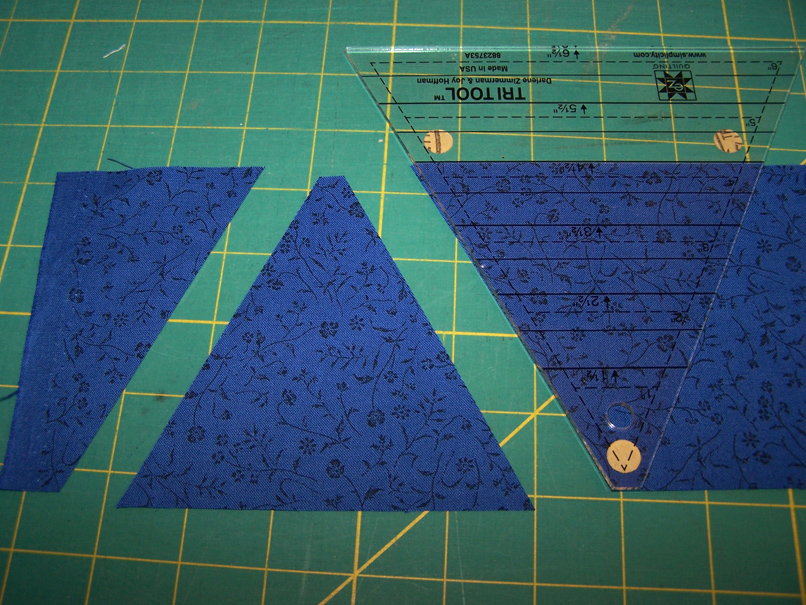 Step 3: To cut a second center triangle, rotate the Tri ruler so the top is at the bottom of the strip and the bottom of the ruler is at the top of the strip. Align the side of the ruler with the newly cut edge of the strip. Align the 4½” mark on the ruler along the top of the strip and align the blunt tip along the bottom of the strip. Cut along one side.
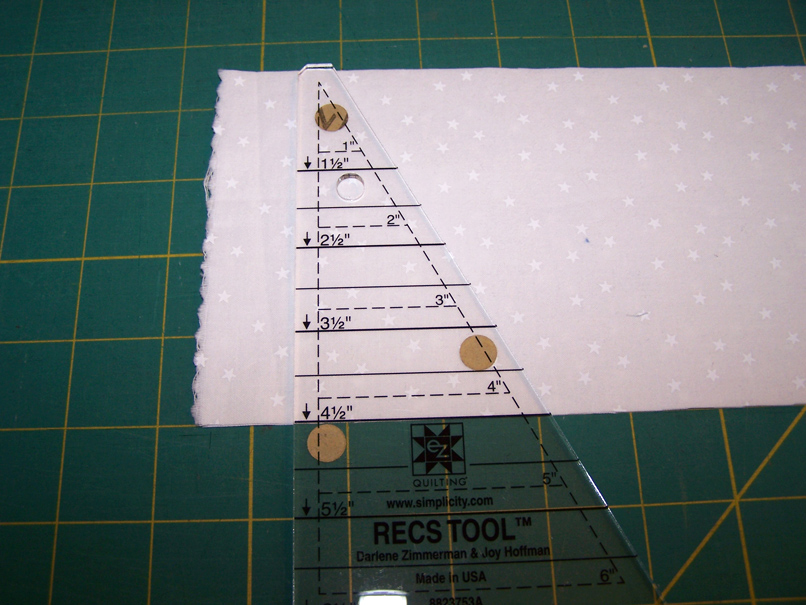 Step 4: To cut the side pieces for the unit, first fold the contrasting 4½” strip of fabric in half. This will give you mirror image pieces, one for each side of the center piece. Next, align the 4½” line on the Recs ruler along the bottom of the strip and the blunt tip along the top of the strip. Cut along both sides of the ruler.
 Step 5: Be sure to trim off the tiny angle at the tip of the Recs ruler. This edge will help in aligning the pieces when sewing them together.
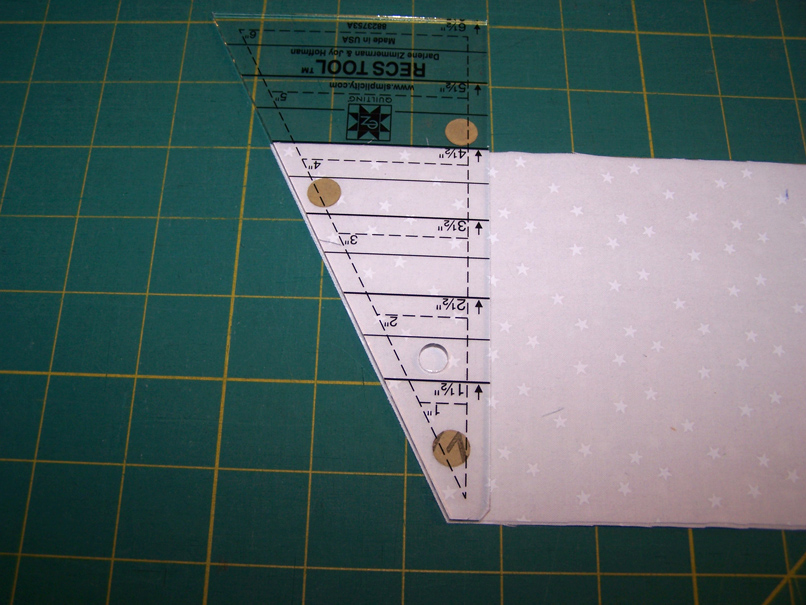 Step 6: To cut another set of side pieces, rotate the Recs ruler so the top is at the bottom of the strip and the bottom of the ruler is at the top of the strip. Align the side of the ruler with the newly cut edge of the strip. Align the 4½” mark on the ruler along the top of the strip and the blunt tip along the bottom of the strip. Cut along one side.
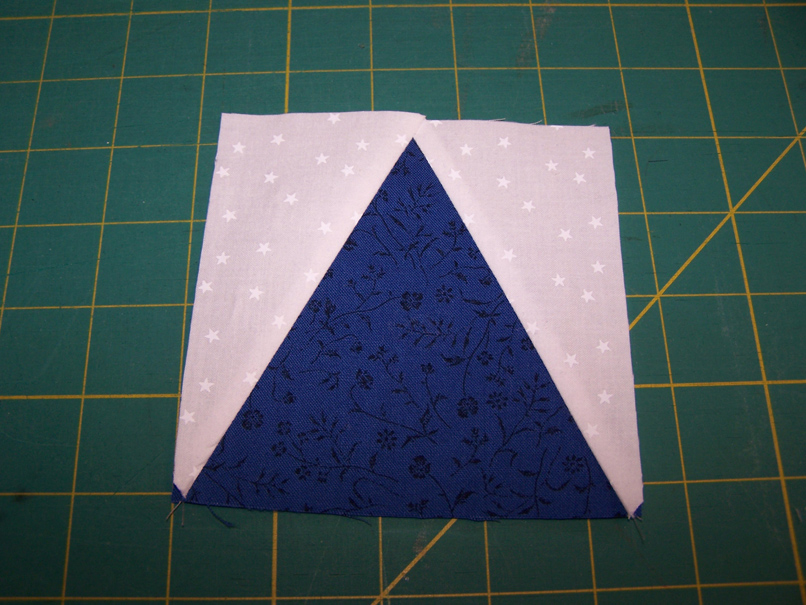
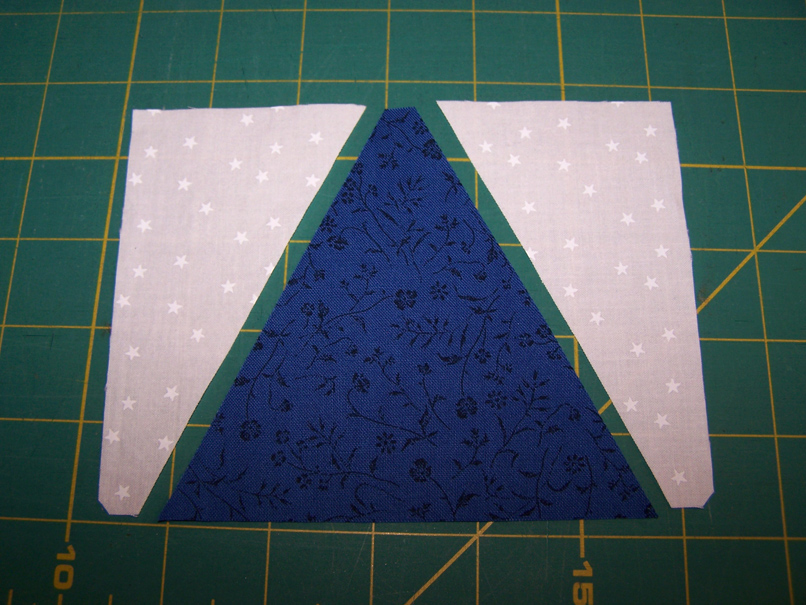 Step 7: Lay the pieces out with one side piece on the right and one on the left of the center piece. Flip one side piece over the center piece matching up the sides and the blunt tip.
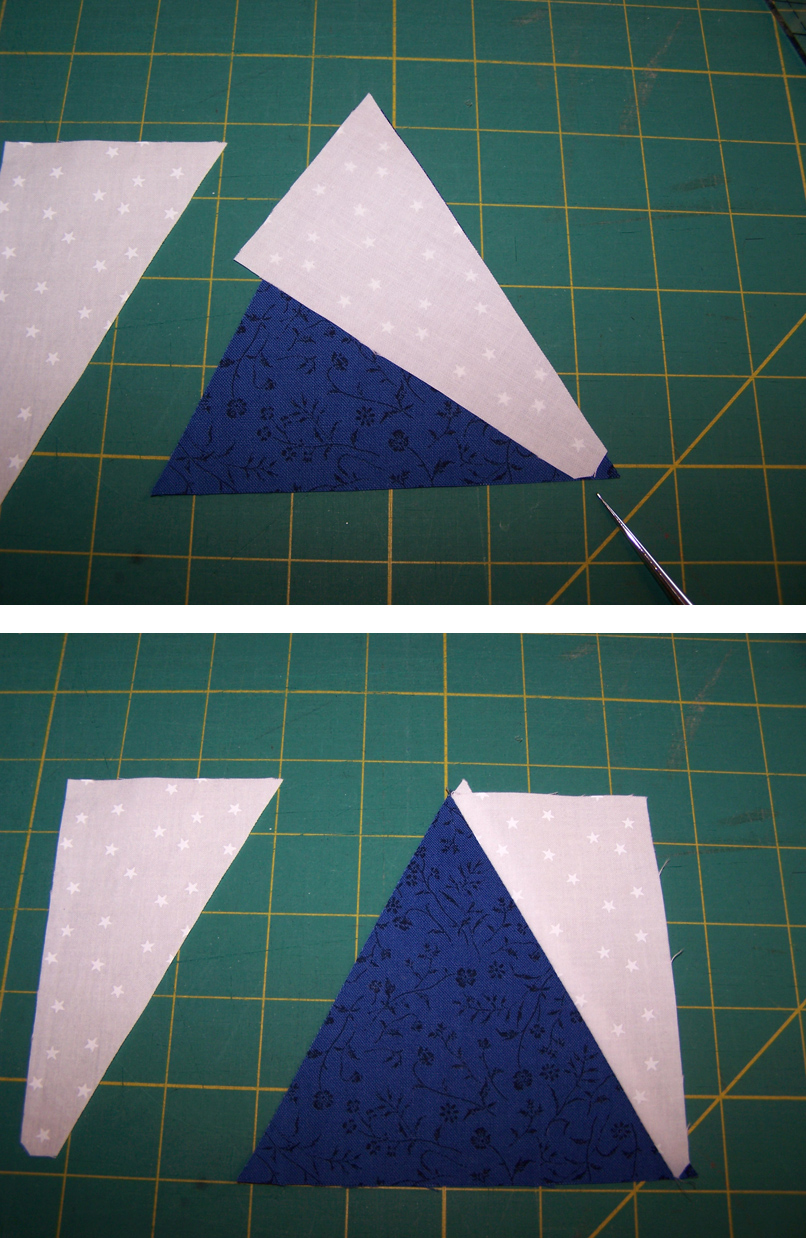 Step 8: Stitch a scant ¼” along the edge and press away from the center.
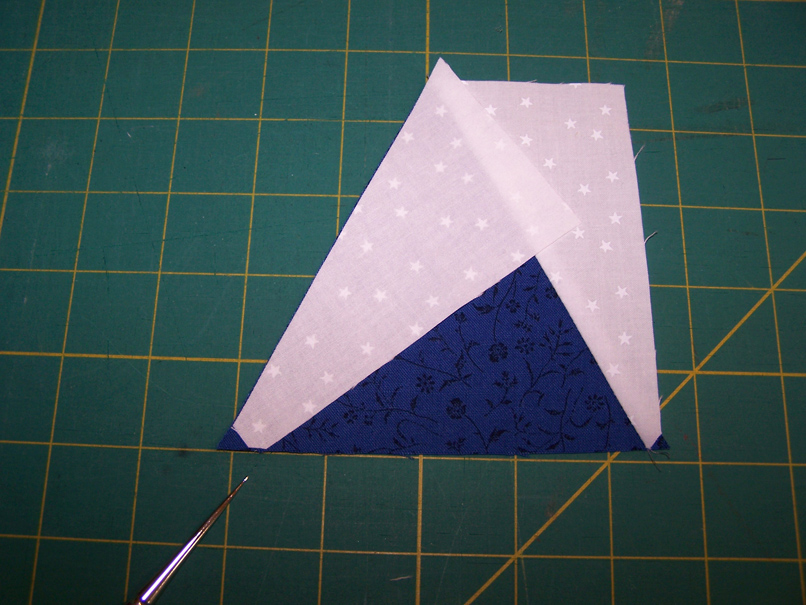 Step 9: Place the second side piece over the center piece aligning the sides and the blunt tip.
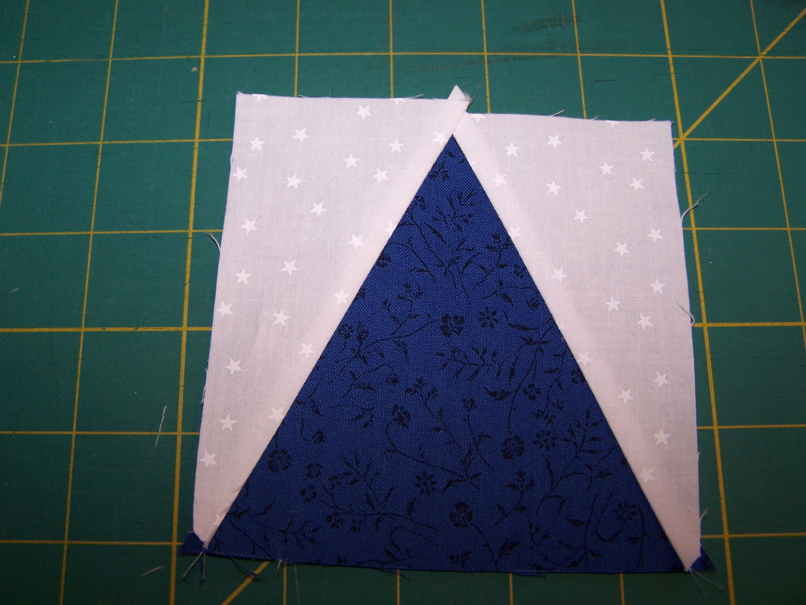 Step 10: Stitch a scant ¼” along the edge and press away from the center.
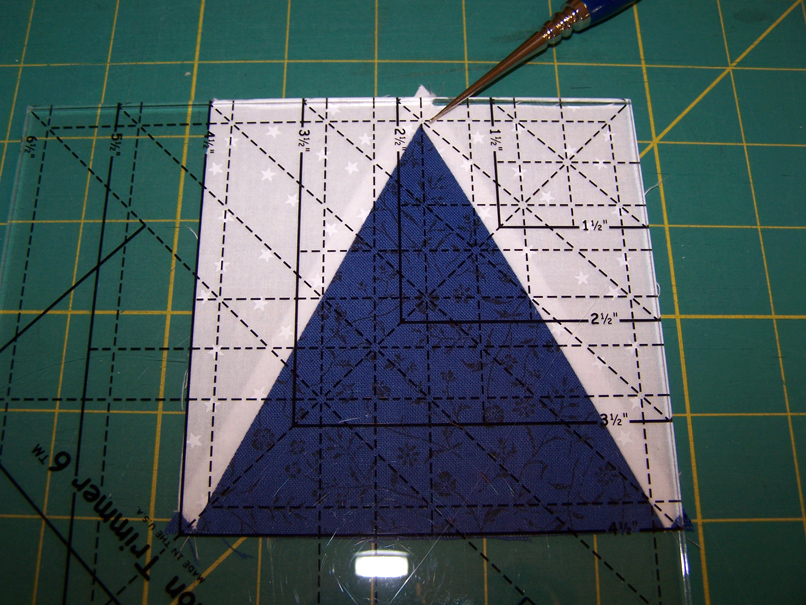 Step 11: To trim, align the Precision Trimmer 6 ruler over the unit matching the cross hatches at the tip of the unit. Check along all four sides to make sure the unit is square. Trim two sides.
 Step 12: Turn the unit around and re-align the tip with the cross hatches on the ruler. Check again that the unit is square, and trim the other two sides to finish it off.
See you next time when we will discuss fancy half square triangle units in the next installment of this series.
More in this Series:- Precision Quilt Piecing Part 1: Squares
- Precision Quilt Piecing Part 2: Half-Square Triangles
- Precision Quilt Piecing Part 3: Quarter & Triple Triangle Squares
- Precision Quilt Piecing Part 4: Flying Geese
- Precision Quilt Piecing Part 5: Square in a Square
- Precision Quilt Piecing Part 7: Fancy Half-Square Triangle
- Precision Quilt Piecing Part 8: Blocks and Borders
Get in touch! Leave a comment or email editor@nationalquilterscircle.com.

Great info and loved the pictures of how to do it.
Looks good