Every year I ponder what to get my neighbors, friends, and service providers for Christmas. Usually I will make an assortment of cookies and distribute them, but this year I am starting early and creating my gifts by hand in the hope of not having to lose those 15 pounds I gain every year test tasting the cookies… (I think I put on three pounds on just thinking about it!)
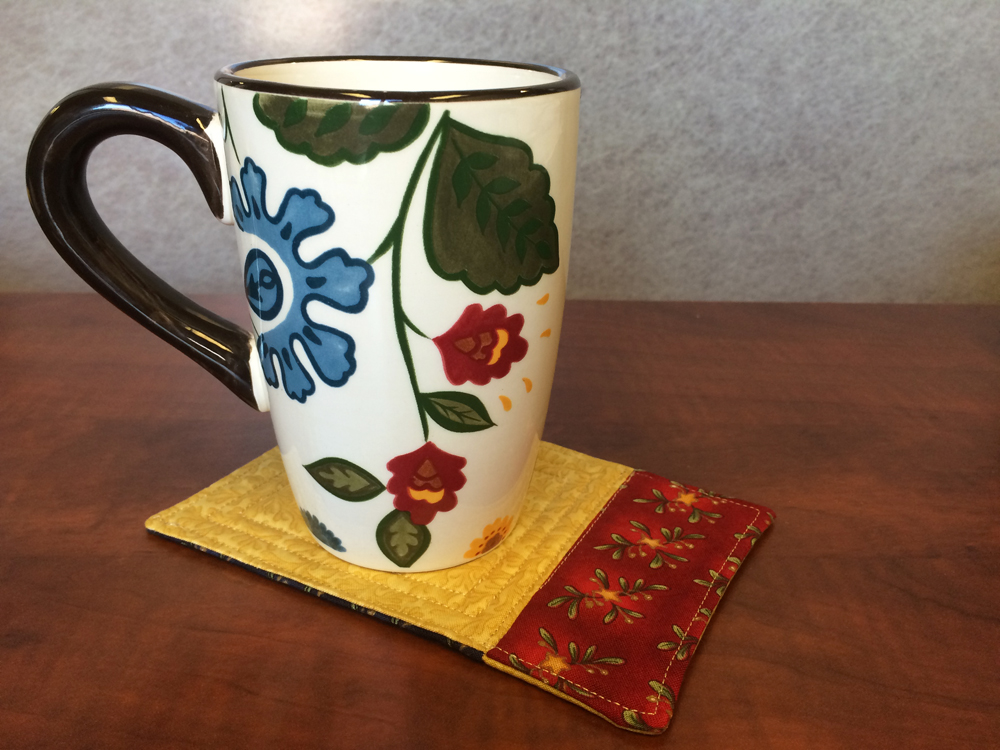 I decided this year I would make some quilted “mug rugs” – cute little coasters that are perfect for a hot mug of coffee or cocoa which are large enough to set a treat on too. My special twist to the project however would be that I would use all those charm packs I’ve been collecting over the years!
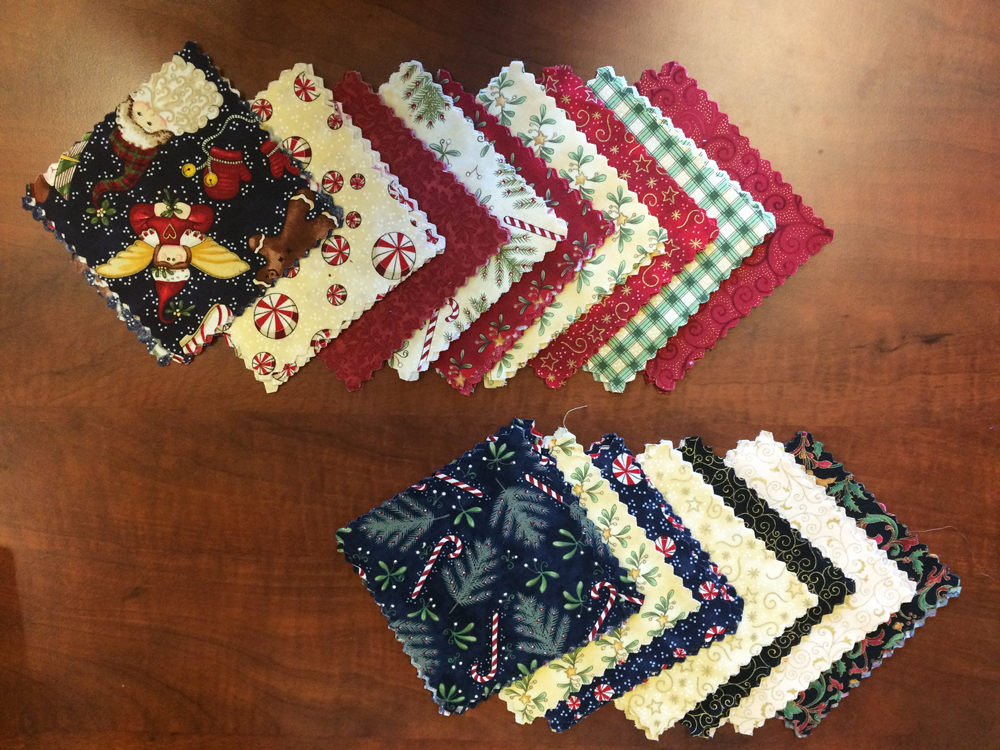 Typically, a charm pack consists of approximately 36 squares of pre-cut fabric that are 5×5 inches. I had some holiday-themed packs on hand and so I decided to give my mug rugs a holiday motif. These rugs are reversible too so you can play around with fabric patterns – try a child-friendly pattern on one side for the kids and a more subtle pattern on the other side for the grown-ups.
I do suggest avoiding plaid or striped fabrics however – unless the charm squares are cut perfectly square you risk skewed lines in your finished product. (Though that may be the look you’re going for!)
How to Make Mug Rugs
For this project we’ll be making a set of two mug rugs using six charm squares. You can also watch a video of this project tutorial – click here to watch!
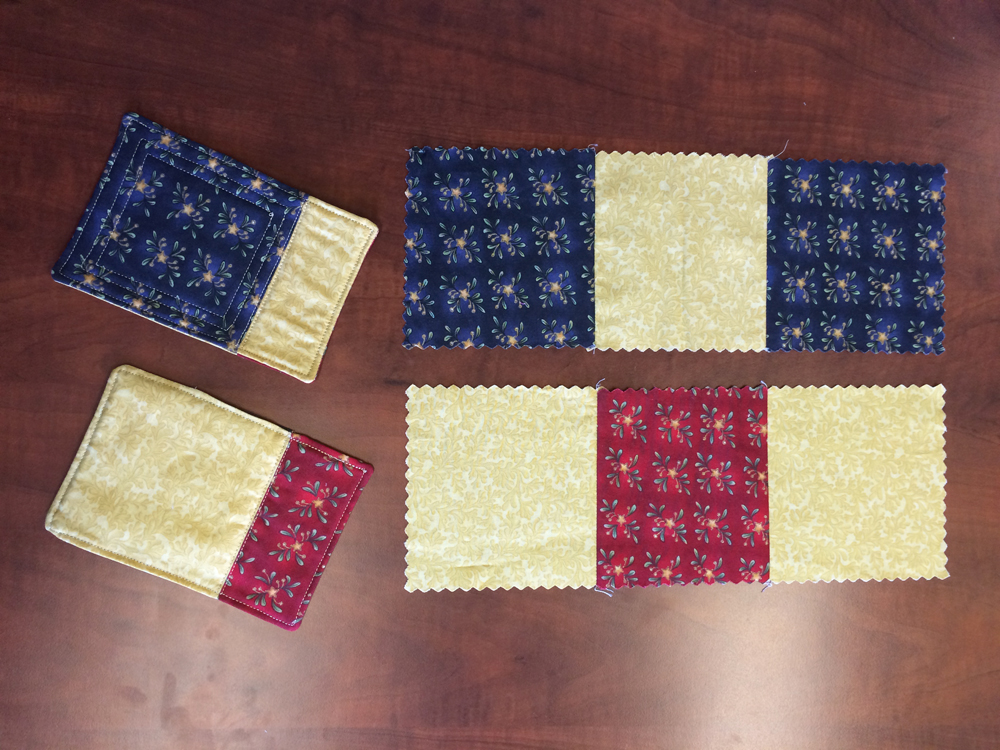 Step 1: Select six charm squares for your mug rugs. Try to select colors and patterns that coordinate nicely. (In this photo you’ll see I’d selected three different patterns – two squares of the blue, three of the gold, one of the red.)
Line up three of your squares in a row with two matching squares flanking a contrasting square in the middle. Sew the squares together using a quarter-inch seam. Then do the same with your three remaining squares.
 Step 2: Press your seams. I recommend pressing one set to the outside and one set to the inside.
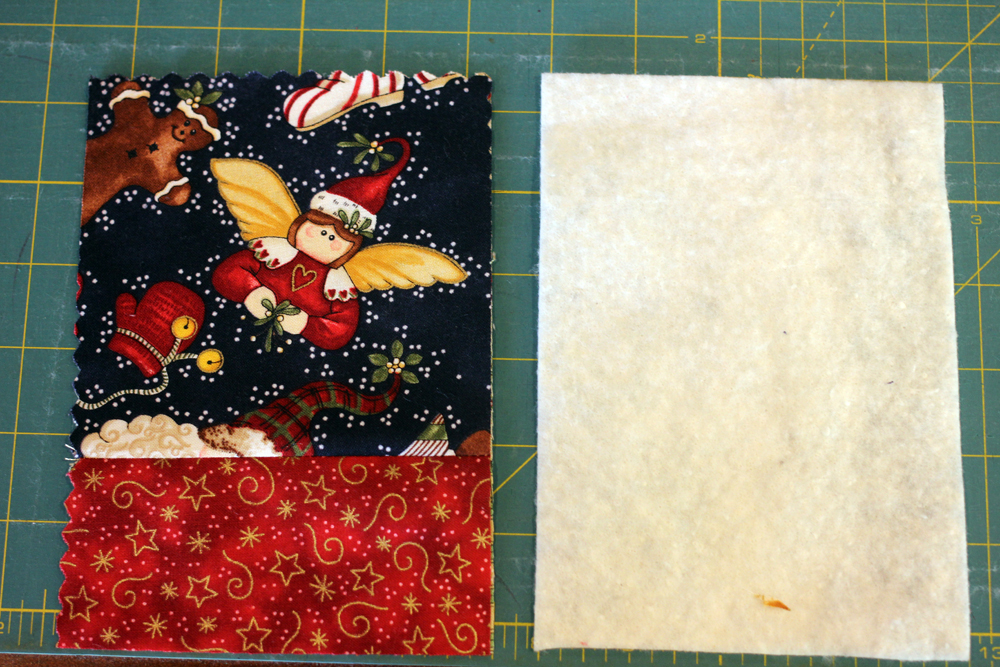 Step 3: Now we’ll head over to the cutting table. Hopefully you have saved some batting scraps over the years – those scraps will be perfect to use for this project because the batting is what helps absorb the moisture from a mug. The first thing you need to do is cut each of your segments in half through the center square. You can either measure with a ruler or simply fold them in half and finger press a cutting line.
Once you have cut the segments in half, I suggest squaring up. Mine measured 6¾ x 4¾. Now simply cut your batting to the exact size as your fabric pieces.
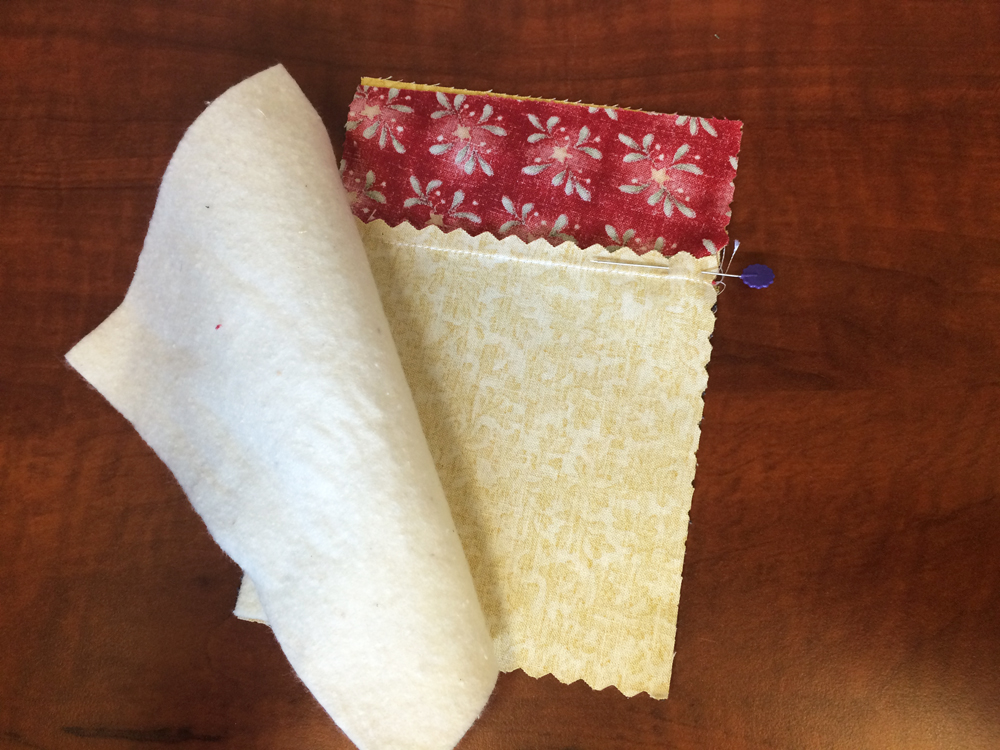 Step 4: Next, put the right sides together, matching the seams. Because we pressed the seams in opposite directions, they should lock together. Then add your batting piece on top and pin where the seams match.
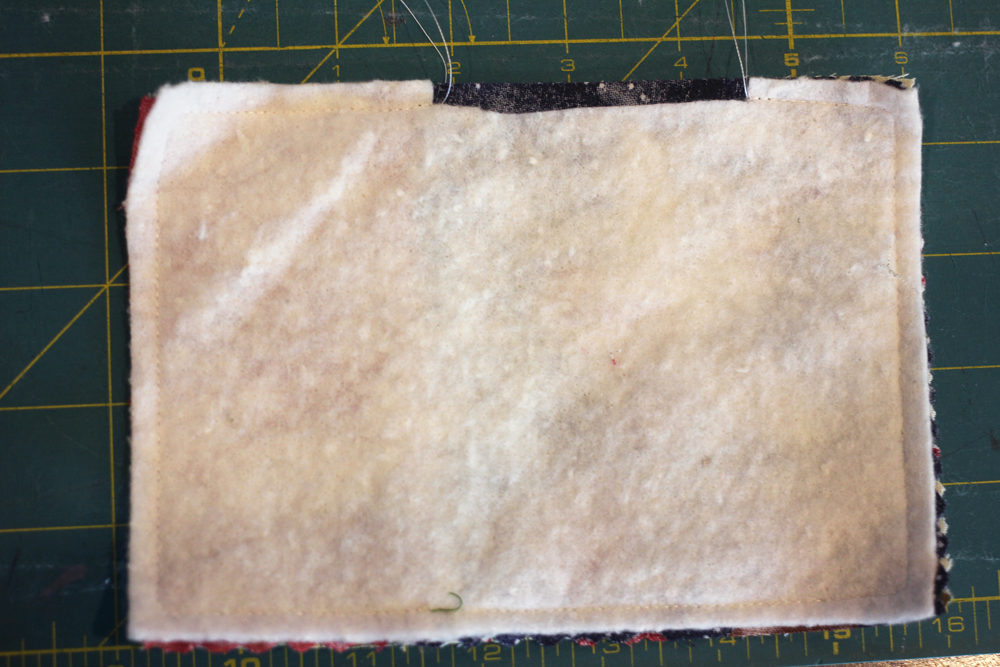 Step 5: Now you will cut away a portion of the batting along the edge next to your pin – a quarter-inch deep and 3 inches long. (You will leave this section unsewn while constructing the rug.) Then sew around the rug using a quarter-inch seam.
Step 6: Next, trim the corners and turn inside out through the section you left unsewn. Use an awl, scissor tip or pencil to poke the corners out.
Step 7: Press the seams again, making sure to press the open section too to create a neat seam for sewing closed.
Step 8: Then you will top stitch to close up the seam. I used a quarter-inch foot that has markings so I could ensure an even edge.
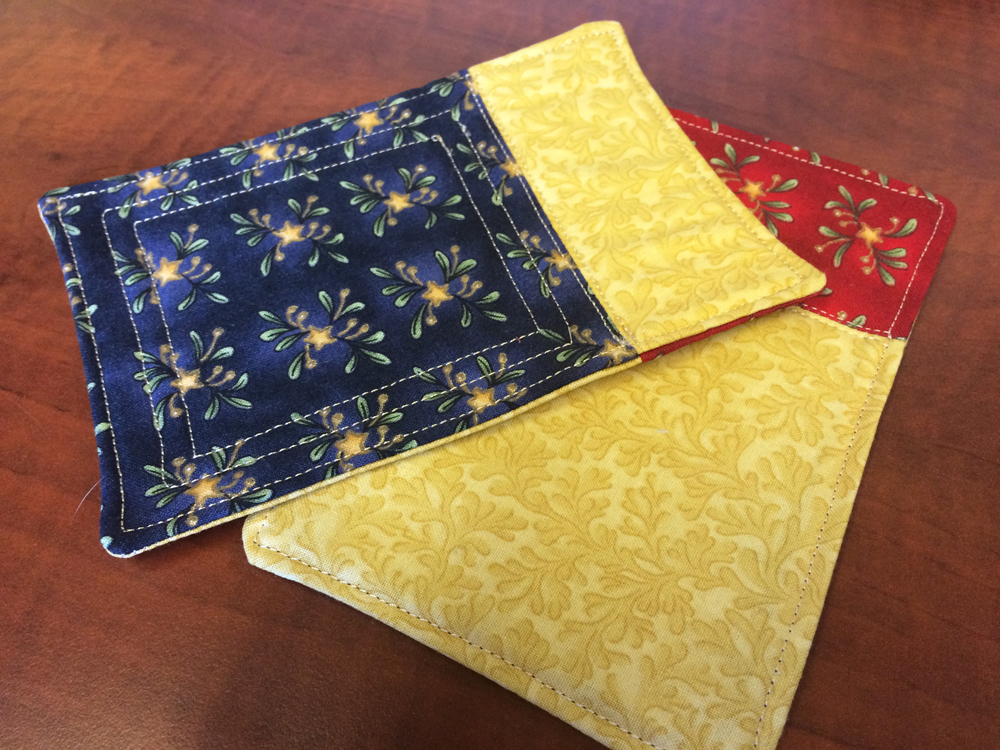 Step 9: For a final dash of pizazz, add some quilting! Any quilting I do will generally be straight stitch, but a decorative stitch would be fun to do as well. I ran a stitch around the inner edge of each color, and added a couple extra lines for fun. This is where you can really get creative! Of course the quilting step isn’t necessary and you may prefer the un-quilted look more.
And there you have it! These mug rugs are a fun, quick, and easy project that also make for great gift ideas. If you’re looking to round out your gift, head on over to the dollar store to pick up a few mugs to go with them!
Happy quilting!
Related Video: Easy to Make Mug Rugs from Charm Squares
Get in touch! Leave a comment or email editor@nationalquilterscircle.com.


Love the milk rugs. Thanks 🤗
I have made bunches of rug mugs and are very easy for a beginner, I have sewed over 45 years, go for it beginners!!!
What are charm squares and where do you get them, and what seam allowance did you use?
Christmas easy gifts
I LOVE this project! However, I really like the size of the mug rug you got as a gift. Could you please share the measurements? If you know of a pattern, could you please share? THANK YOU!!
looking for mug rug patterns
I absolutely love this idea!
Awesome idea. Always looking for something quick and easy. Thanks
Nice.
Just signed up here. I am so happy. Can't wait to start making these great mug rugs. I am sort of a mess these days. Only 60. Never thought I would be so unable to do much. 3 time cancer survivor. Chemo really beats you up. So anyway, I have my mind, my warped humor and I can see and craft. I just love the crafts you offer. Should be a great holiday.